Assignment 4
3D scanning and 3D printing
Introduction
3D scanning is the process of visualising objects to analyse its physical characteristics like shape, colour etc. The collected data can then be used to construct digital 3D models.
3D printing is an additive manufacturing process that involves construction of a three-dimensional object from a CAD model or a scanned 3D model. It includes variety of processes in which material is deposited, joined or solidified under computer control to create a three-dimensional object, with material being added together (such as plastics, liquids or powder grains being fused together), typically layer by layer.
The objective of this assignment is to take a physical object. 3D Scan it. 3D Print the 3D scanned object. Compare the actual physical object and the 3D printed object.
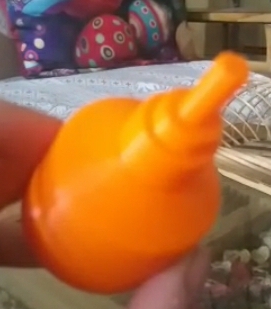
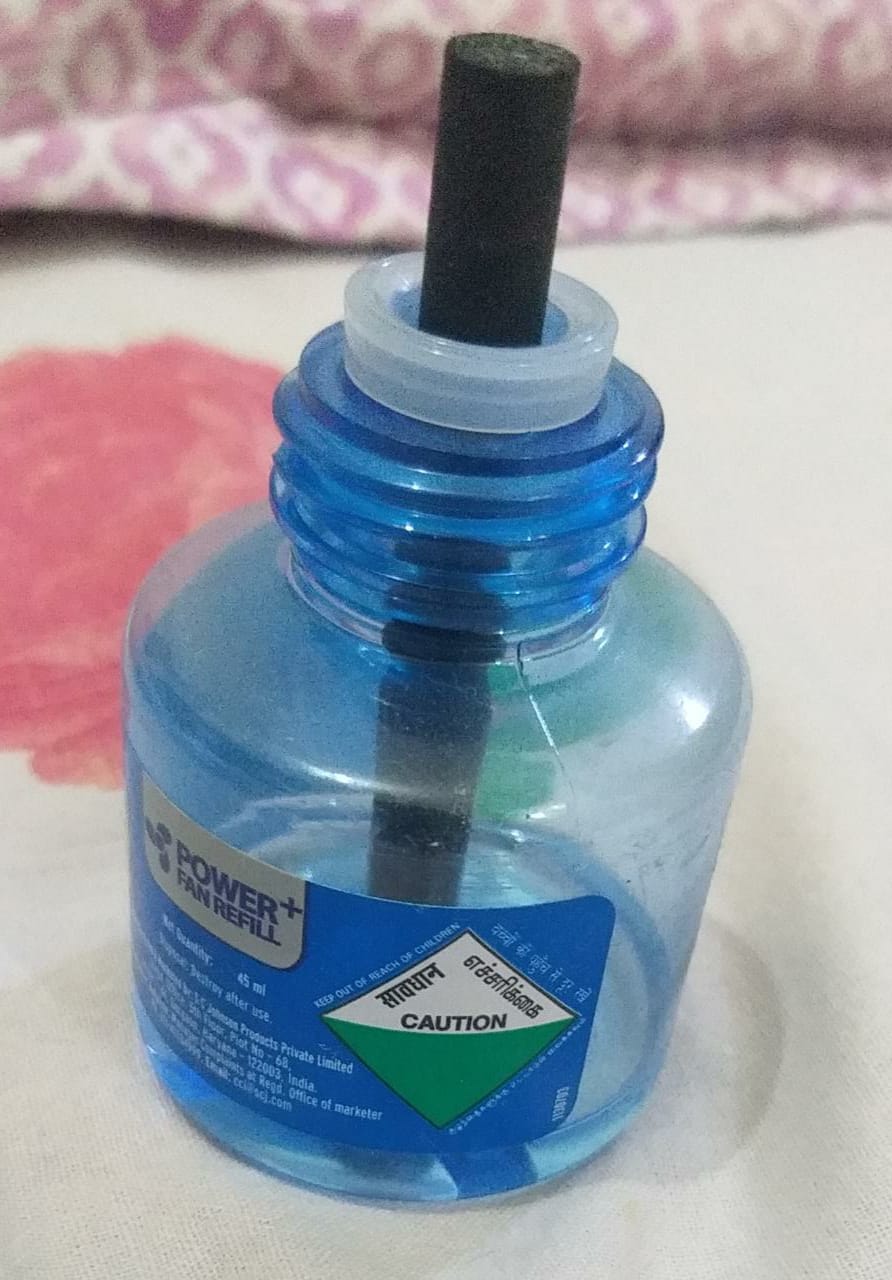
The object chosen is an Allout refill.

Process
Step 1: Scanning App installation- Installed Scann 3D app on my mobile.
Step 2: Imaging- Started taking the photos by keeping the camera steady at a minimum distance of 1-1.5 foot. Took around 40 photographs to cover every view of the object. Saved the scanned file.
 Step 3: Mesh Preparation- Imported the scanned file to Maya 2019, photogrammetry software for cleaning, retopology and mesh preparation. Maya is 3D computer animation, modeling, simulation, and rendering software.It is used to generate 3D assets for use in film, television, game development and architecture.
Step 4: Slicing- Slicing was done in Ultimaker Cura 4.9.0. After that I input the fill rate and temperature. Set the nozzle. Preview and adjust the printing time. The GCODE is generated which is loaded to 3D Printer
Step 5:Printing- 3D printing was finally done using Creality Ender 3 3D printer. Total 3D printing time was 2hours 52 minutes.
Step 3: Mesh Preparation- Imported the scanned file to Maya 2019, photogrammetry software for cleaning, retopology and mesh preparation. Maya is 3D computer animation, modeling, simulation, and rendering software.It is used to generate 3D assets for use in film, television, game development and architecture.
Step 4: Slicing- Slicing was done in Ultimaker Cura 4.9.0. After that I input the fill rate and temperature. Set the nozzle. Preview and adjust the printing time. The GCODE is generated which is loaded to 3D Printer
Step 5:Printing- 3D printing was finally done using Creality Ender 3 3D printer. Total 3D printing time was 2hours 52 minutes.
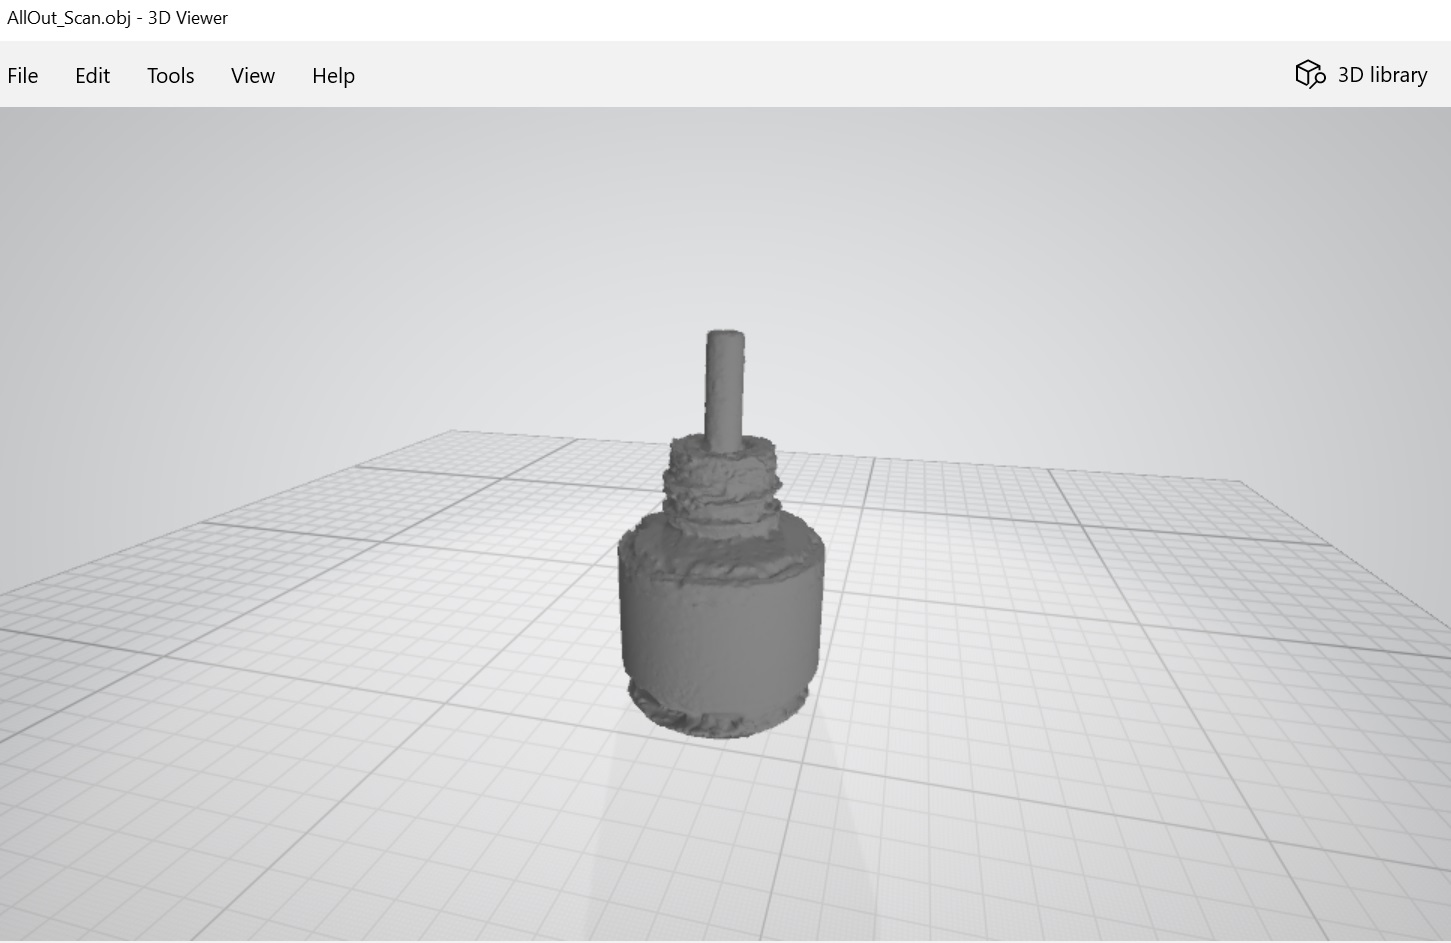
Output
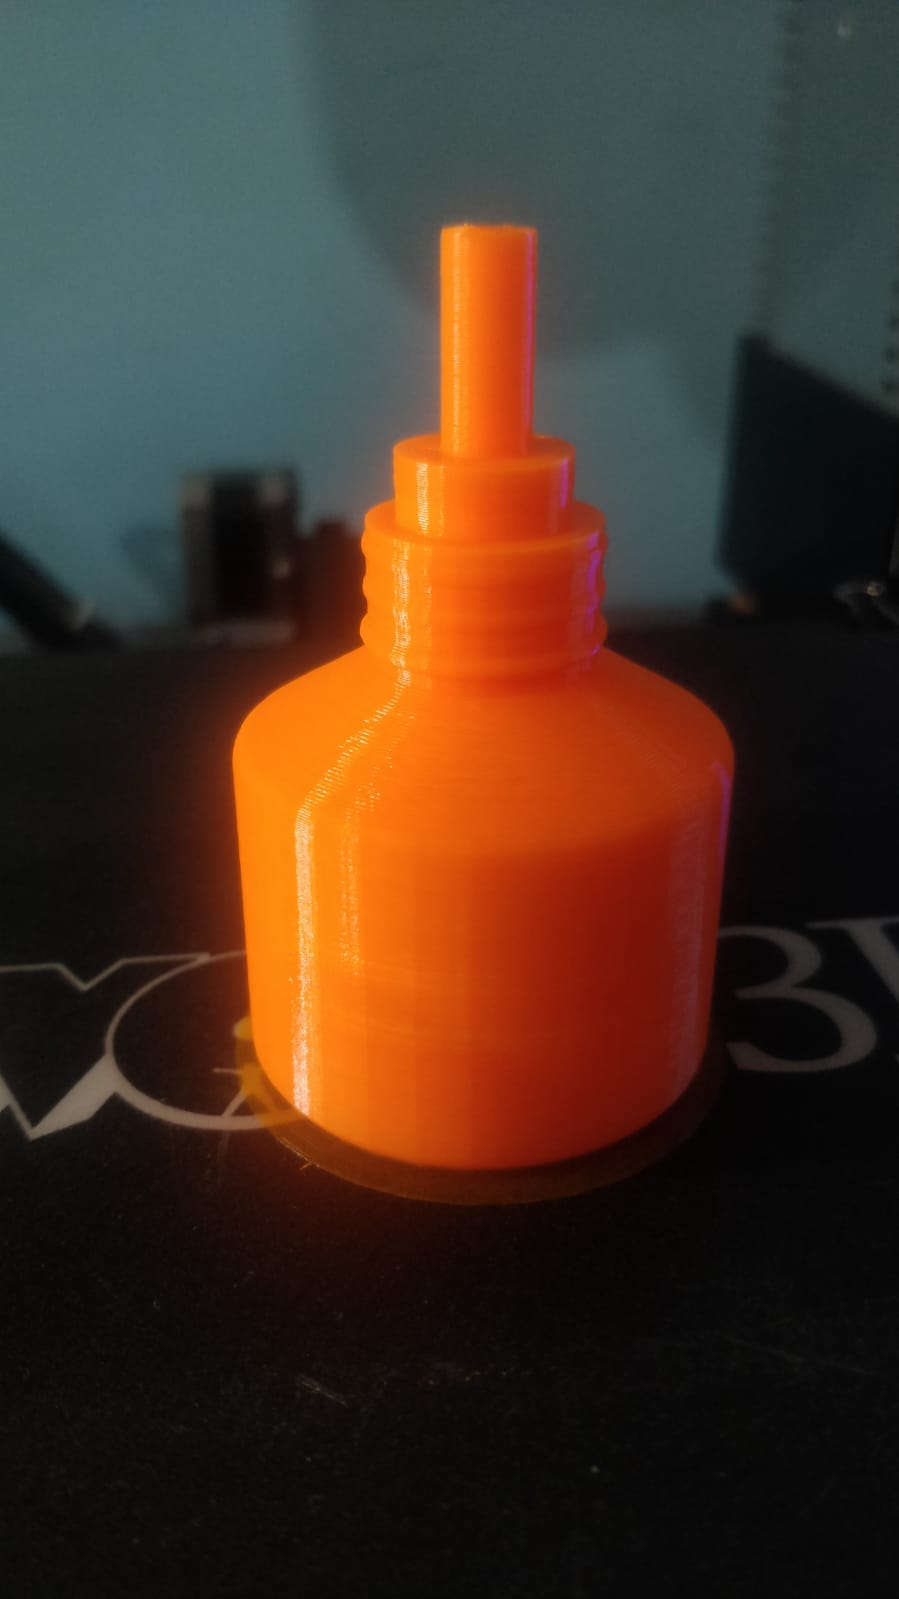
Comparison of 3D printed object with actual object
Bottom Surface: The bottom surface of the printed object is flat unlike the actual object which has crests.
 Top Surface: The actual object has groove between wick and surrounding plastic coil whereas in the 3D printed object, it is a continuous surface.
Apart from the above two comparisons, I planned to do Impact test as well but due to resource constraint could not conduct.
Problems faced and learnings
First 3D model was not of good quality because of other objects in the background.
Light conditions were affecting the quality of scan. So I did the scanning in broad daylight.
At the starting of printing, the material was not pouring out of the nozzle. So, once it was cleaned, the process was completed without any interruption
This is the first time I have done 3D scanning and printing. I learnt that with this technology, I can easily create real time geometries with high precision and accuracy. It is hassle free like conventional manufacturing processes.
Learning and using photgrammetry is highly useful for my Research as well.
Design Files
.STL file
.OBJ file
.GCODE file
.MTL file