Assignment 1
Website Design and Development
Every artist, designer, researcher, innovator or anyone who has created something in their life has a right to present it to people. In this era of digitization, onlinw platforms are the fastest way of making your work speak to a larger population. Designing your own website gives you the freedom and opportunity to express yourself through your ideas and designs. This assignment focuses on demonstration of portoflio website created using the web development skills and knowledge gained during the course.
Softwares used
The following softwares need to be downloaded for the basic website development and testing
- Sublime Text Editor
A text editor is needed for editing the files and Sublime seems to be the best one so far. It makes the boring looking code colourful and gives you references side by side. - MAMP
MAMP stands for ‘Mac Apache MySQL PHP’. It is used to test the files on our local browser before we upload it on the actual server. This is extremely helpful because uploading files again and again on the server is time consuming. MAMP gives instant editing results. - Infinity free
Infinity free is a website which gives you a free sub-domain based on their own domain. We can upload our files for free on that server. It is a good bet to test your website before spending money.
Lets get started!
By following the simple steps , we can create a basic webpage
Step 1
Vist the website W3Schools.com. This website is very helpful in understanding how some defined commands and tags written on a text file can look in the form of a website.
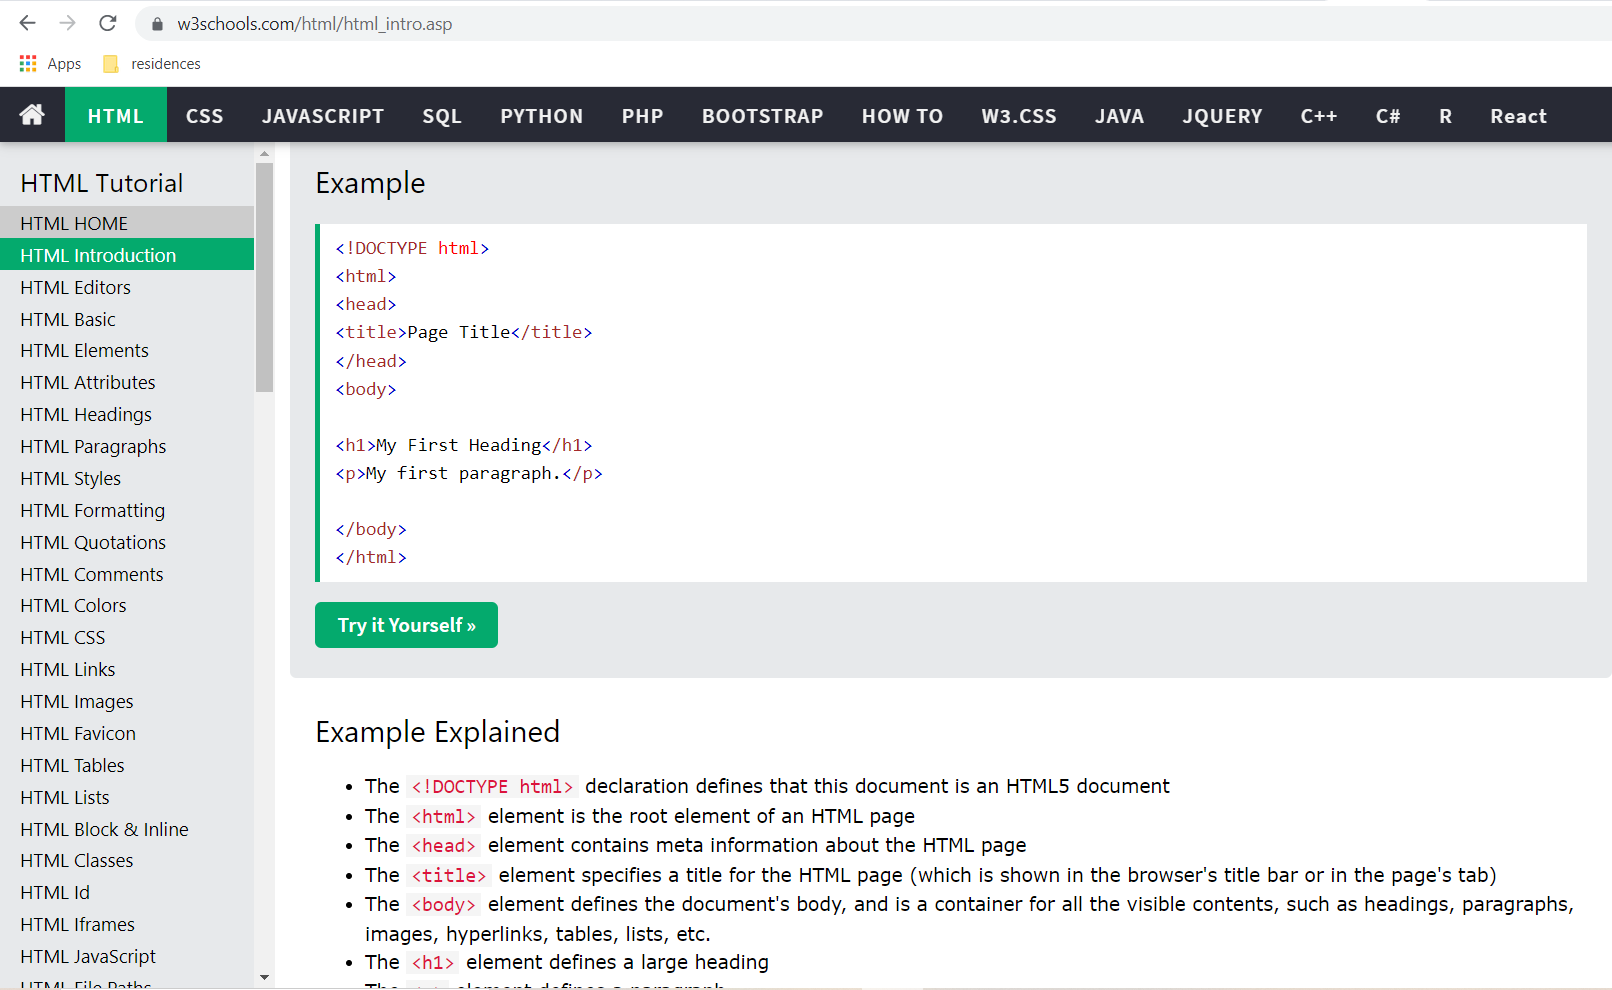
Now when you try this yourself, you can see how your content is going to look as a website. Most of the changes or the content that we want to put on the website can be added withing the body tags.
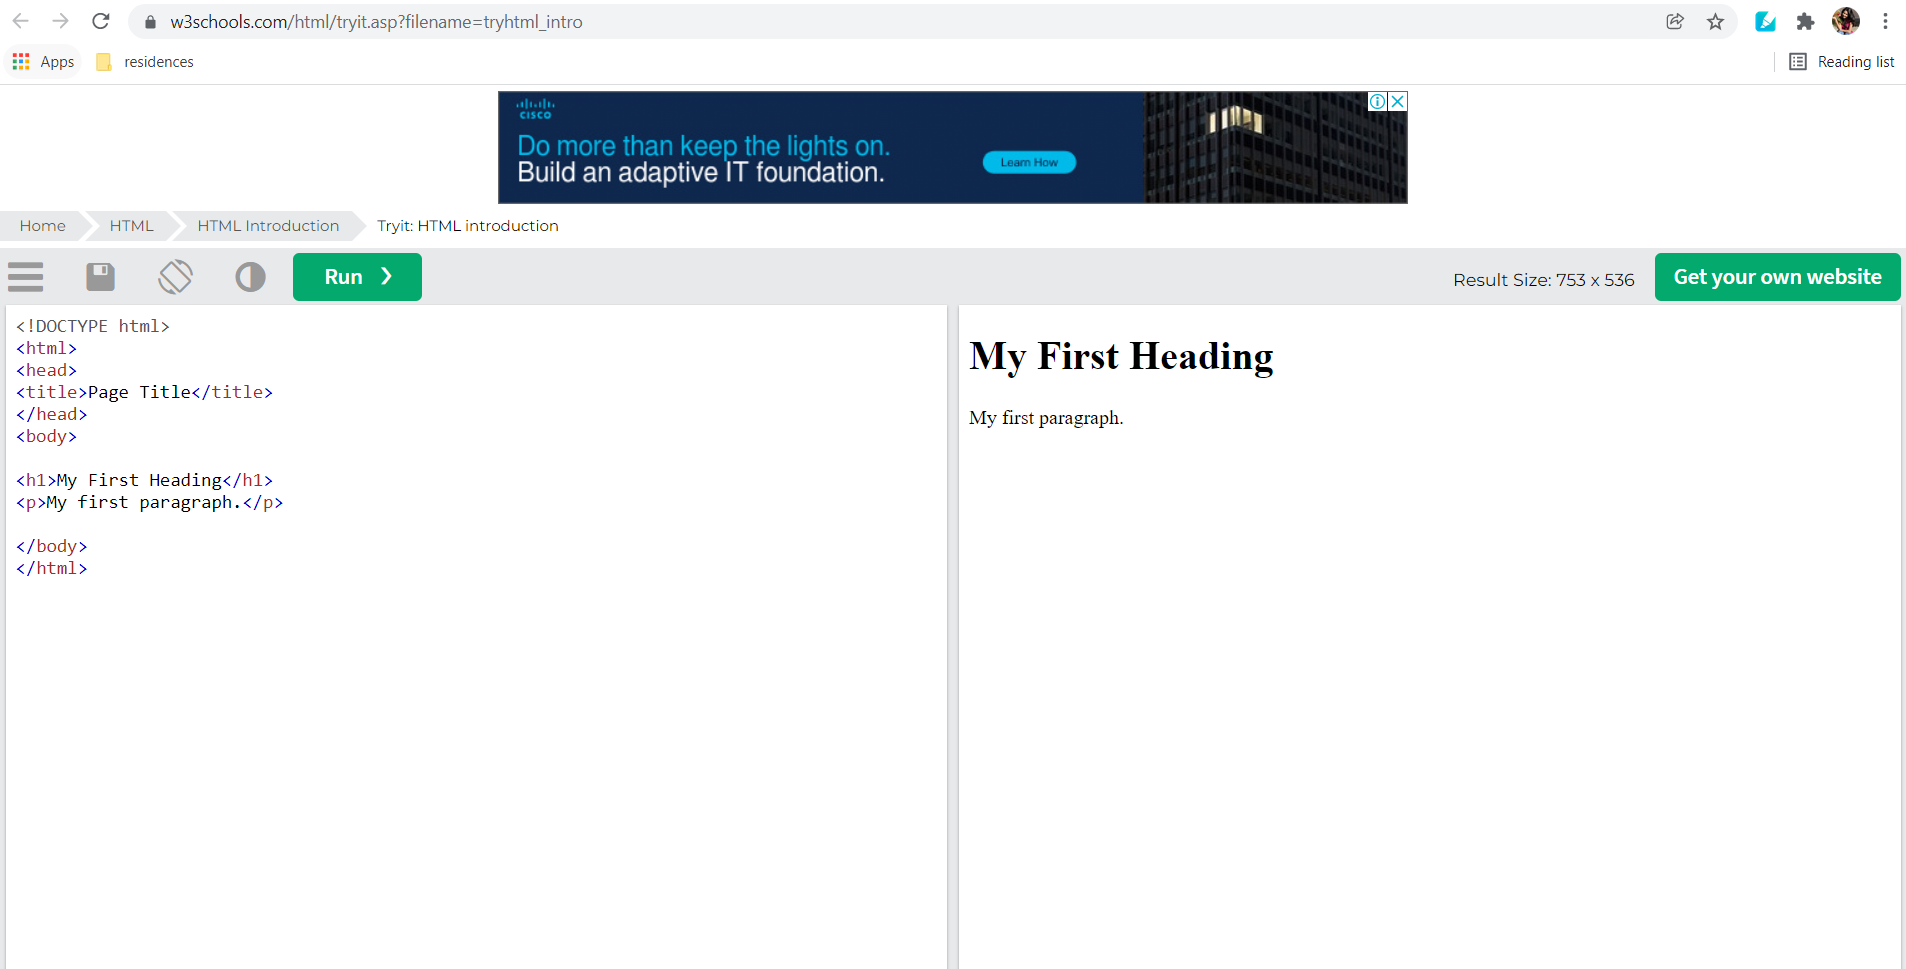
Step 2
Lets try out some simple commands on this website.
- Paragraph tag
< p>< /p>
Anything which is included within the paragraph tag will get a paragraph spacing and the text will be viewed as it is on the web.
- Heading tags
< h1>< /h1>Any text enclosed within the heading tags will be bolded and size will be changed. There are 6 types of heading tags based on their sizes starting from h1 to h6
- Heading 1 -
This will be the largest heading!
- Heading 2 -
This will be somewhat smaller
- Heading 3 -
This will be more smaller
- Heading 4 -
This will be even more smaller
- Heading 5 -
This is so small that it is rarely used
- Heading 6 -
This is the smallest and is almost never used
- Heading 1 -
- Break Tag
< br>
HTML is unaware of the spaces in the paragraphs or lines.It reads text continuously and can only show a single space between two words. To get more space, putting our words within tags is important. Either paragraph tag or break tag is used for it. Break tag will push the text after it, to the next line. If we use two break tags together, then we can see a line gap. - Listing
< b>< /b>
There are two types of lists
Ordered lists – Lists which are numbered and are shown by- < ol> < /ol>
Unordered lists – Lists which are bulleted and are shown by - < ul> < /ul>
List items come in between these lists by the list tag < li> < /li>
Example – Ordered list
- Onion
- Tomato
- Apples
- Onion
- Tomato
- Apples
Step 3
Adding an image to the website
Use this tag to add images.

Mandatory attributes –
- It will include the location of the image with extension
- alt – It is a name we give to the image for the computer to read. Always add the alt attribute because if somehow your image fails to load, it will show this name
- We can also edit the width and height of the image.
- If you edit either width OR height, the aspect ratio of the image will be maintained.
- If you edit both, it will change.
Step 4
Anchor Tag
< a href=”complete_link”>Text which opens the link
- The href attribute has the link to go to a particular file
- Links can be used within the list tag also to connect our list items to separate pages.
- This will be frequently used.
Step 5
Download Open VPN software
To get the vpn access from the IIT Delhi server you have to send a permission mail to the computer science department and they will send you the certificates required for the access. Once you receive this, you need to download Open VPN software. After downloading, open it and it will show running. Then from the up arrow key on your task bar, find the VPN option, right click on it and select connect.
Congrats! You are just one step away.
Step 6
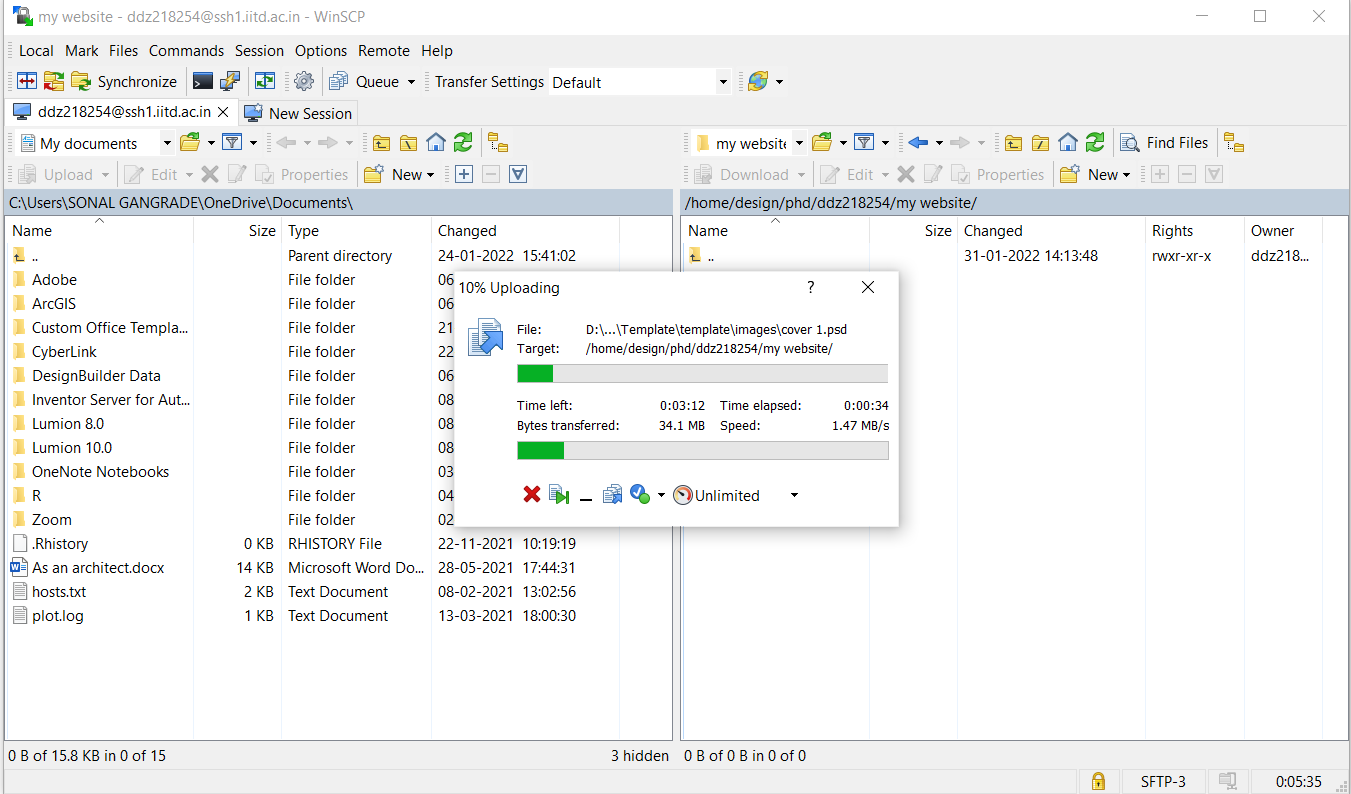
Uploading your website on IITD server
- Download Winscp software
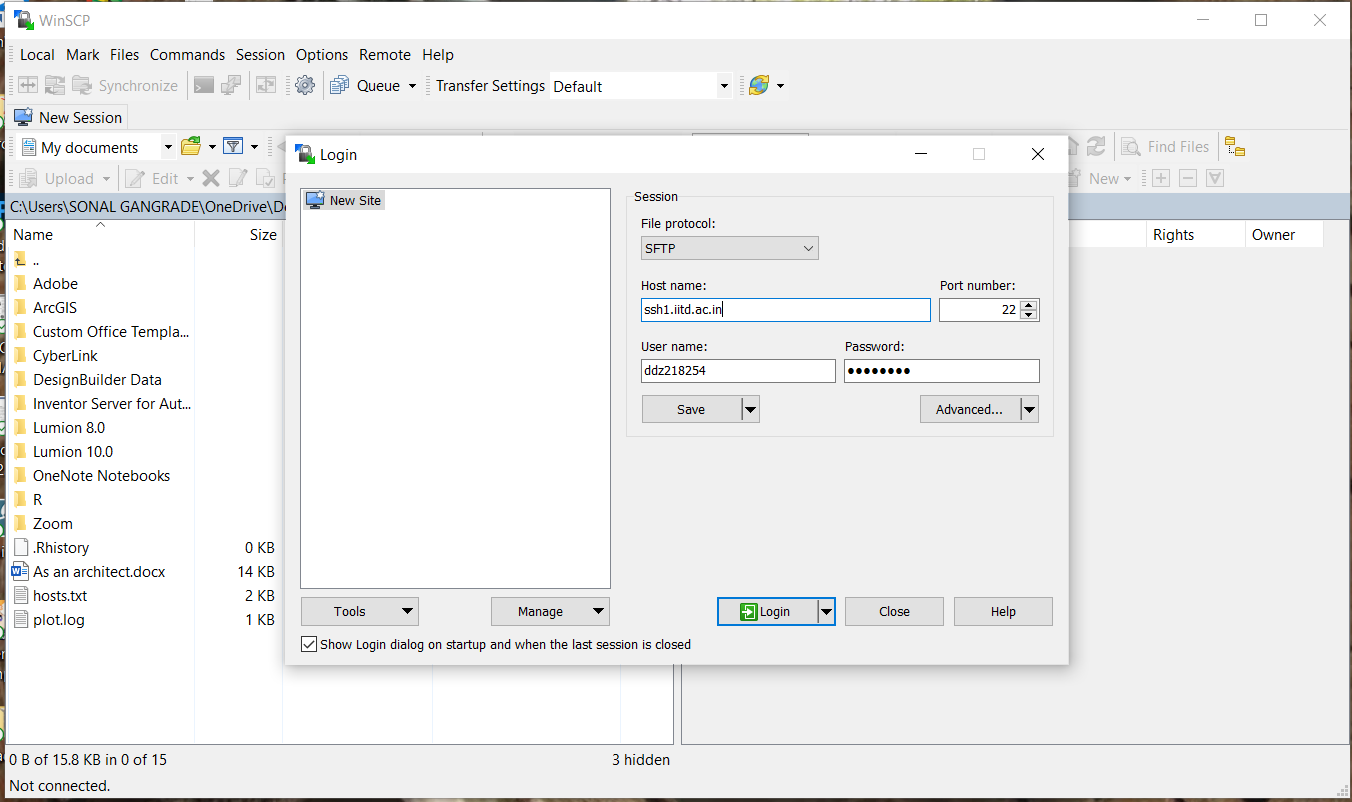
- After installing the Winscp software, agree to all the dialogue boxes (as recommended or set at default)until you reach the Login dialogue box.
- In the Login dialogue box,select SFTP and write the host name as - ssh1.iitd.ac.in , and fill the username and password with your kerberos ID.
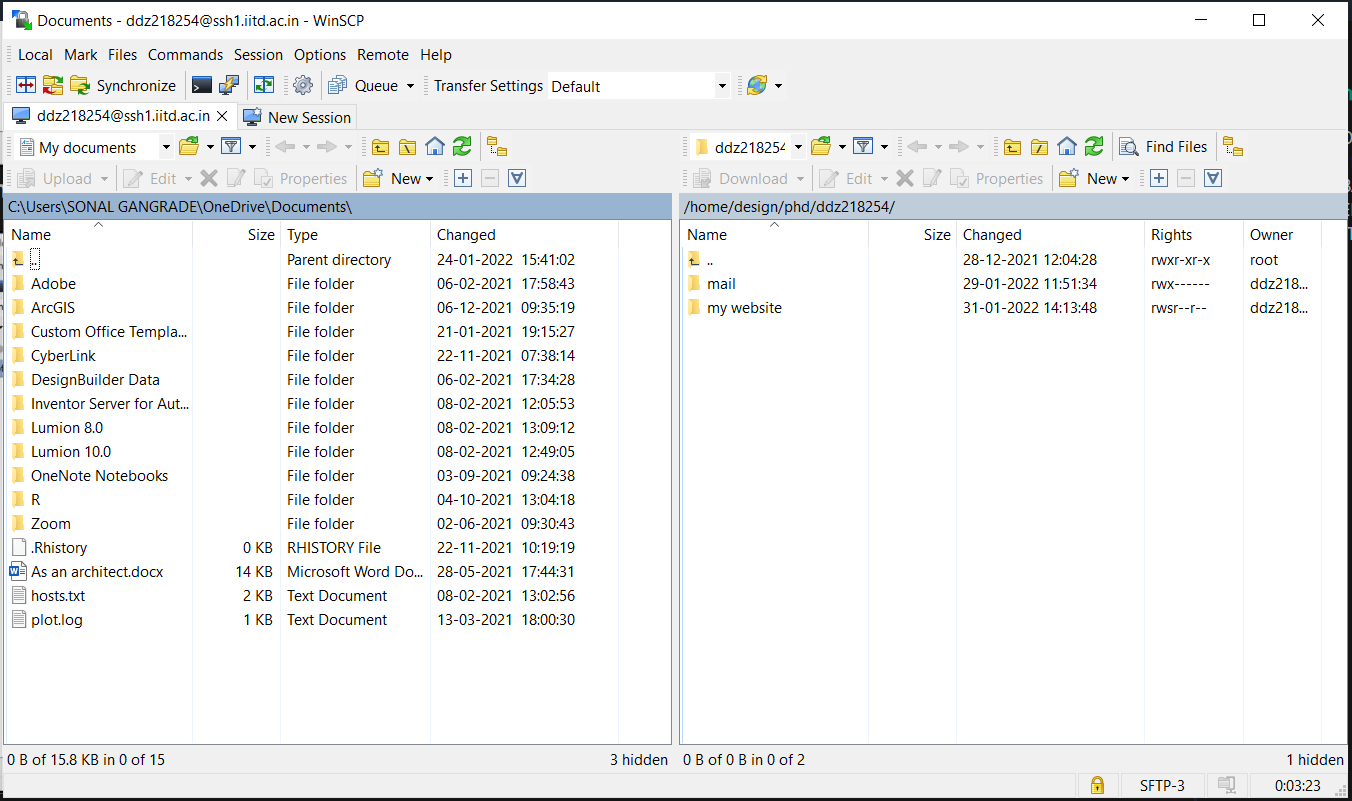
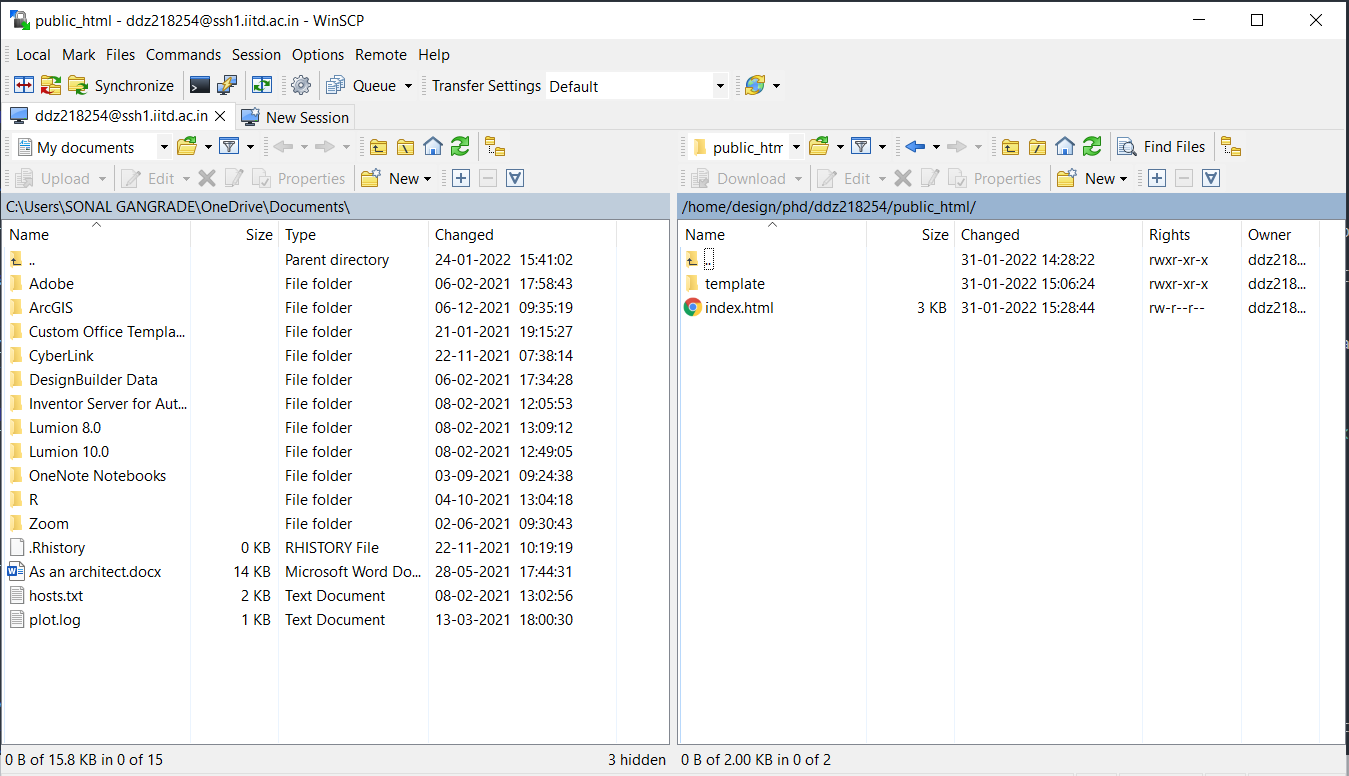
- Now that you are logged in, on the right side panel, create a new folder and name it "public_html" for Ph.D students / "private_html" for Masters students and donot change any permission settings.
- Now copy paste/drag and drop the "index.html" and the folder which has all other webpages and images/videos in the "public_html" folder.
Note - It is very important for your homepage html file to be named as index.htm only because the server detects this name only. - Now type the address "https://web.iitd.ac.in/~yourusername/" in any internet search engine and see your website in action!
Learnings
This assignment made me realize that its an easy and fun process to design your website using HTML. Also, with this tutorial, I hope that it becomes easy and interesting for beginners to start their own website sing HTML.