Chameleon - Part 1
Project Development till Minor
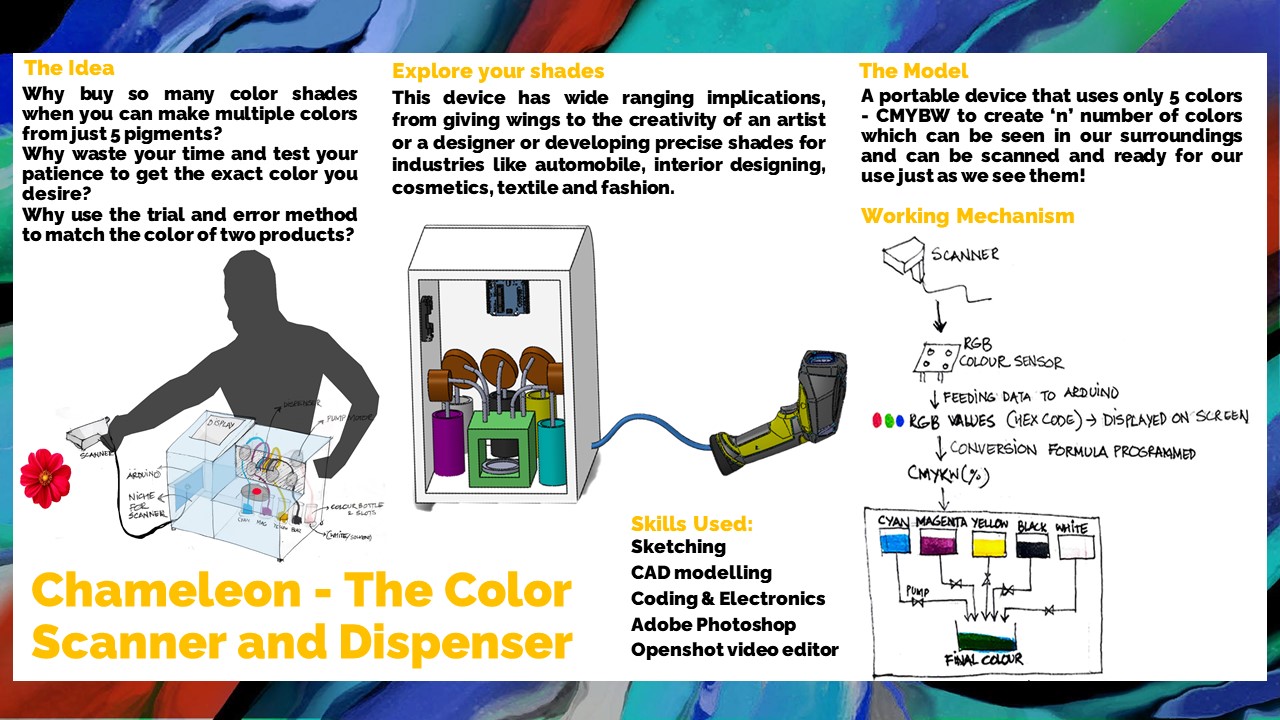
The idea
The basic idea of our team (Sonal, Mohit, Anshuman and Gracy) is very simple which stemmed from the artist's struggle of rigorous colour mixing to achieve a colour-paint they desire. The idea was broken down into 3 steps -
- See and desire - Scan
- Find and match - Colour detect & tell
- Get and use - Dispense instantly
Keeping these features in mind we evolved our designs.
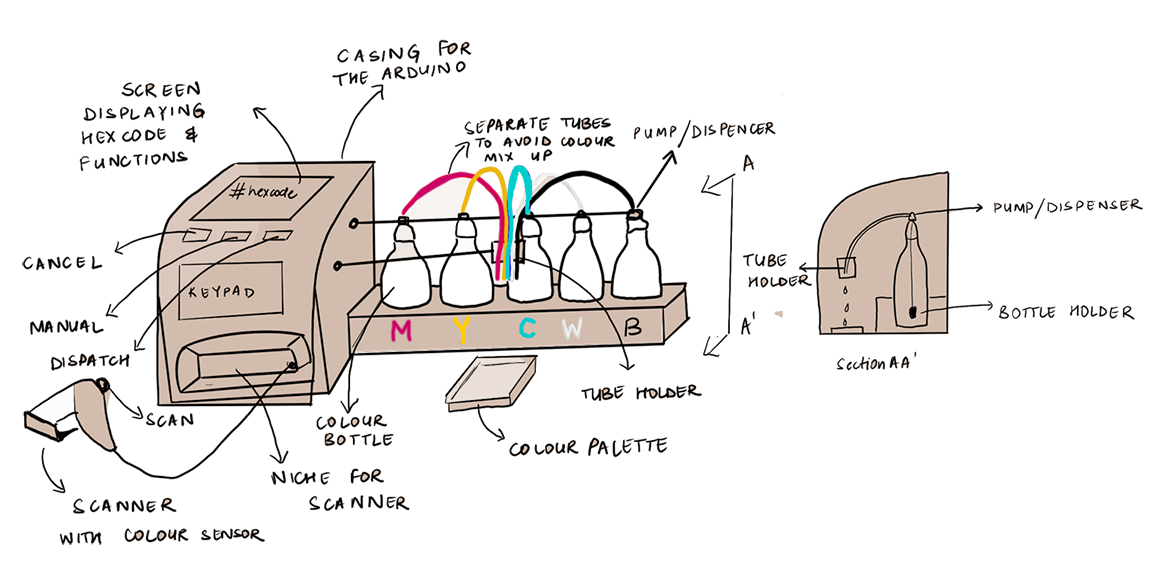
Design prototype #1
We then thought of about improving the aesthetics by concealing the tubes and the bottles.
Design prototype #2
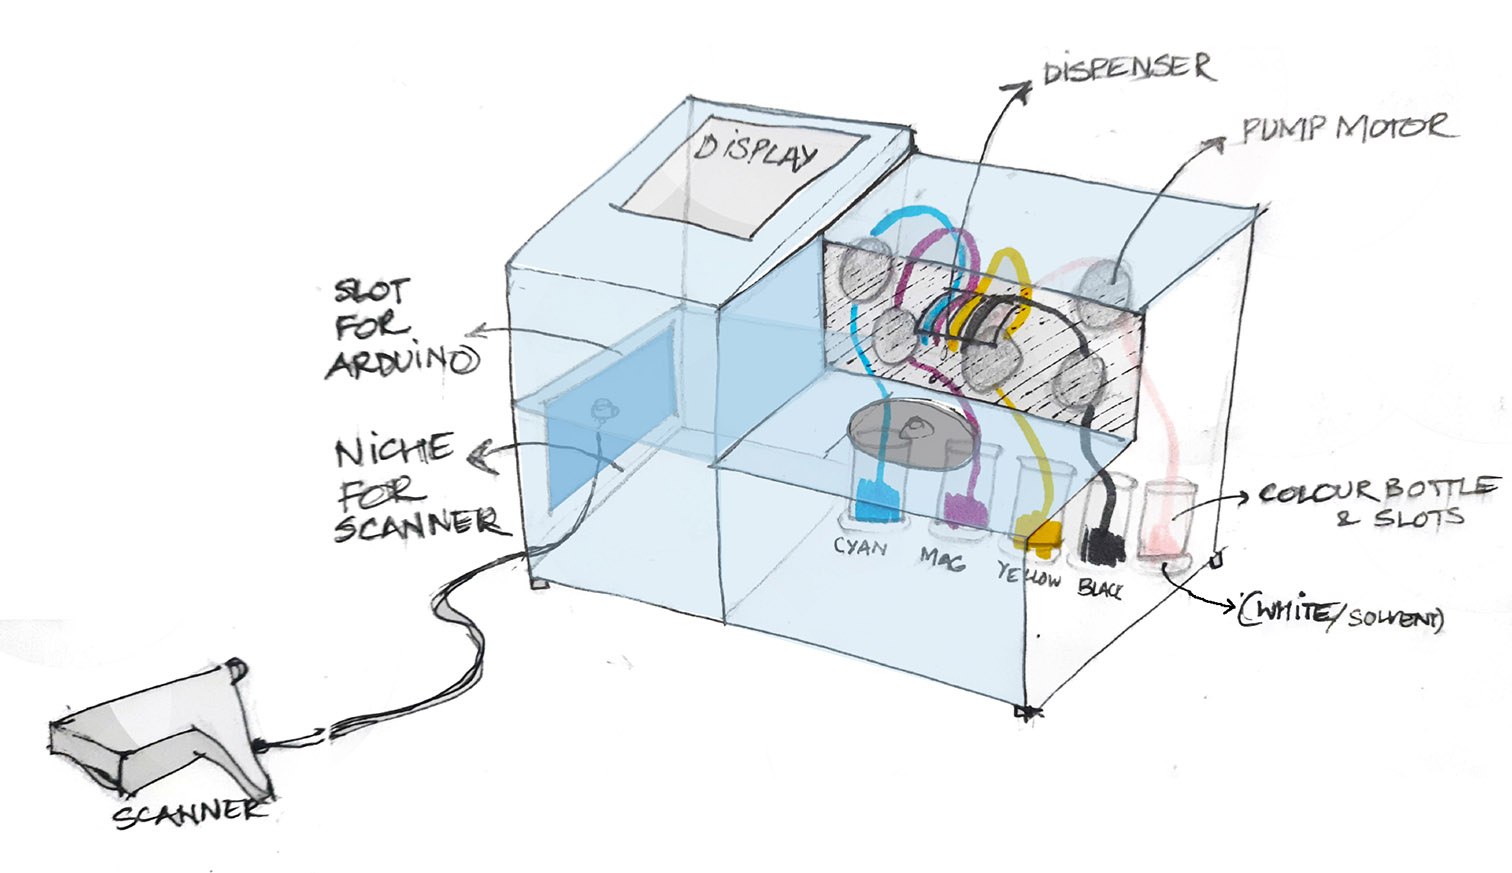
We decided to move ahead with this design and work on making it better!
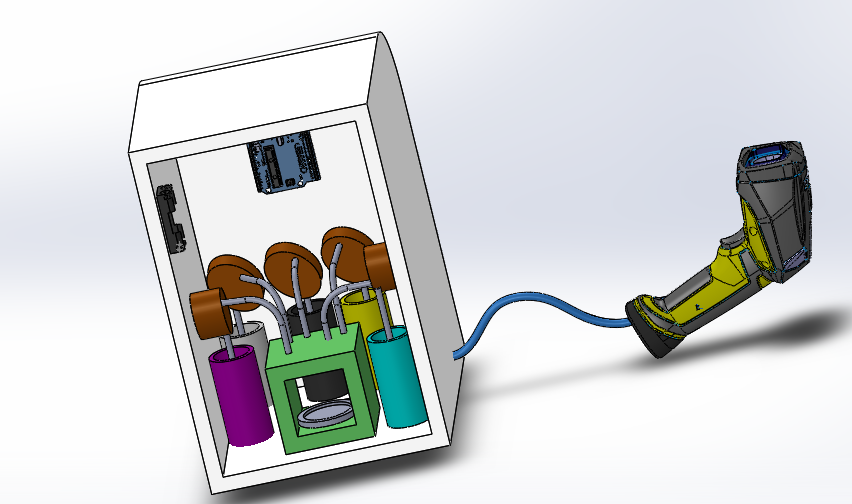
CAD model
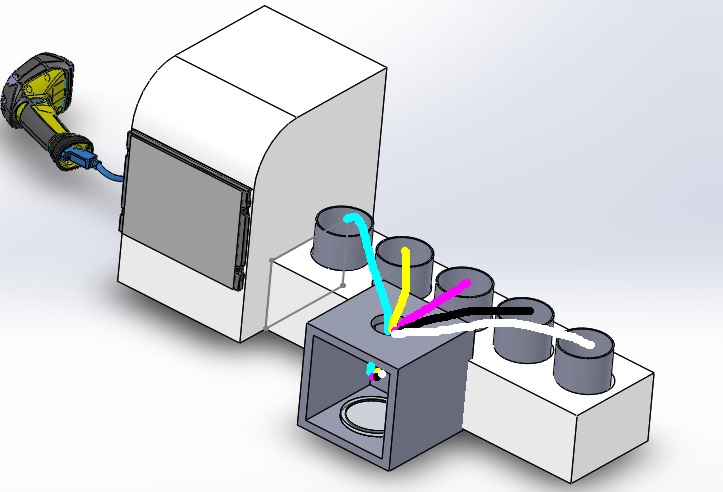
We then started working on the 3D of the protype on Solidworks to get a sense of its dimensions and individual components.
Our work so far in a nutshell
Video
Market survey
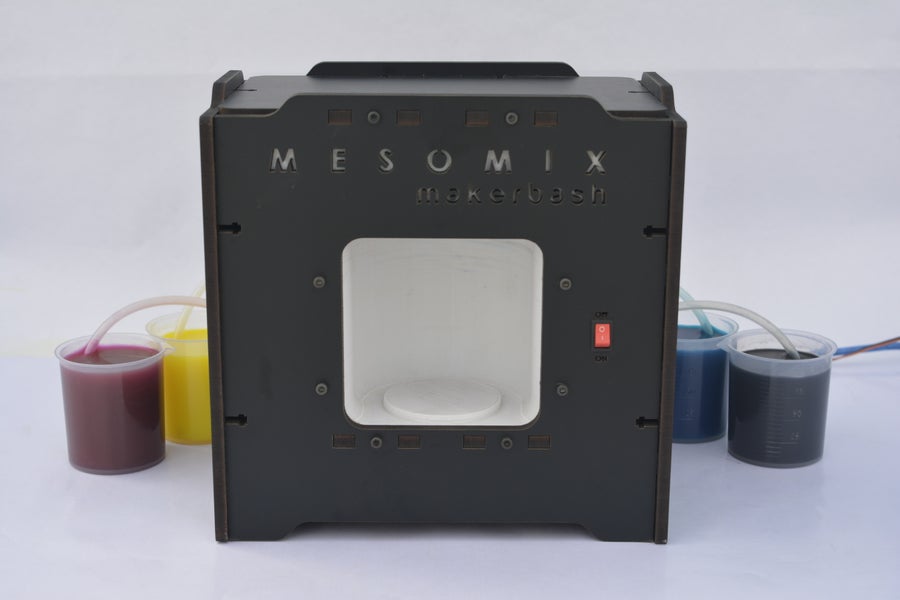
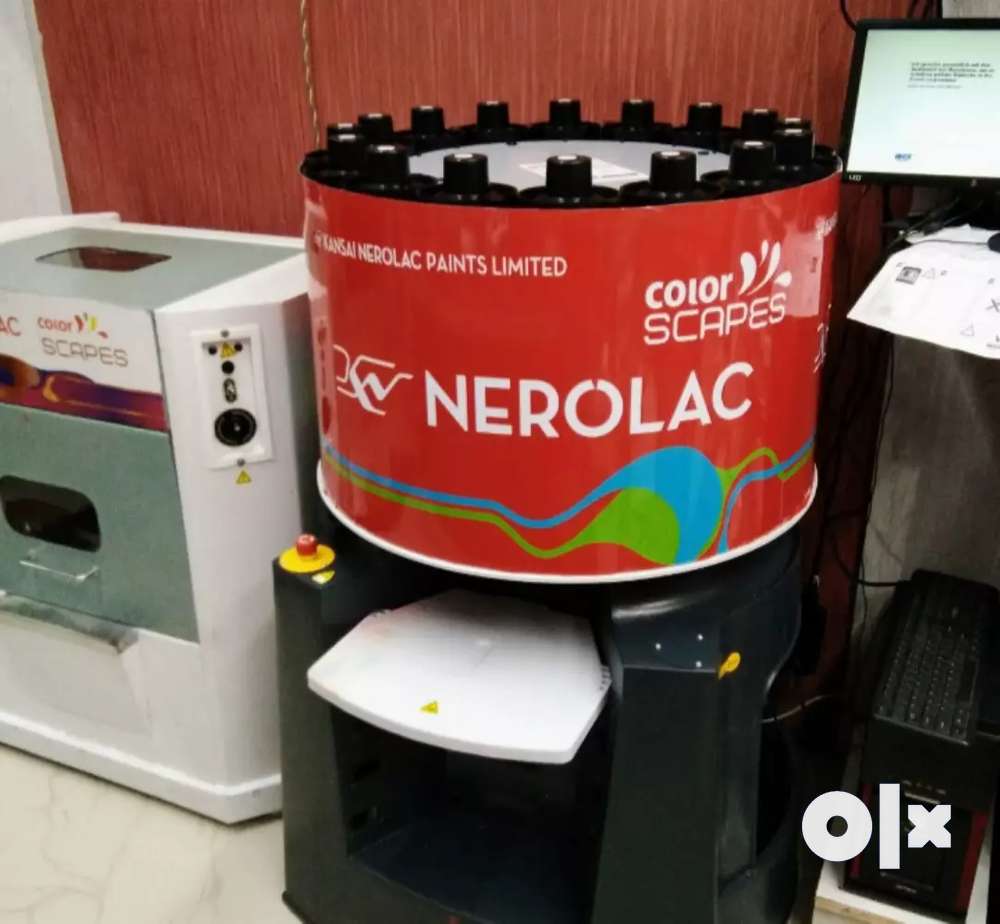
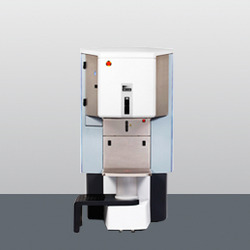
To understand the mechanism, components, usage and challenges that our product may face, we did a market survey of existing products which have a similar function as Chameleon ranging across various industries. We then identified the pros and cons from these products to refine the features of our design and also understand the challenges we may face throughout our design journey.
- Mesomix
- Nerolac colour mixer
- HA440 Paint Dispenser
- X-SMART Automatic paint dispenser

- Loreal Lipstick printer
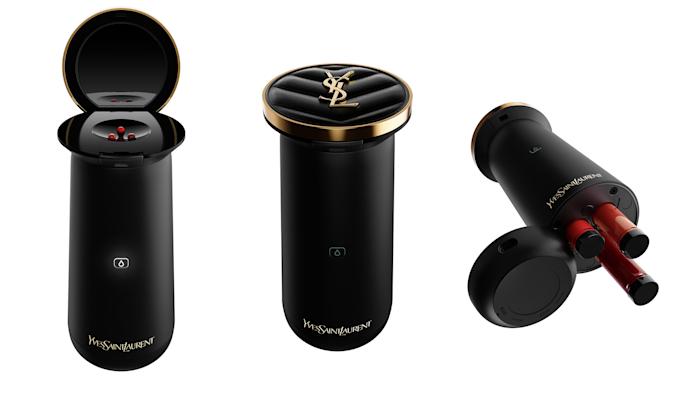
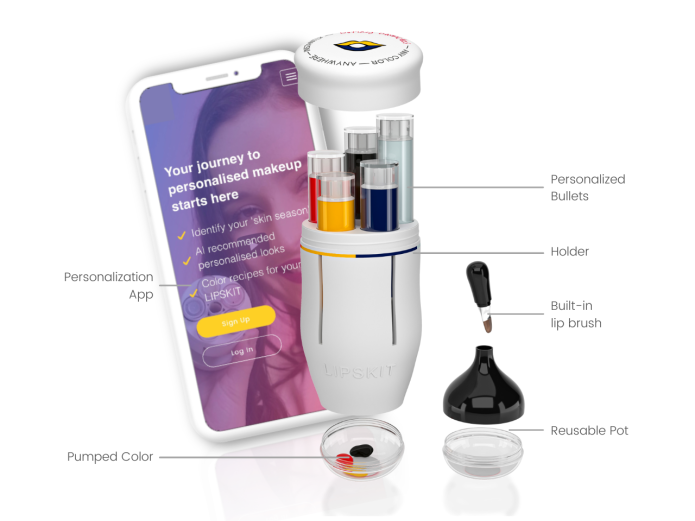
- GoPlay lipskit
Challenges
The market survey made us realize that for bringing our idea to life we will have to overcome following challenges:
- Portable - Keeping the size of the device portable so that it is lightweight, have a battery power source , and can work for small quantities and batches of input and output colour
- Colour Memory - Appropriate colour sensor needs to be used to store maximum colour shads in its memory. For example, 8-bit colour sensor can store upto 256 colour shades.
- Contactless colour sensor - Most of the colour sensors work only when they are in contact with the surface having the colour, or have to use an app from phone to capture the colour in the form of an image.
- Effect of light - Fluctuations in brightness of the surrounding, or any kind of reflection may have an impact on the colour detection. But, as our target is to get the colour we are looking at the moment, fluctuations due to light may work as a plus point for us in detecting different shades from the same surface in varied brightness.
- Colour consistency - As the device uses a pump mechanism to obtain the colour from the cartridges, it will be important to use appropritate solvent with different type of paints so that the output colour is neither dilute nor does it affect the hue of the desired colour.
- Mixer - The mixing need to be manual and external so that the otlet doesnt have to be cleaned after every use and the next colour dispensed is not contaminated from the pigments of previous colour.
- Contactless scanner - Designing this from scratch for the chameleon is a chalenge.
- Affordable - Keeping all the features in mind as well as manufacturability, the prduct should be affordable for the users.
Components
List of some components along with links:
Electronics:
Arduino UNOColor Sensor
Stepper Motor Driver
Pump
DC Jack Connector
Switch
Stepper Motor
RGB LED Strip
Buzzer
Hardwares:
100ml BottleSilicone Tube
Assembly Requirements- Body, Nuts and Bolts
Skills Required
Following skills are required:
- Laser Cutting
- CAD modelling
- 3-D printing
- Arduino coding
- Adobe Photoshop
- Coding and Programming
- Video editing
Project Timeline
The tentative timeline starts from the day of presenting Project Proposal (31st January 2022)
- Week 1 - Researching the particular components that will be required for the project - Arduino, sensors, scanner, display screen, motor,etc.Then making a list and placement of order for the same.
- Week 2 - Dividing the team of 4 in 2 groups and working on
- The algorithm for converting RGB model to CYMK model
- The algorithm/coding for dispensing the paint
- Week 3 - Understanding and defining the working of the arduino through simulation softwares
- Week 4 - Assembling the arduino and connecting it with scanner and sensors
- Week 5 - Working on the Cad model for designing parts of the outer body
- Week 6 - Testing the electronic model and listing the shortcomings
- Week 7 - Work on the shortcoming found in testing and make the soft-prototype for the outer casing
- Week 8 - Modify prototype as required, manufacture the parts of the prototype and assemble them
- Week 9 - Ready the Final prototype
- Week 10- Work on the final presentation for the project