Assignment 4
Part A.
What are the different sensors in your phone and what do they do? Conduct an experiment to measure and analyse data for a sensor in a log and report your findings.
List of Different sensors in my phone and their working.
1) Proximity Sensor-The proximity sensor detects when a user is holding the phone near their face during a call and turns off the display to prevent keypad presses and battery consumption from the display. The proximity/light sensor is located to the right of the earpiece
2) Ambient Light Sensor-It is a photodetector that is used to sense the amount of ambient light present, and appropriately dim the device's screen to match it.
3) Accelerometer Sensor-Accelerometers in mobile phones are used to detect the orientation of the phone. ... In practice, that means that an accelerometer will measure the directional movement of a device but will not be able to resolve its lateral orientation or tilt during that movement accurately unless a gyro is there to fill in that info.
4)Magnetometer Sensor-The digital compass that's usually based on a sensor called the magnetometer and provides mobile phones with a simple orientation in relation to the Earth's magnetic field. As a result, your phone always knows which way is North so it can auto rotate your digital maps depending on your physical orientation.
Experiment.
Below video shows testing of all my sensors in mobile phone usinf Sensor test app.
Part B.
Measure Somthing: Add a sensor to micro controller board and read it. Document the process. Find the application in real world around you and report your finding.
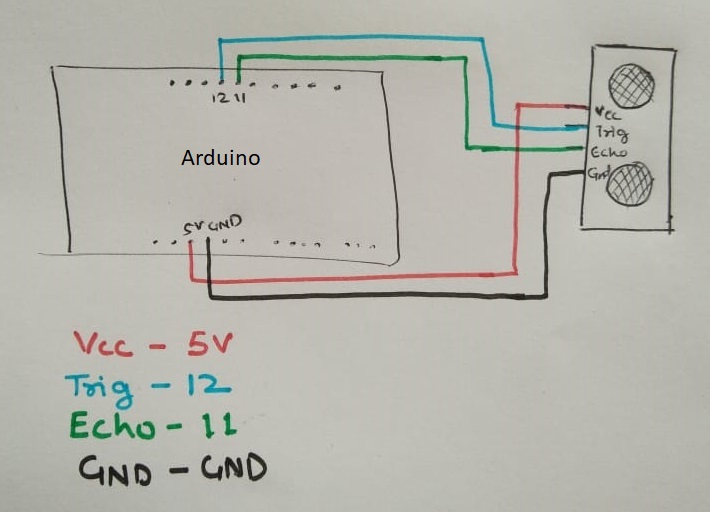
Planning
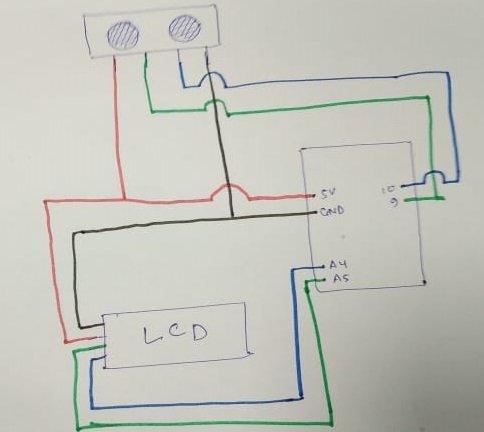
First part of plan was to draw Circuit Diagram which is shown in below images.To have basic Understanding
Just for my Understanding.
Component Used
List of basic components used while doing this assignment.
- Beardboard (1)
- Jumper wires
- Ultrasonic sensor (1)
- Ardiuno(1)
- Switch(1)
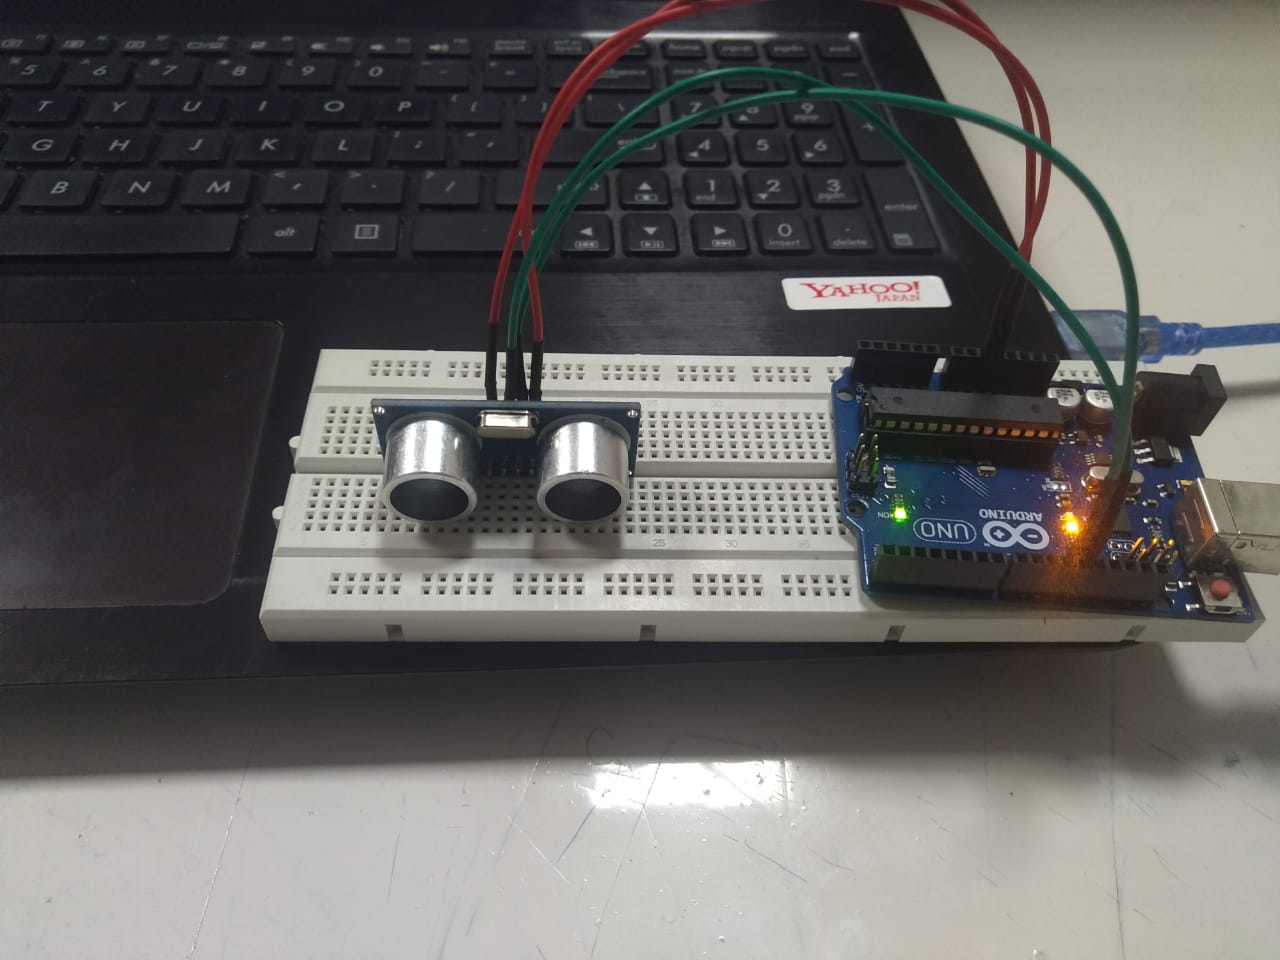
Circuit preparation
This is how our prepared circuit looks like.
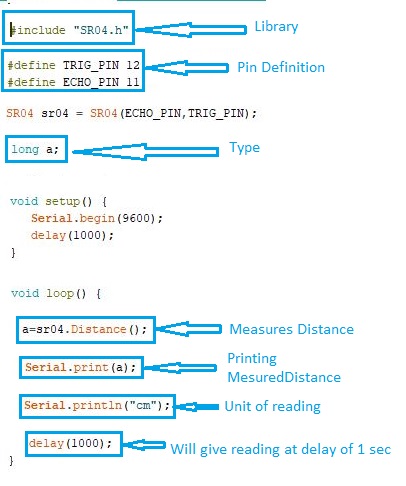
Programming Codes
Below Image shows the code I used.
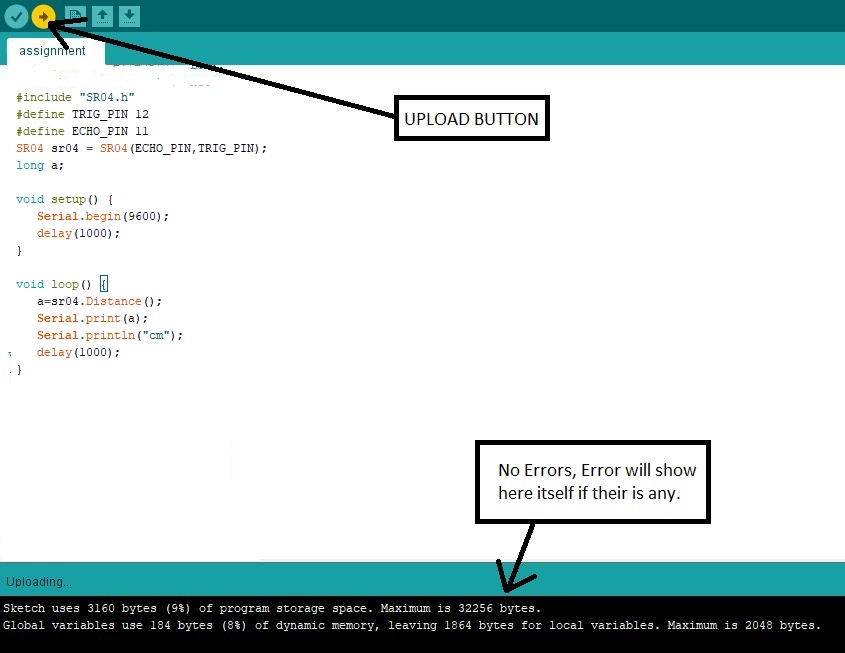
Codes Execution
To execute codes we need to press upload button and after pressing that button their should not be any error as shown in image below
Now for checking reading go to serial monitor.
Please check below video to watch our working model.
Applications
1) We are gonna use this sensor in our Project (Ergo Heal).
2) We can use this sensor in doors to make it open and close automatically.
3) It can be used in toilets for auto flush, though it already have infrared sensors.
Part C.
Add an output device to a Microcontroller board and program it to do something.
Planning
First part of plan was to draw Circuit Diagram which is shown in below images.To have basic Understanding
Just for my Understanding.

Component Used
List of basic components used while doing this assignment.
- Beardboard (1)
- Jumper wires
- LCD (1)
- Ardiuno(1)
- Switch(1)
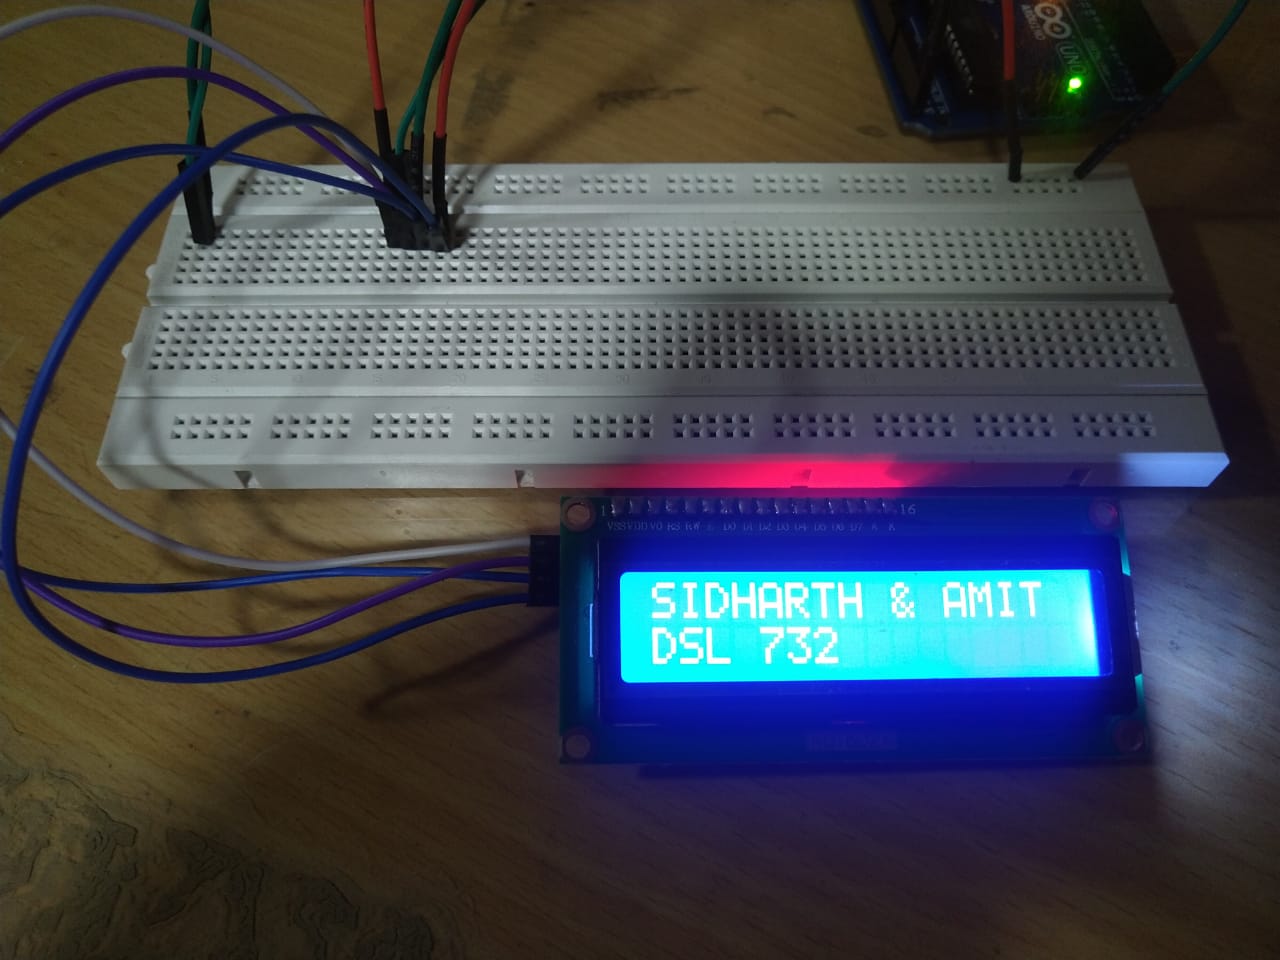
Circuit preparation
This is how our prepared circuit looks like.
Programming Codes
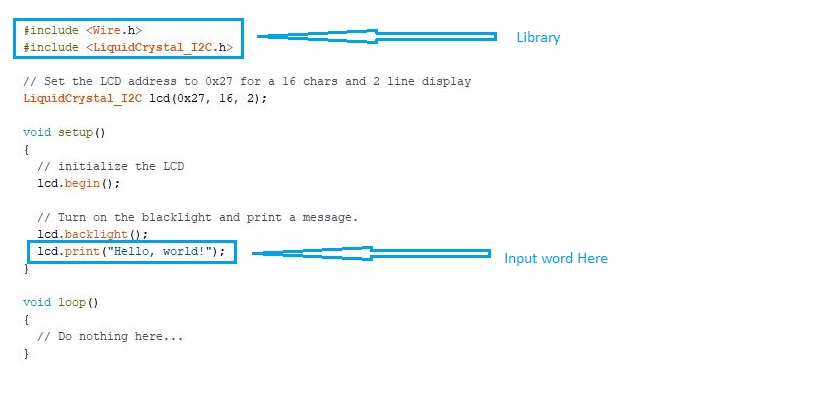
Below Image shows the code I used.
Codes Execution
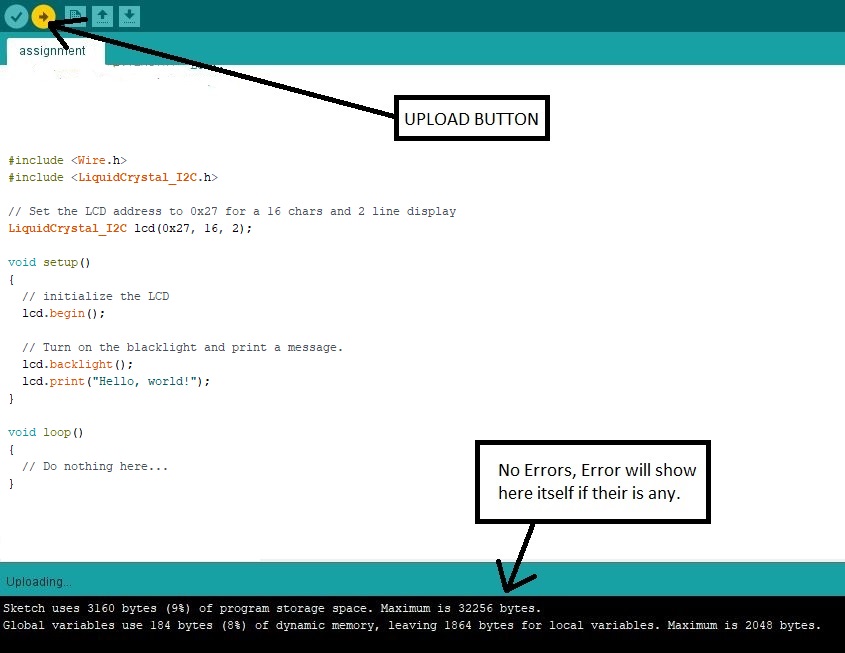
To execute codes we need to press upload button and after pressing that button their should not be any error as shown in image below
Please check below video to watch our working model.
Part D.
Combine input and output device together.
Planning
First part of plan was to draw Circuit Diagram which is shown in below images.To have basic Understanding
Just for my Understanding.
Component Used
List of basic components used while doing this assignment.
- Beardboard (1)
- Jumper wires
- LCD (1)
- Ultrasonic Sensor (1)
- Ardiuno(1)
- Switch(1)
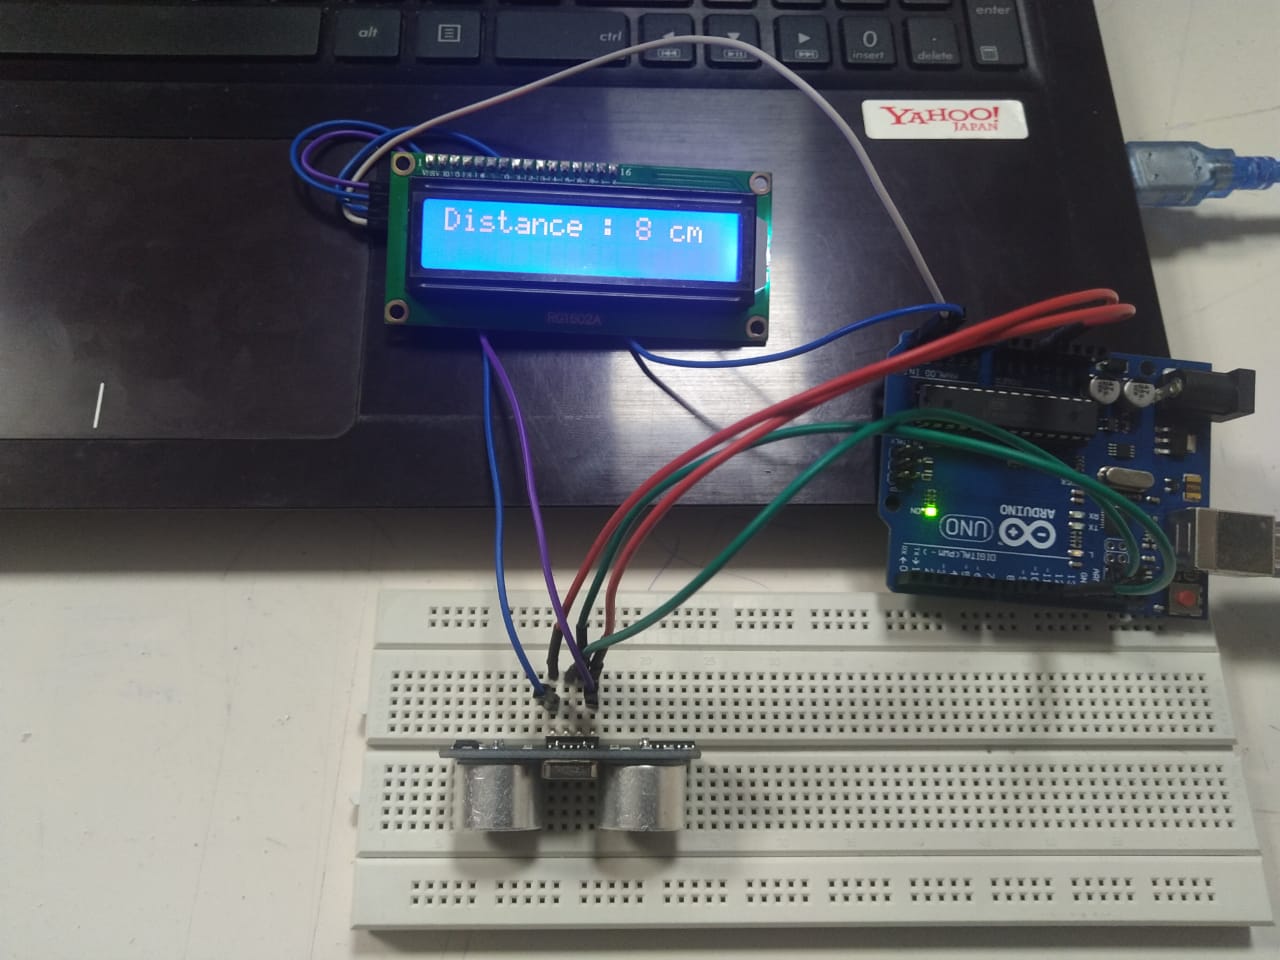
Circuit preparation
This is how our prepared circuit looks like.
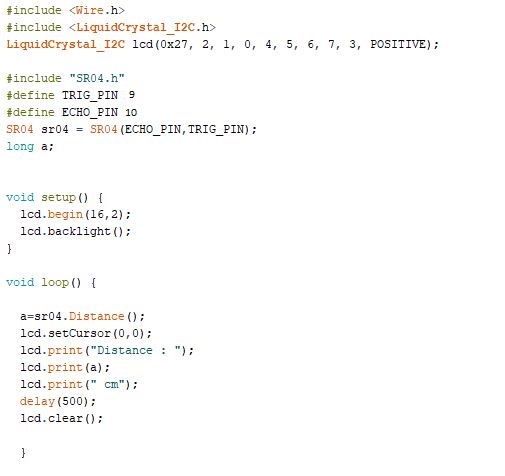
Programming Codes
Below Image shows the code I used.
Codes Execution
Same as above 2 cases.
Please check below video to watch our working model.
-------------------------------------End of Assignment---------------------------------------