Assignment 7
3D Printing
Introduction
3D printing or additive manufacturing is a process of making three dimensional solid objects from a digital file. The creation of a 3D printed object is achieved using additive processes. In an additive process an object is created by laying down successive layers of material until the object is created.
IN this assignment we got to learn about 3d printing.We used solidworks to make the 3d model and then using ideamaker to interface with the 3d printer and bringing the models to life.
3D modelling and 3d printing
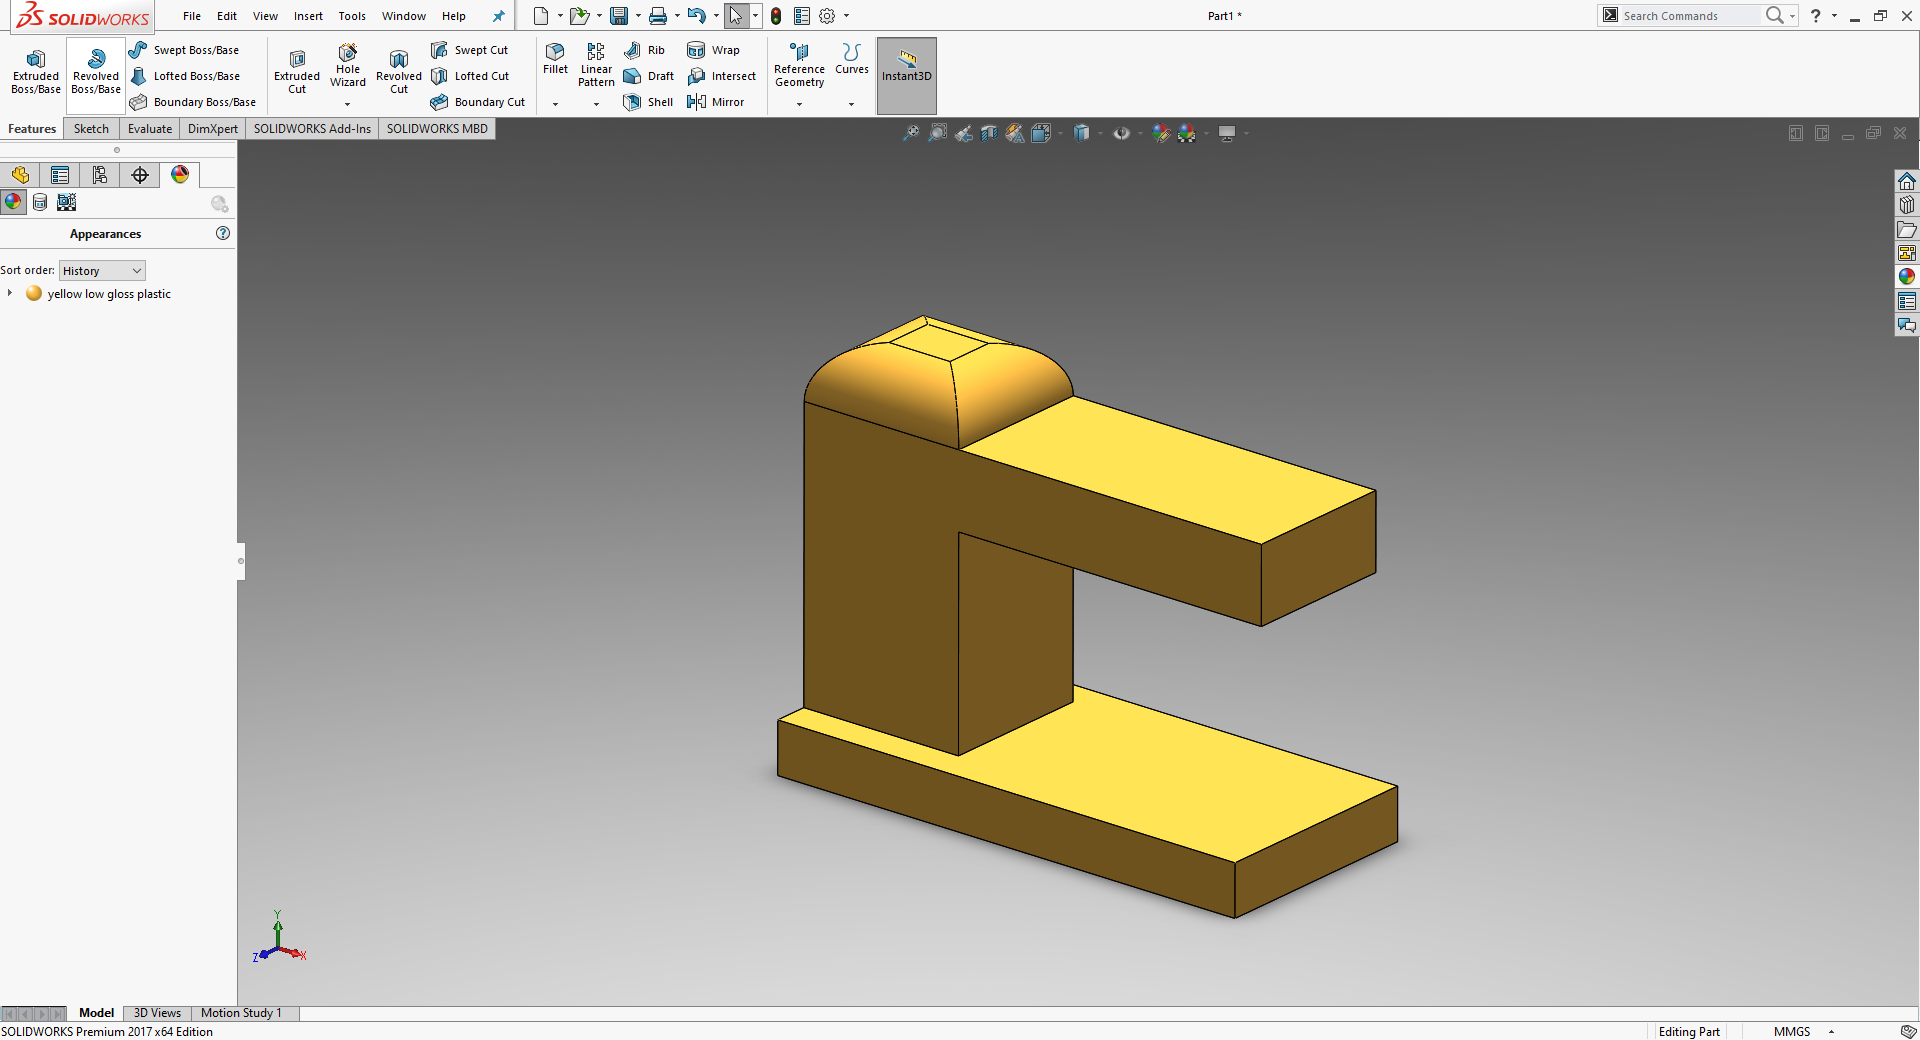
Step 1 : We made the model in soldiworks.
Step 2 : We imported the file to ideamaker.
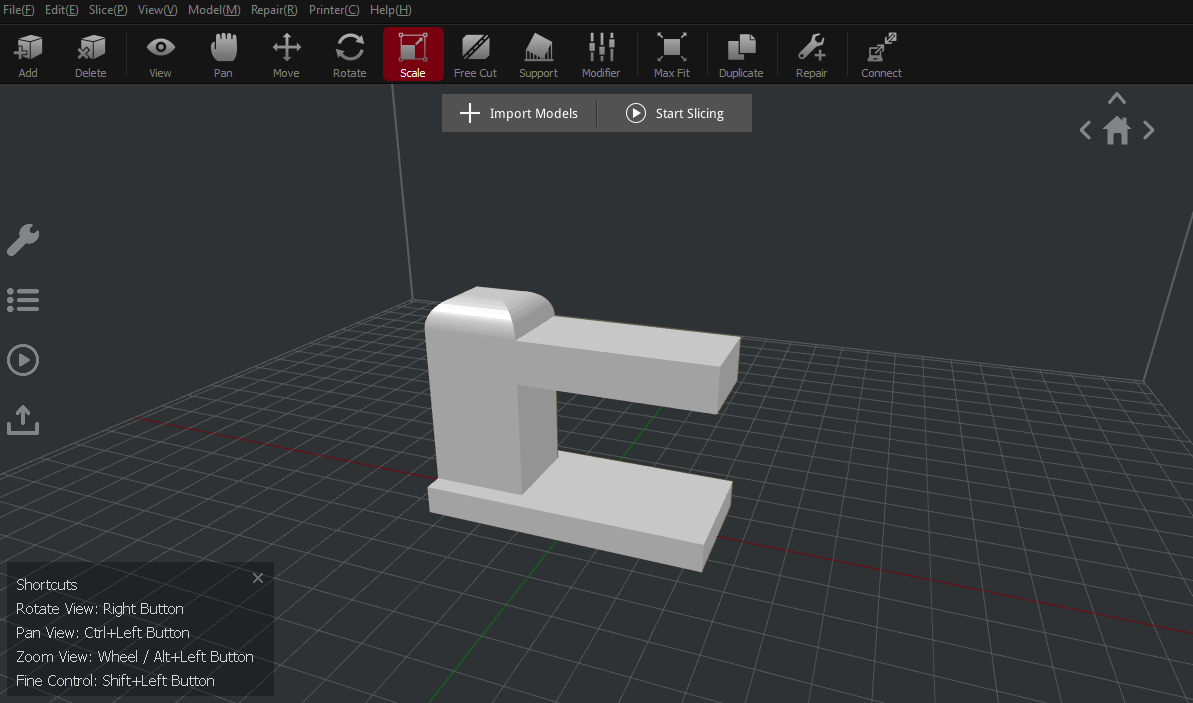
Step 3 : Taking it to the printer. After importing the model, the object is scaled to the required dimensions and then a slicing template is created by clicking on 'Start Slicing'. The 3D printer model and filament properties are input to the tempplate with various other printing properties such as the speed, wall thickness or number of walls, the type of infill, the infill density and much more. After creating the template it is important to set the nozzle temperature and the bed temperature which are 215 degrees and 60 degrees Celeius respectively.
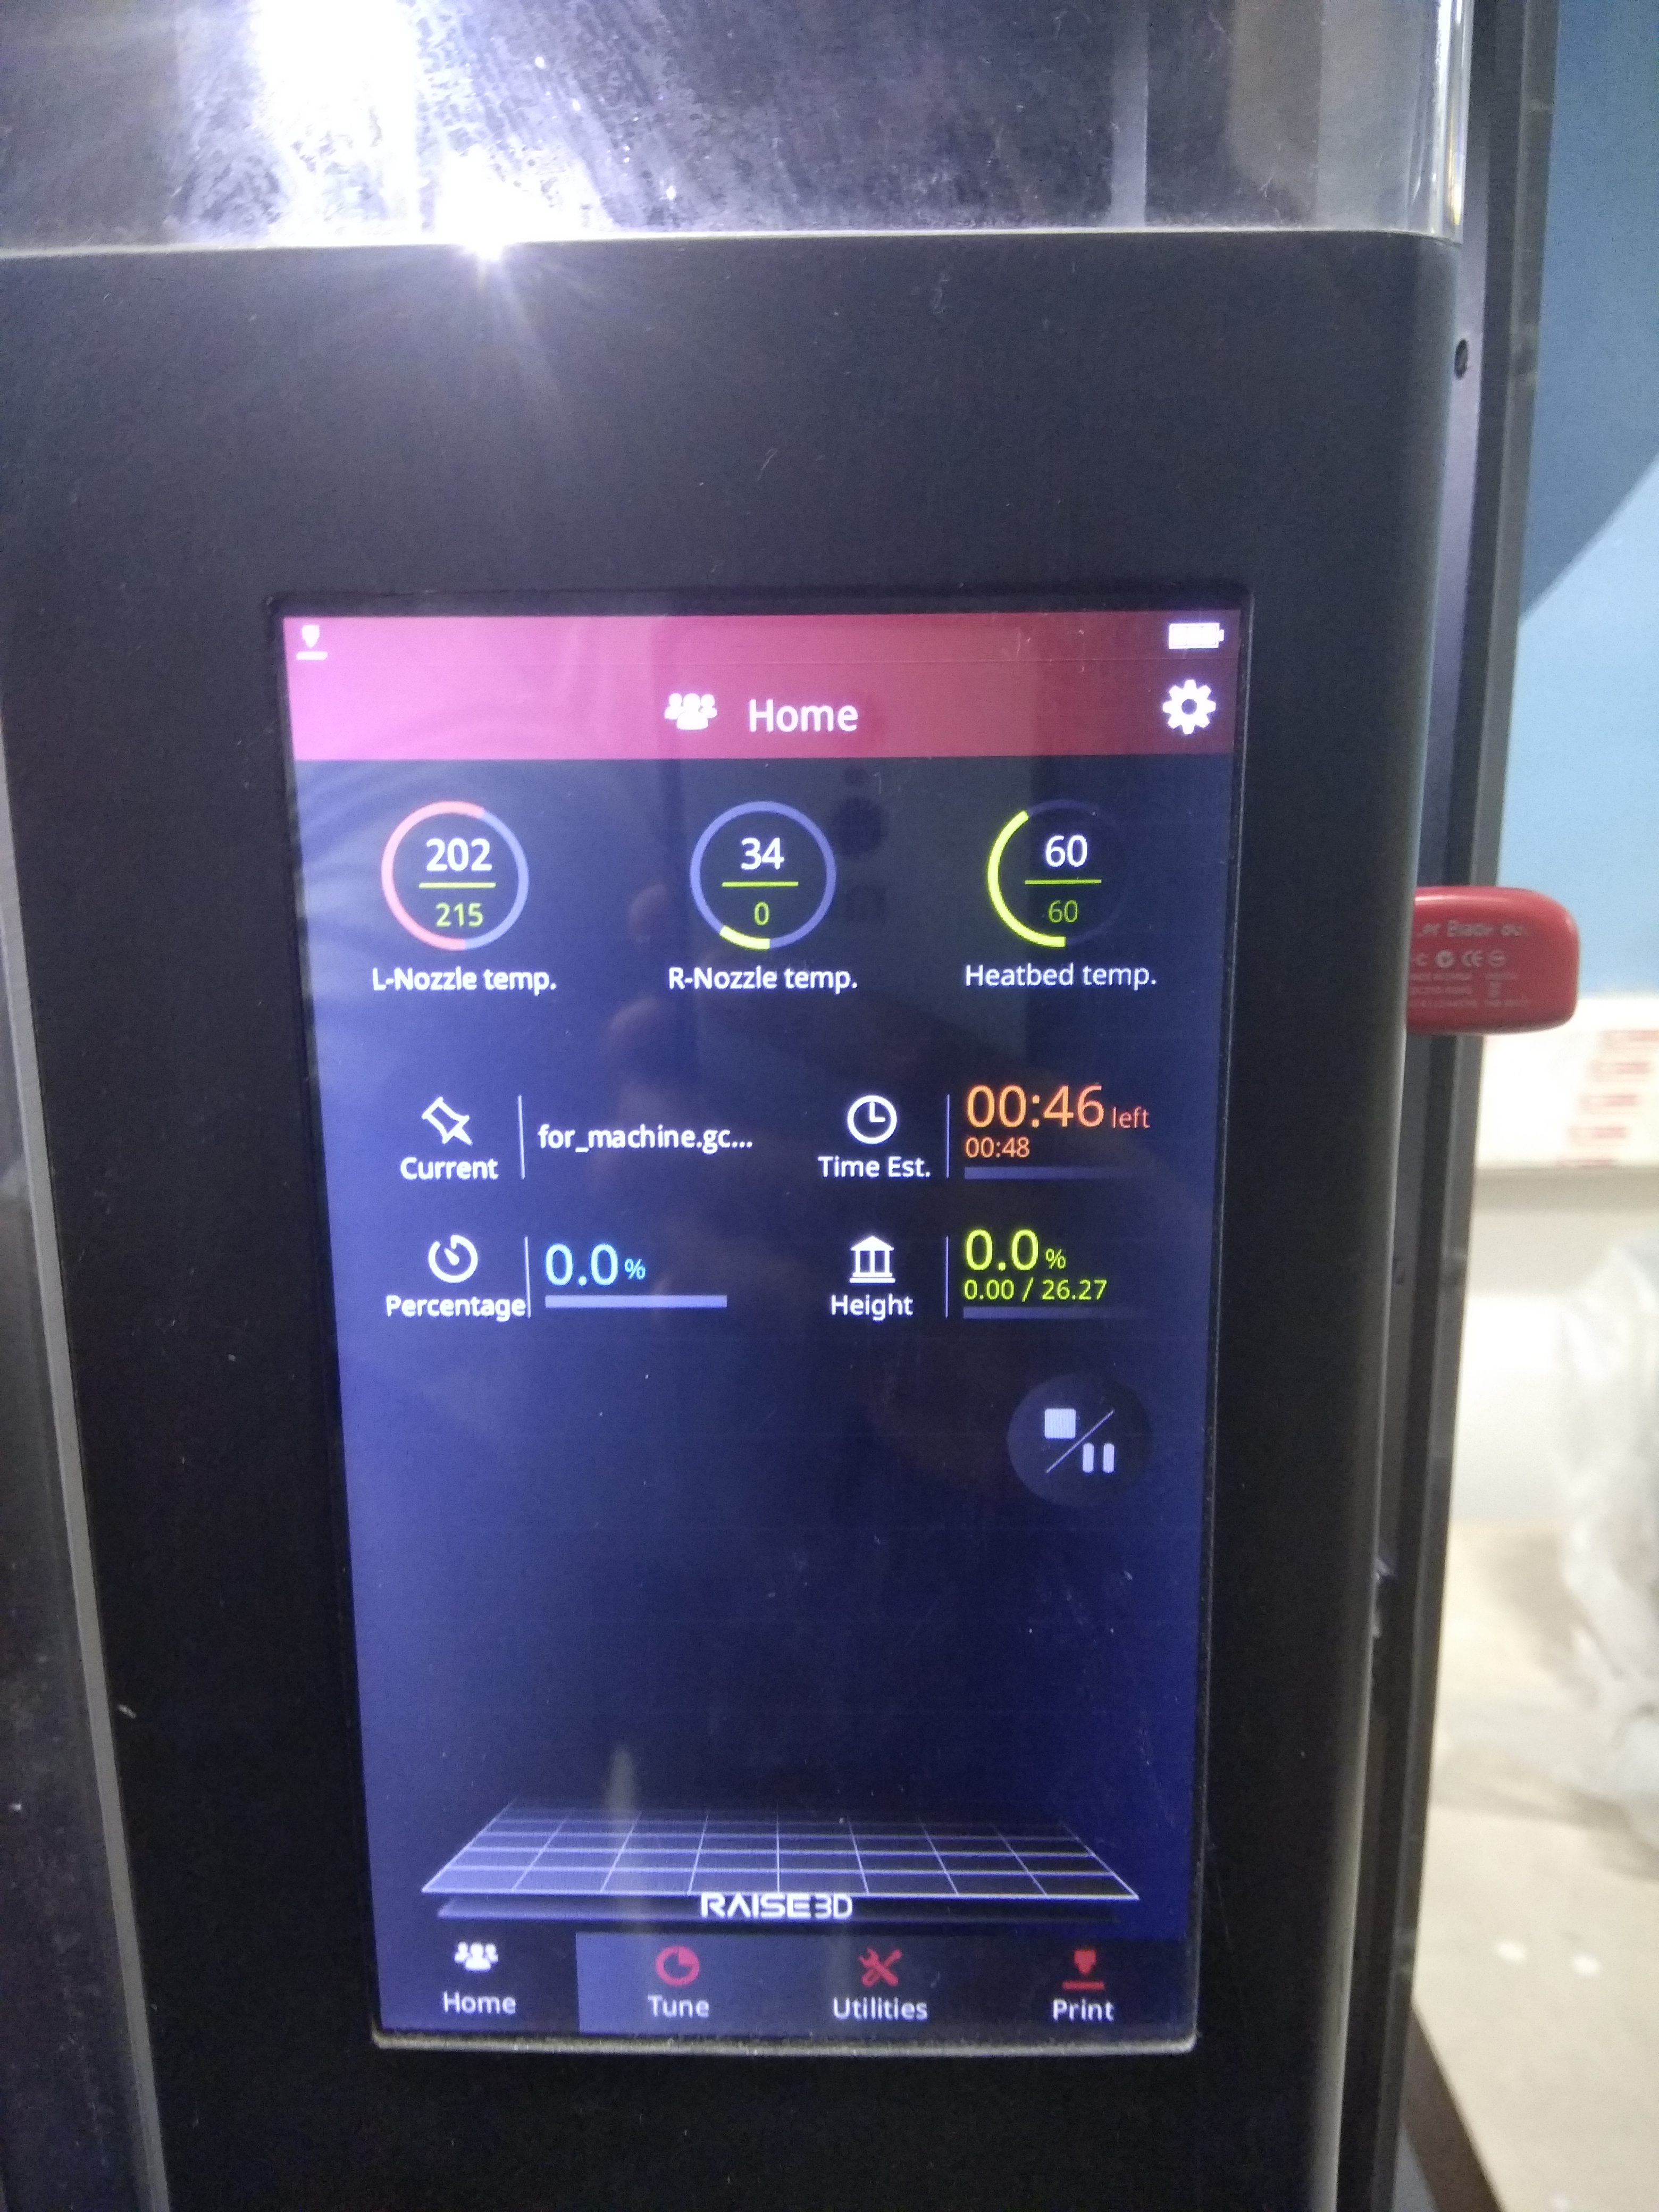
Step 4 : Printing
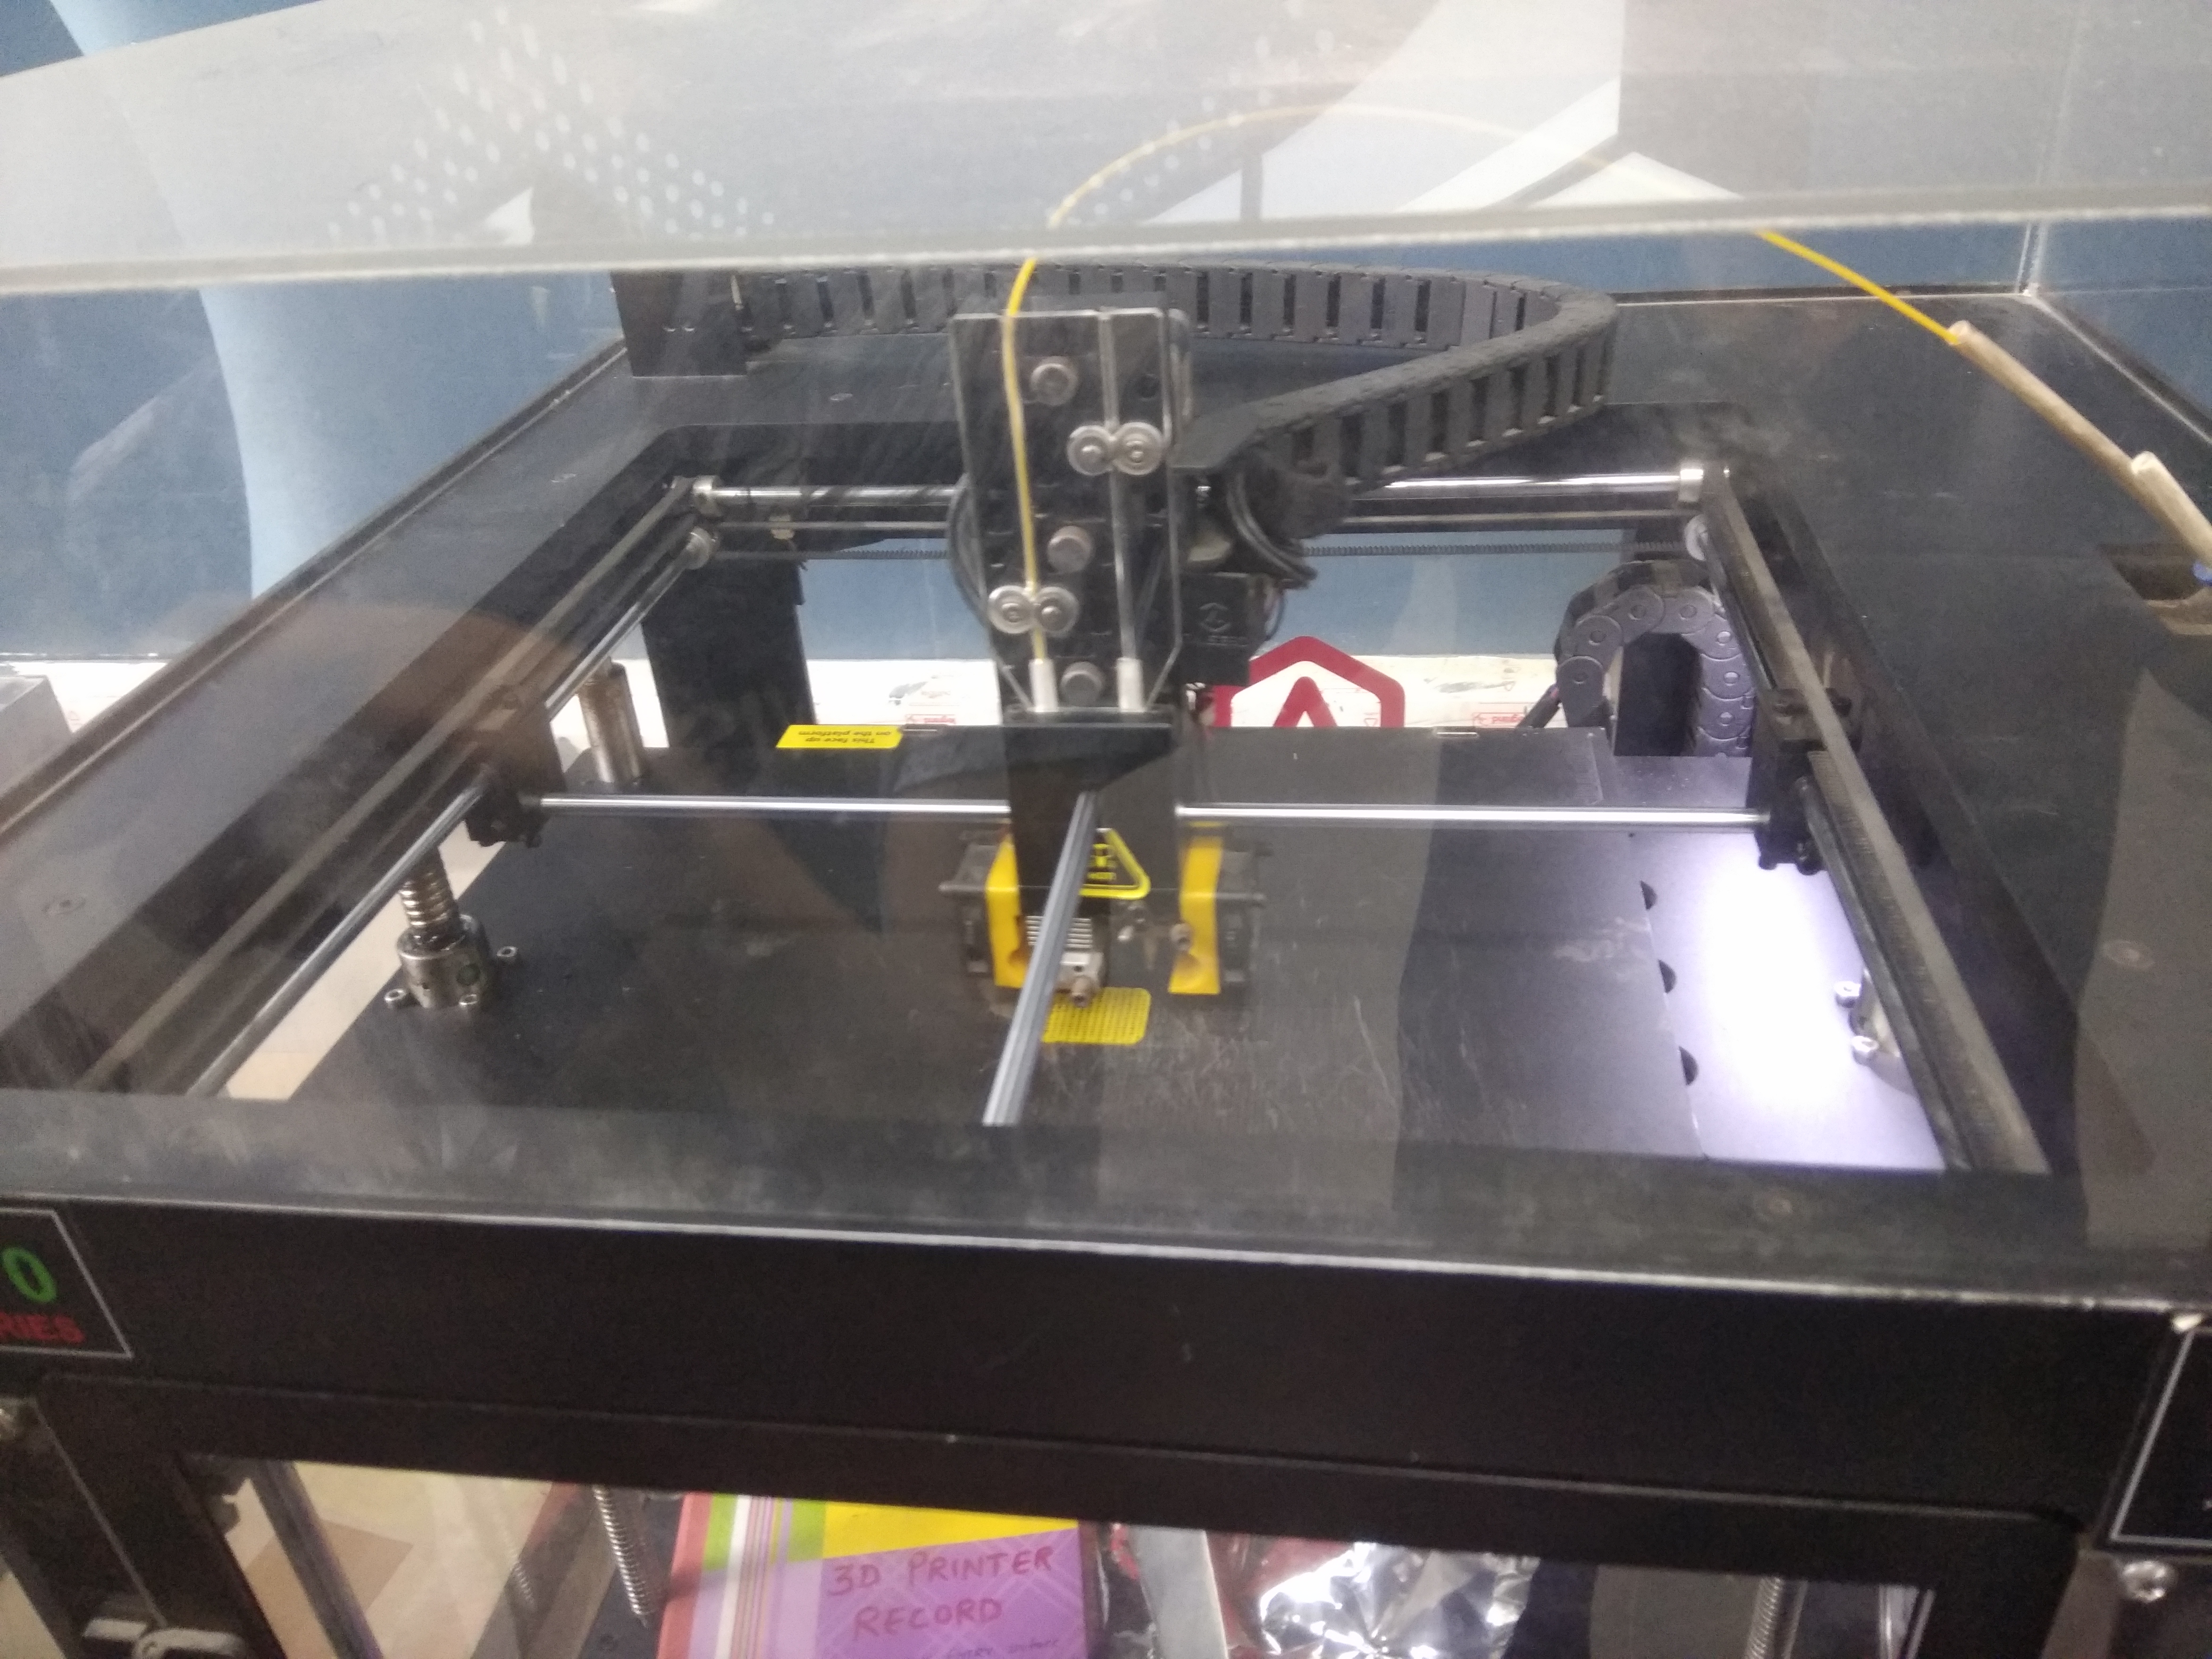
The printer is turned on and the Sliced file which is a G-Code file is transfered to the printer by a USB. Before printing we need to make sure the filament flows through the nozzle at set temperature. If not, the filament has to be unloaded and the end has to be cut at an angle and re-loaded into the nozzle. Then it is sent to print. The images below show the various stages of the printing.
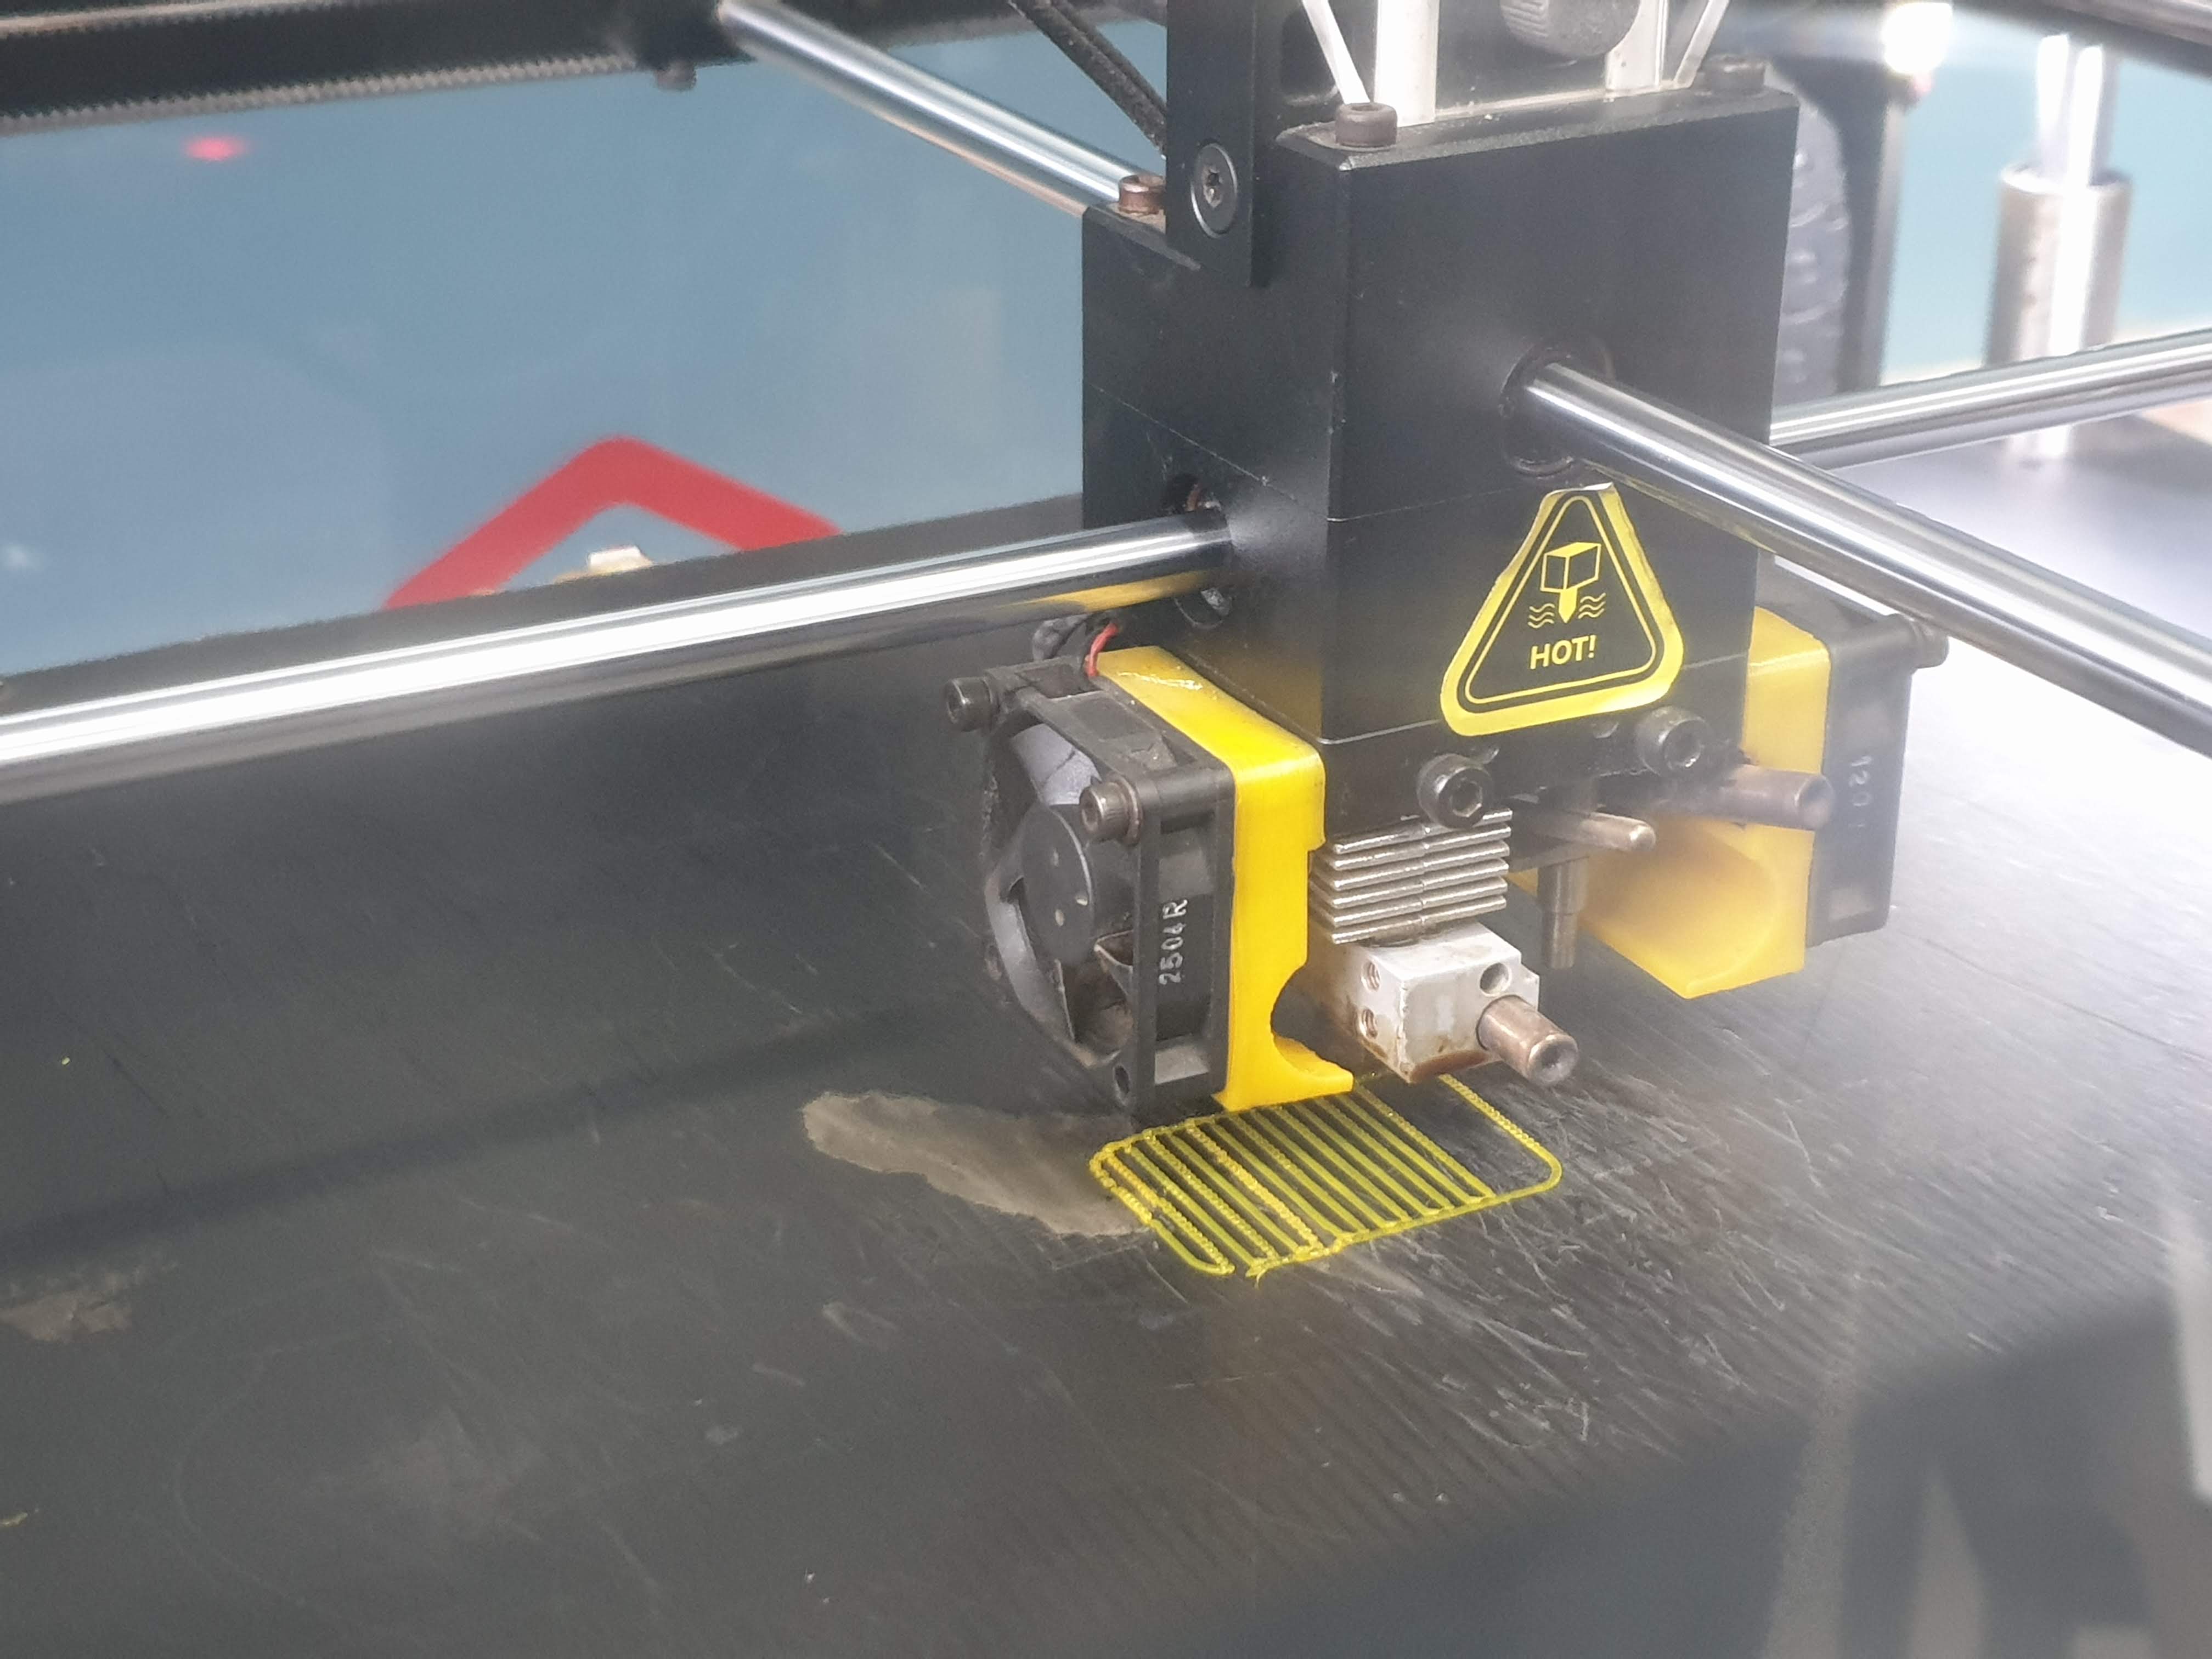
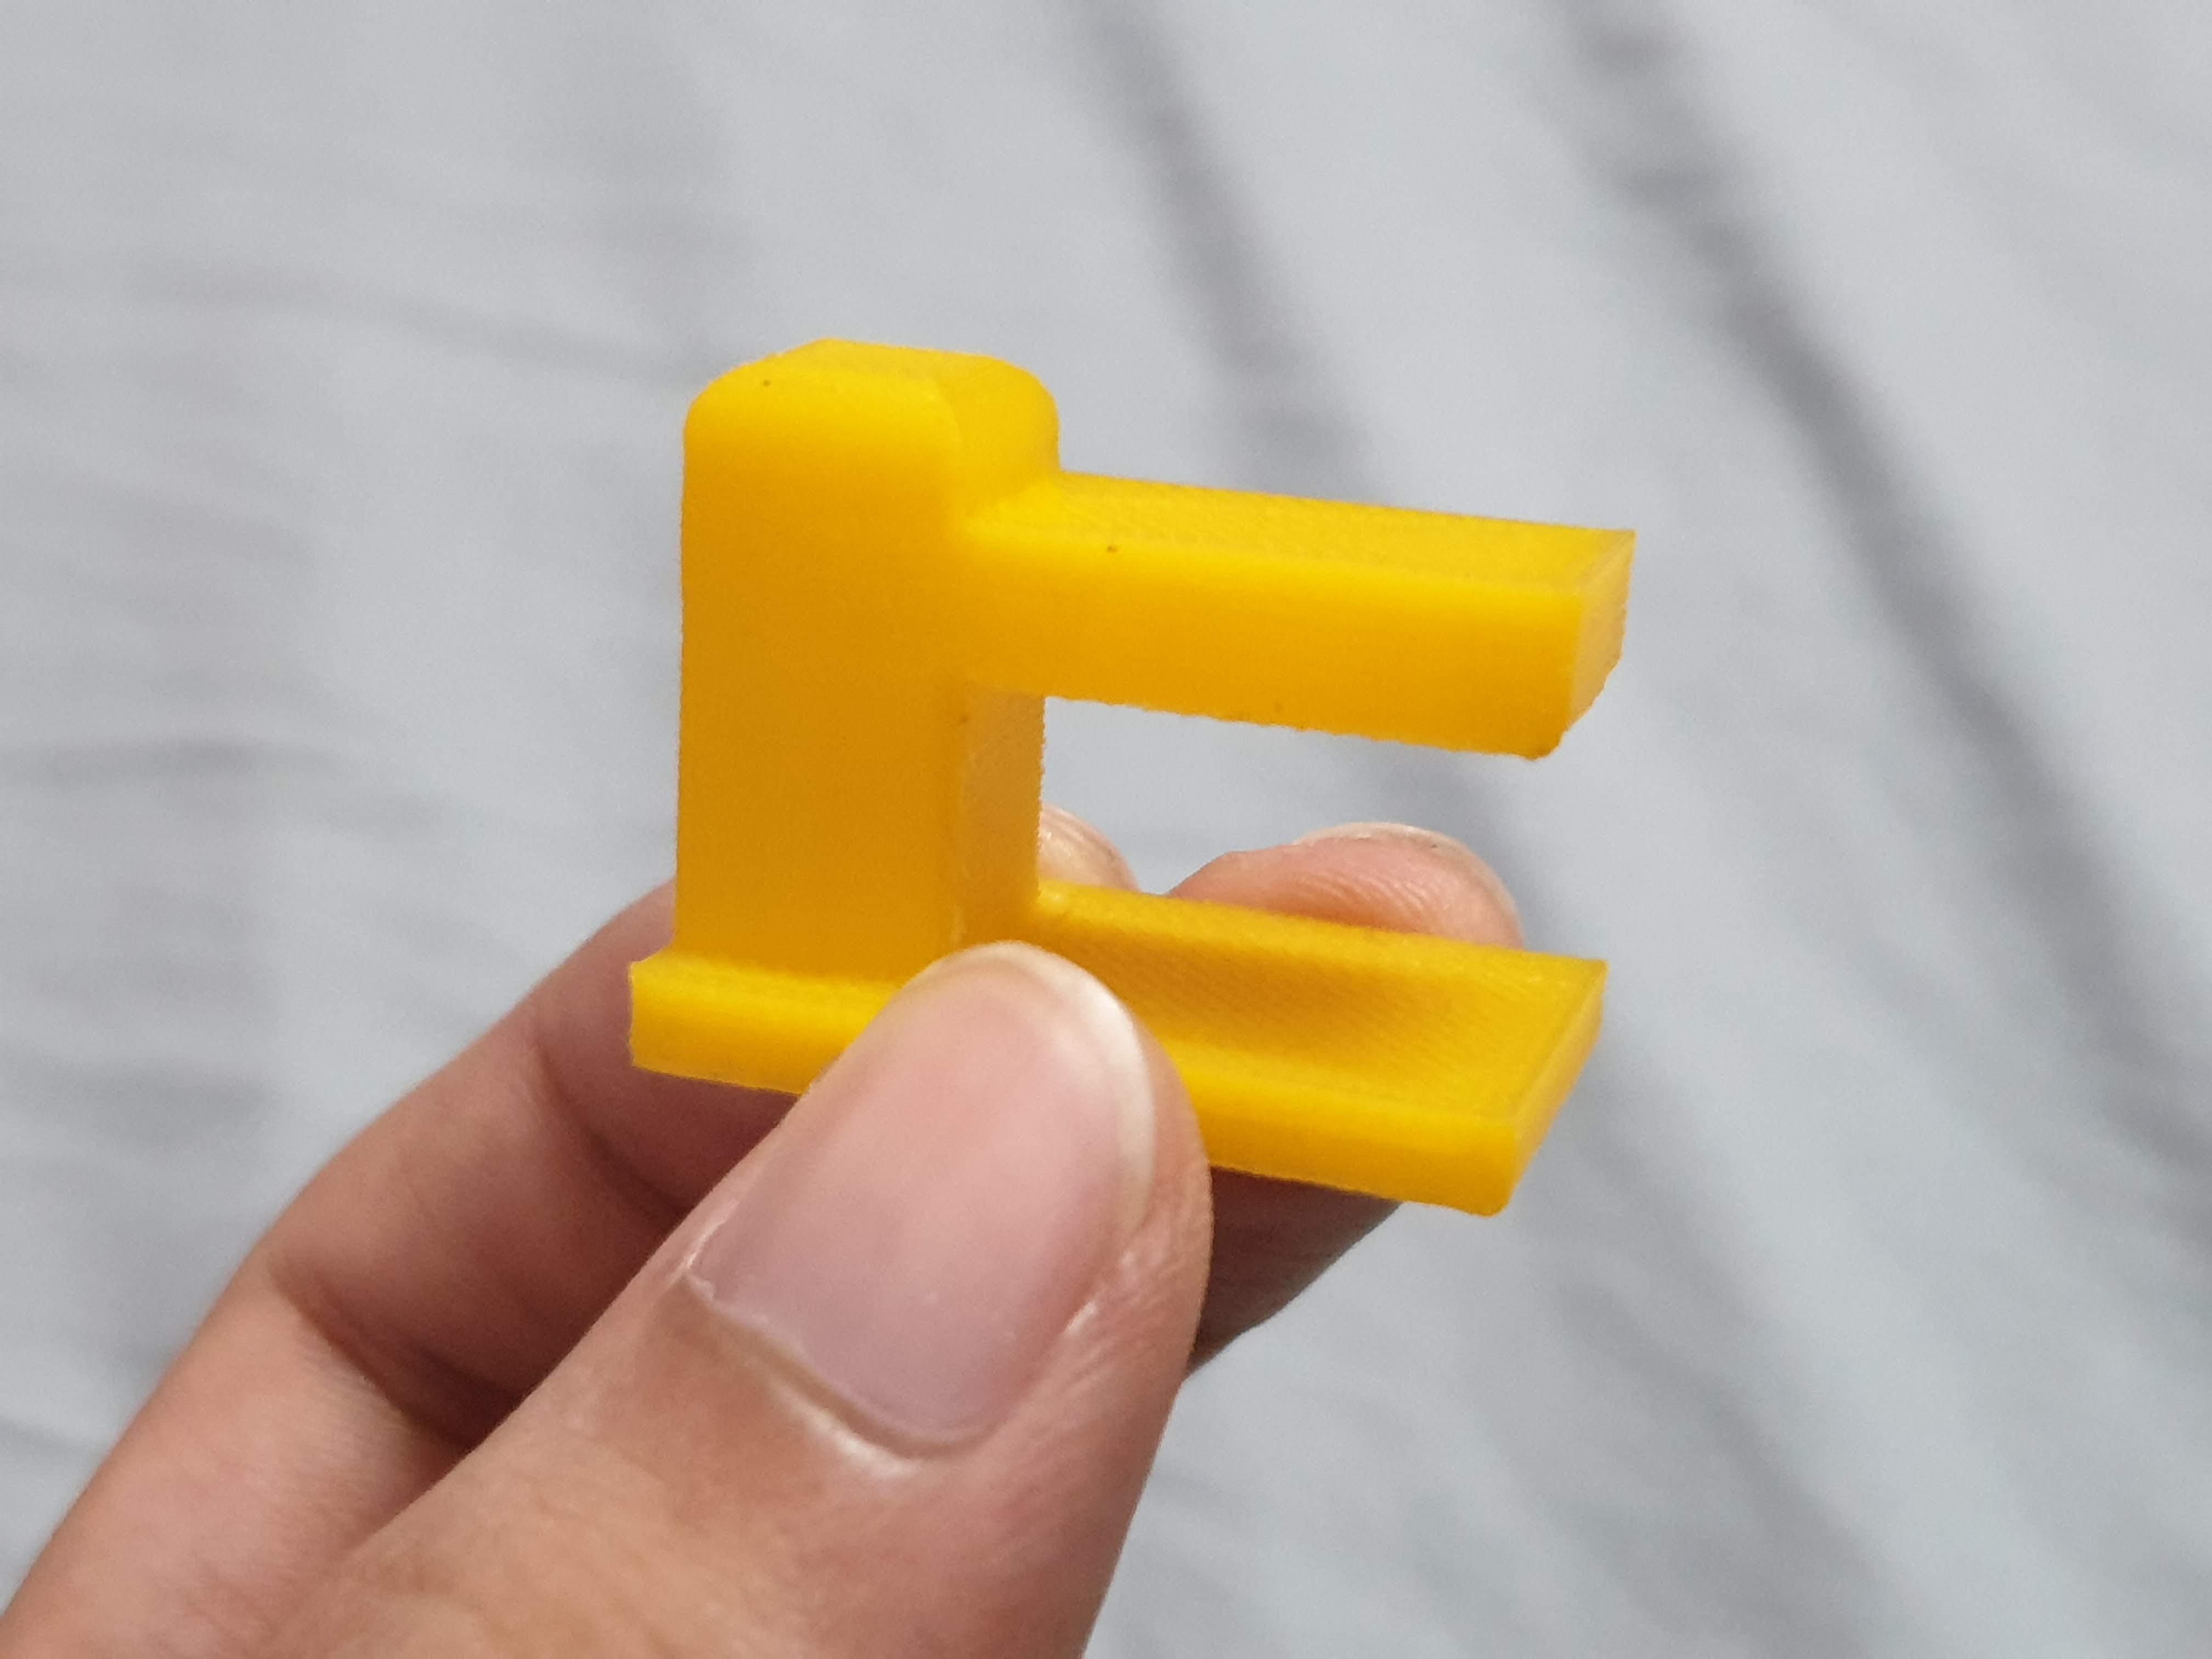
The finished 3D printed model has three components to it. The sacrificial layer which gets rid of any starting glitches while the print starts and it also makes it easy to take off from the bed. And then there are the supports that are given to any part of the model that overhangs past a certain angle.
Problems faced
1. In 3D printing, printer automatically gives autosupports to the hanging parts and a bed for the base of the object. To avoid this, the 3D model is sliced into two parts and printed seperately and joined together.
2. During the second printing process, material was not coming out of the nozzle, so unloading and loading of the material had to be done. In 'Utilities' tab, Unload of the L-Nozzle had to be pressed, wait for the temperature to reach desired value shown, after which PLA comes out and the edge has to be cut in an angle. Then load the material.
Having fun with 3d printing
Making thor's hammer with 3d printing