Assignment 5
Networking and Communications
Building Mobile App-Location Detector
For the purpose of first part of assignment, I have built an app using MIT app inventor which spots the location of user in map and upon detection LED blinks via arduino.

Steps
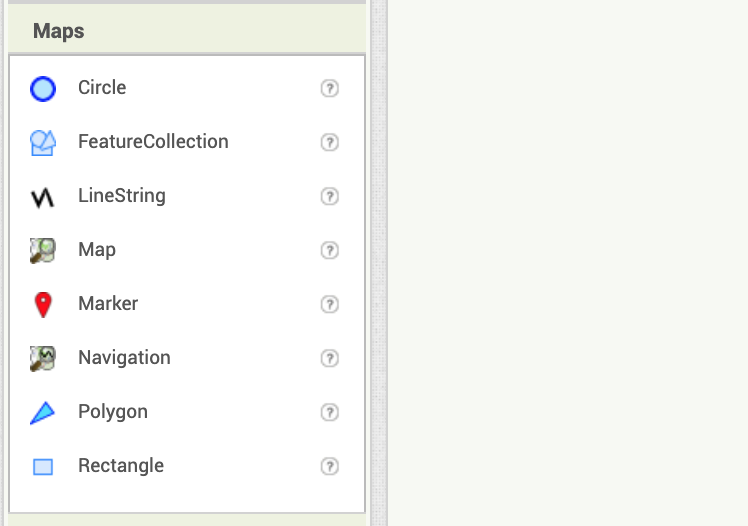
- Using MIT app inventor, start a new project. For location detector, simply load Map API from palette section.
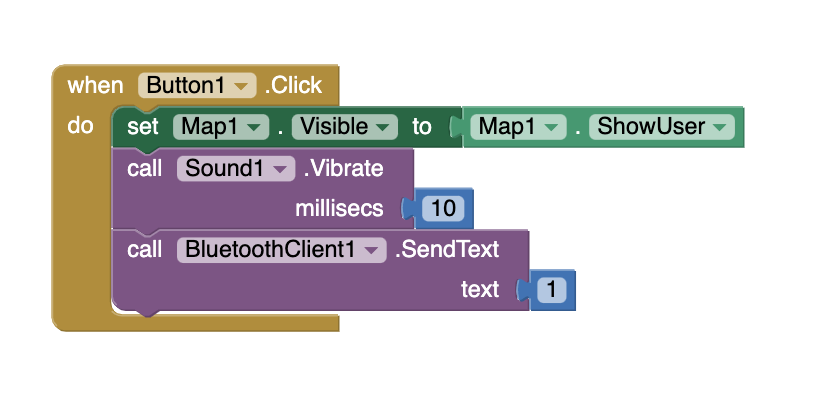
- Load buttons and import the following code into the block section. This code detects the location on map when user clicks on "Get my location" and also plays a sound- "We know where you are".
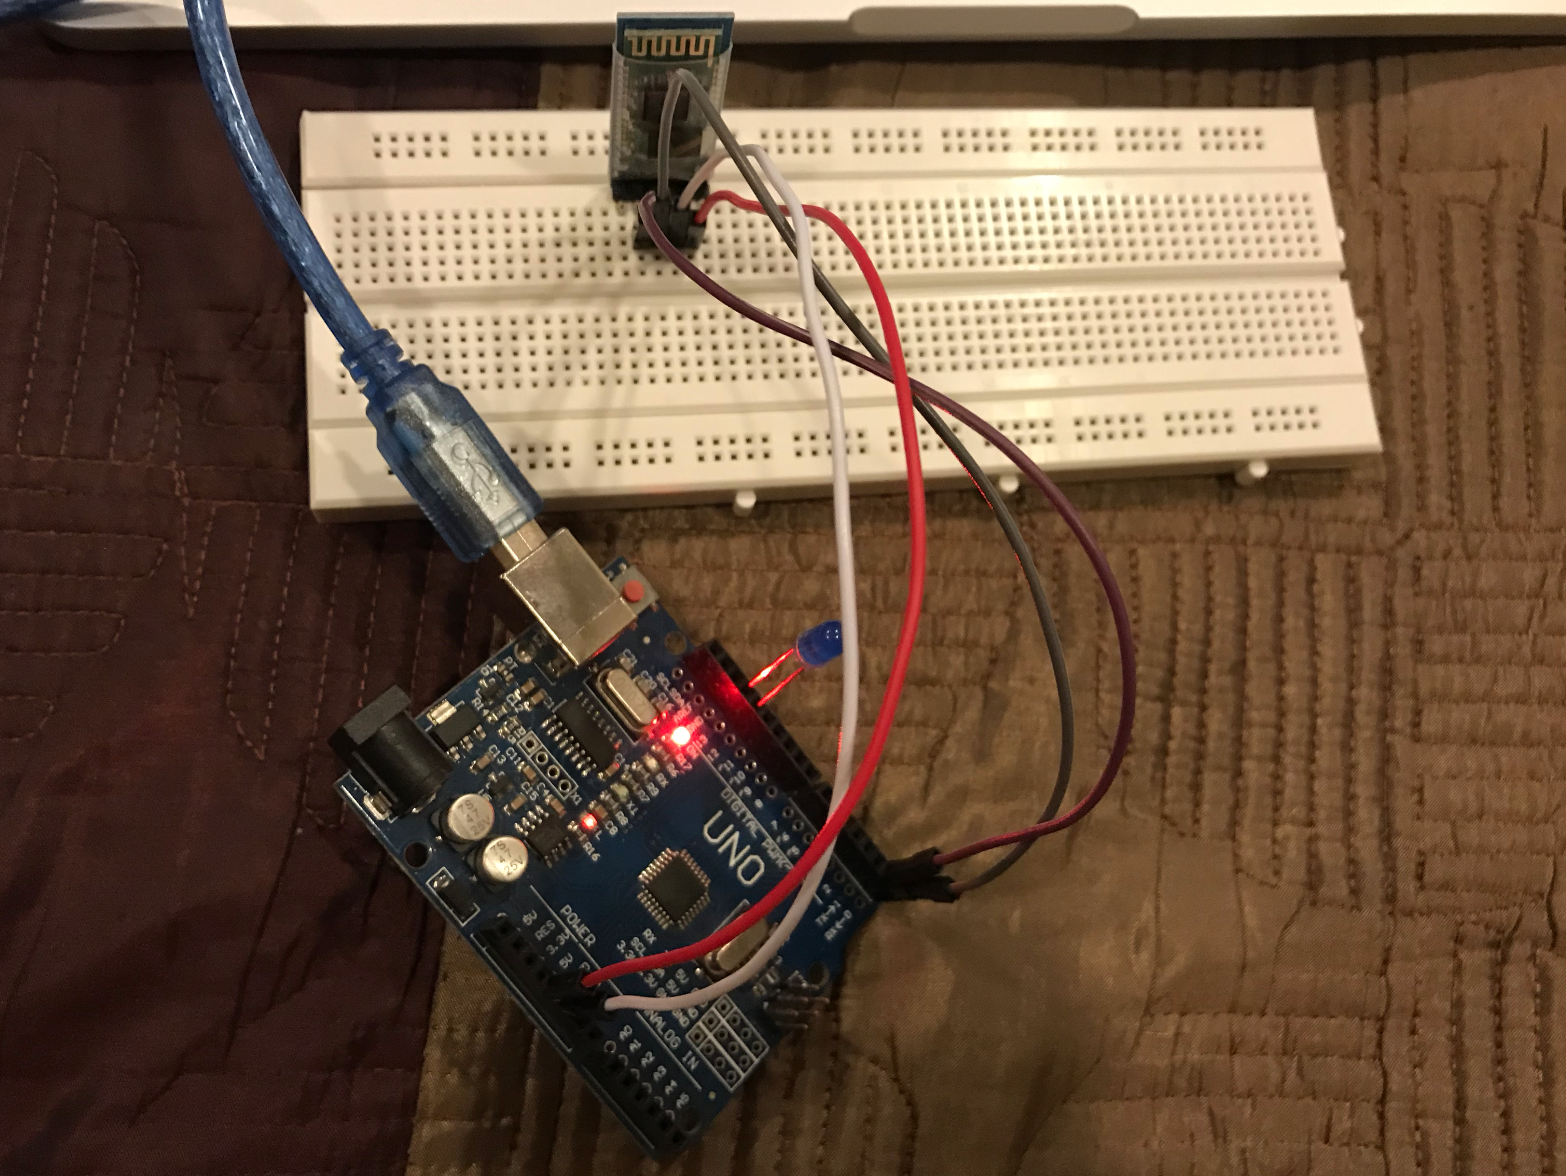
- For connecting the app to Arduino, use HC-05 module for communication of commands from mobile app to arduino. Follow steps from here to connect to make arduino and HC-05 connections. Code is added in next section- This code helps us in communicating from app to arduino using HC-05 bluetooth module.
- As soon as user clicks on "Get my location" button, map detects their location and plays-"We know where you are" along with blinking of LED connected to arduino.
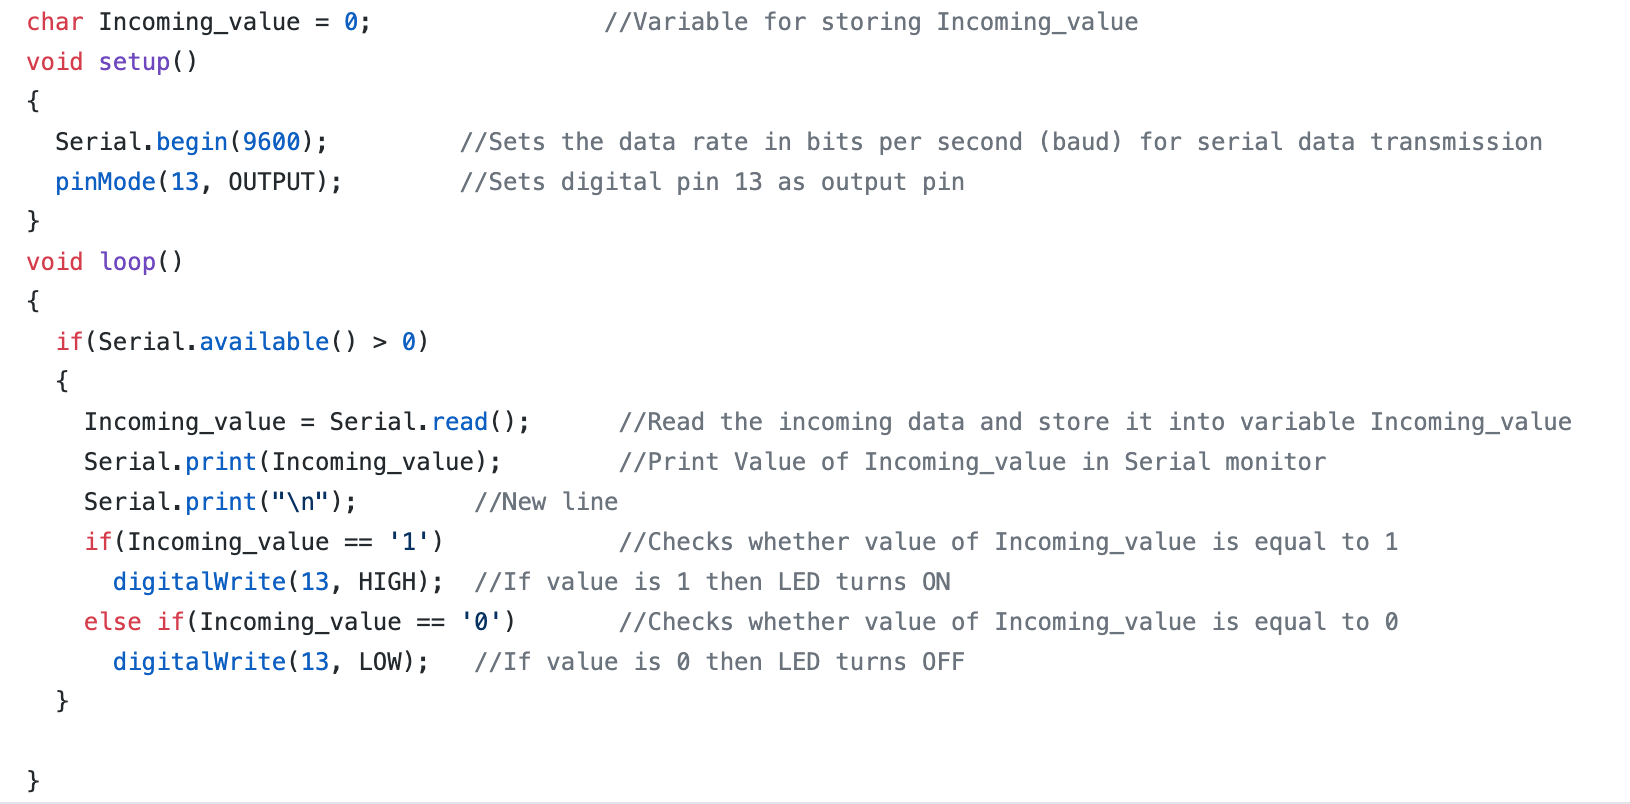
Code
For connecting arduino to mobile app, this code is followed. Further additions on app code are done under blocks section in MIT app inventor and can be explored here
NodeMCU based Weather Station
This mini project is around nodeMCU based sensor data communication to cloud. A DHT11 with NodeMCU setup would be used to send data to Thingspeak cloud. This data would be analysed further for heat index calculation.
Steps
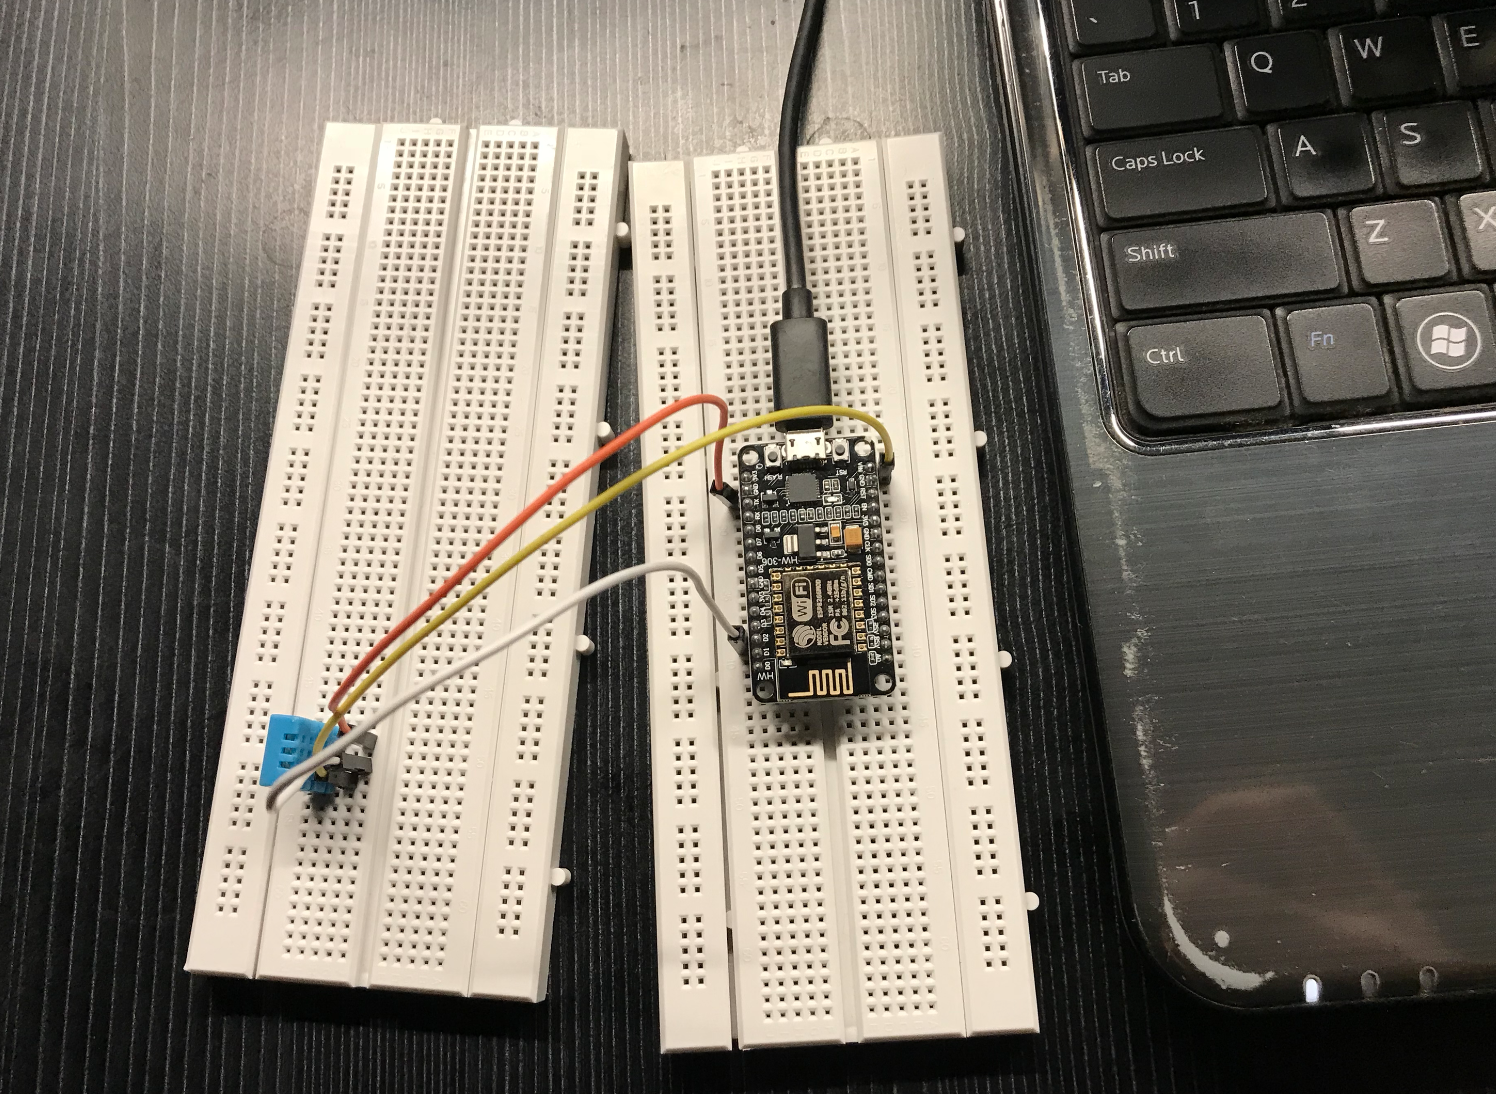
- Circuit was assembled in my study room (which remains undisturbed) as shown below. No fan or air conditioner is turned on. Connections are pretty much simple with nodeMCU and DHT11 (VIN -> VCC, DATA -> V2, GND -> GND)
- Used MATLAB account details to log in to ThingSpeak cloud channel. New channel creation box promts to a list of fields. Activate the fields wanted (Field 1 and Field 2 for temperature and RH data)
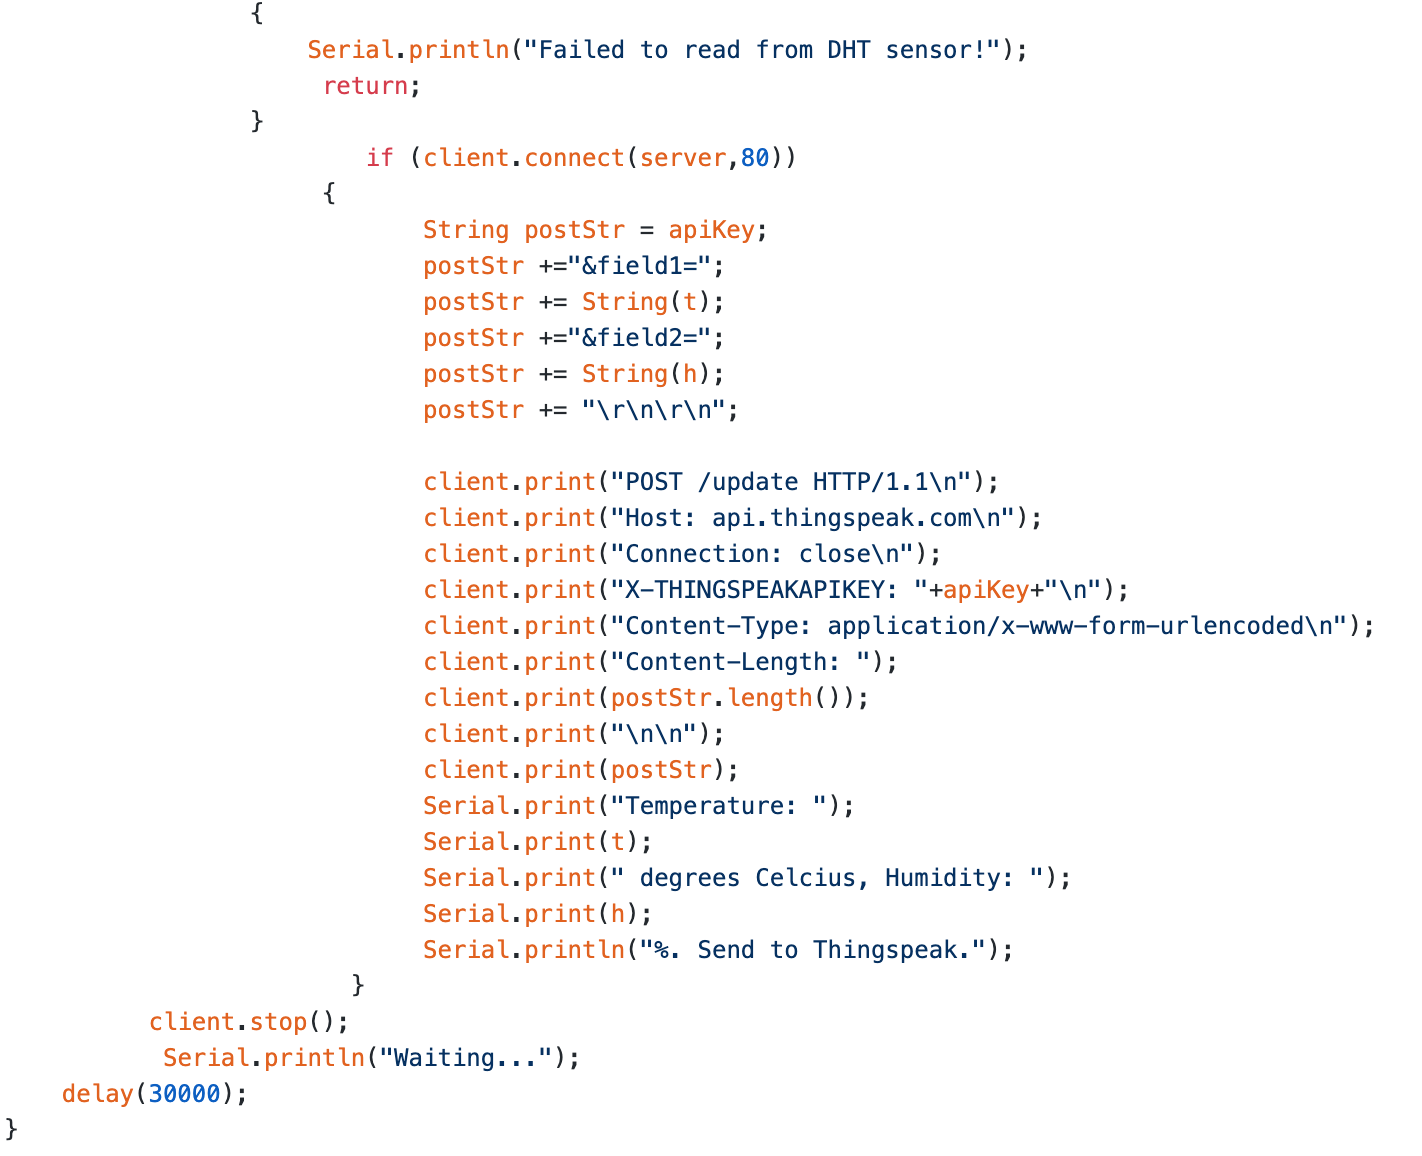
- Data is received by describing API key details in code. A new "write API" key is generated under API keys tab.
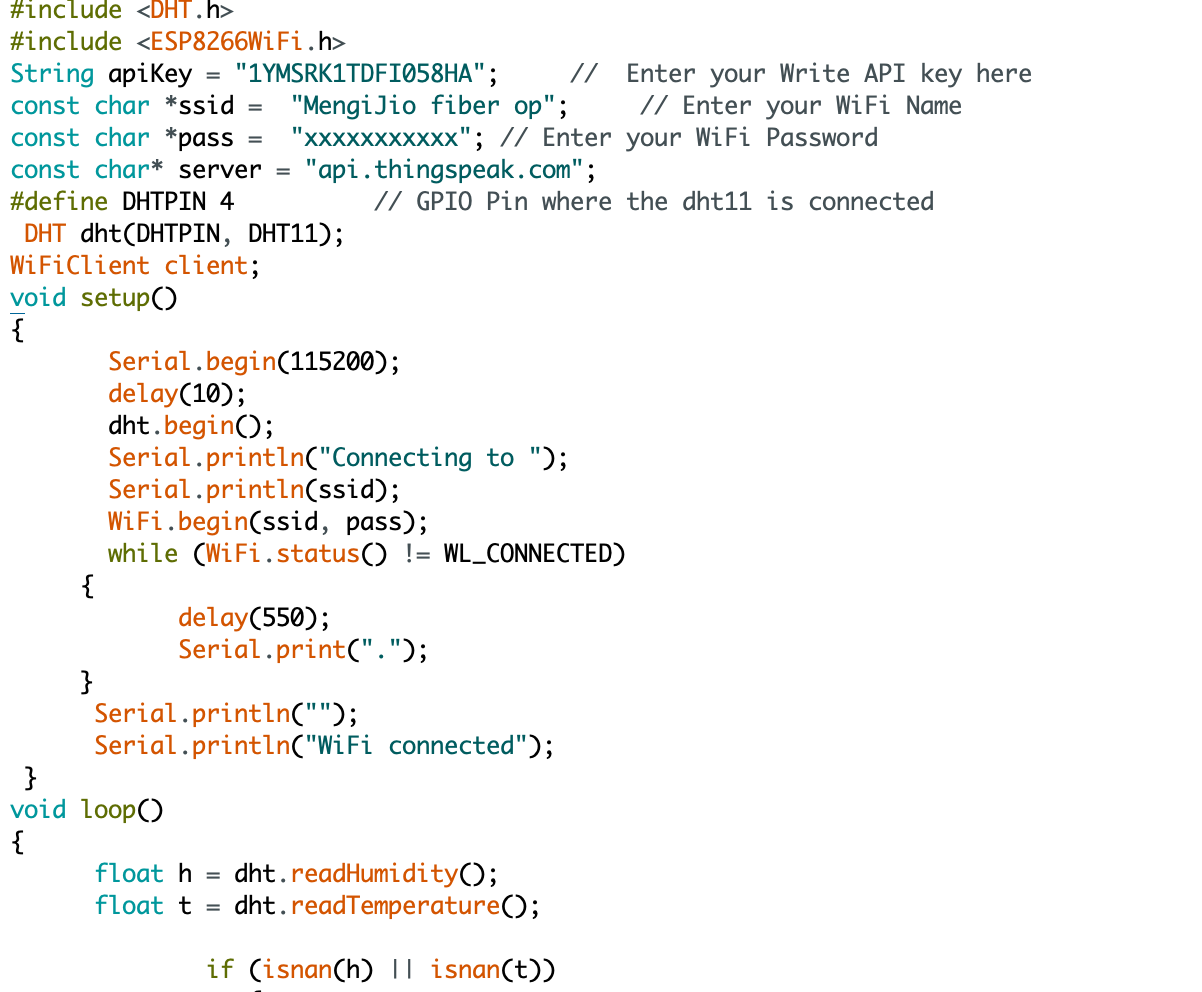
- For uploading code to nodeMCU, arduino sketch is used. In the arduino sketch, Wi-fi details along with password and API key are updated. Certain packages have to be downloaded in arduino sketch before running nodeMCU and board type also needs to changed. Details can be found here
- Once sketch is complete, NodeMCU is connected and sketch is uploaded. Temperature and RH measurements are observed using serial monitor. Readings are taken in every 5 minutes continously.
- Measurements are collected for 8 hours 30 minutes
Results
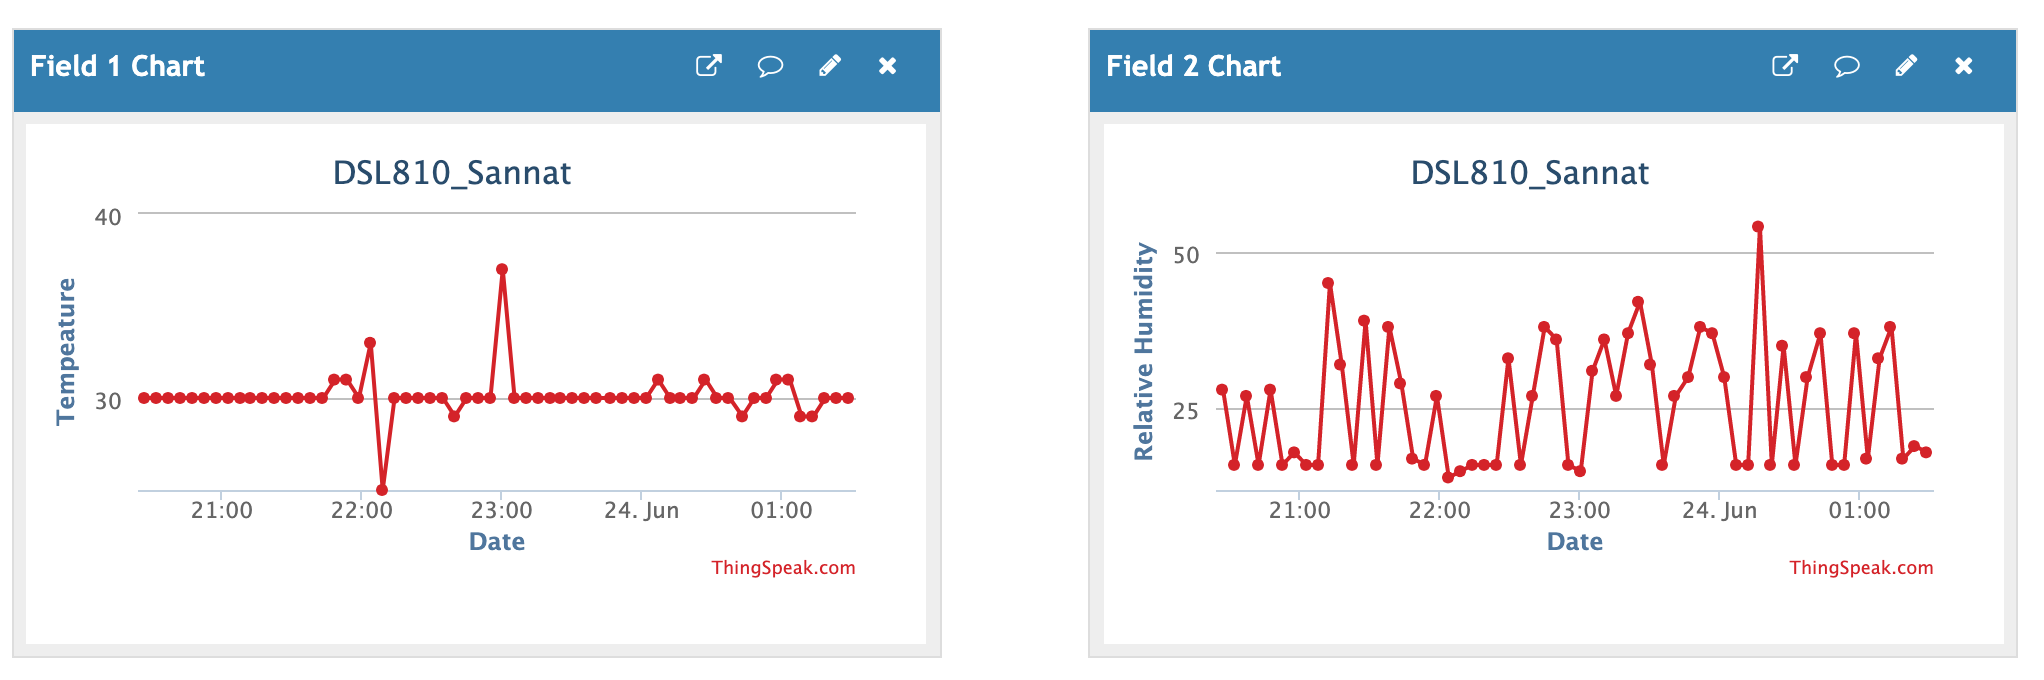
- Data can be accessed on ThingSpeak channel. The data reports temperature mean around 30 degrees but there are spikes of 5-7 degrees for some interval which is quite unsual. One hypothesis can be the presence of DHT11 near laptop fan outlet. Since the laptop was pretty old (WinXP generation) it might have been heated during some times of processing and resulting effect is captured by DHT11. ThingSpeak channel can be accessed here
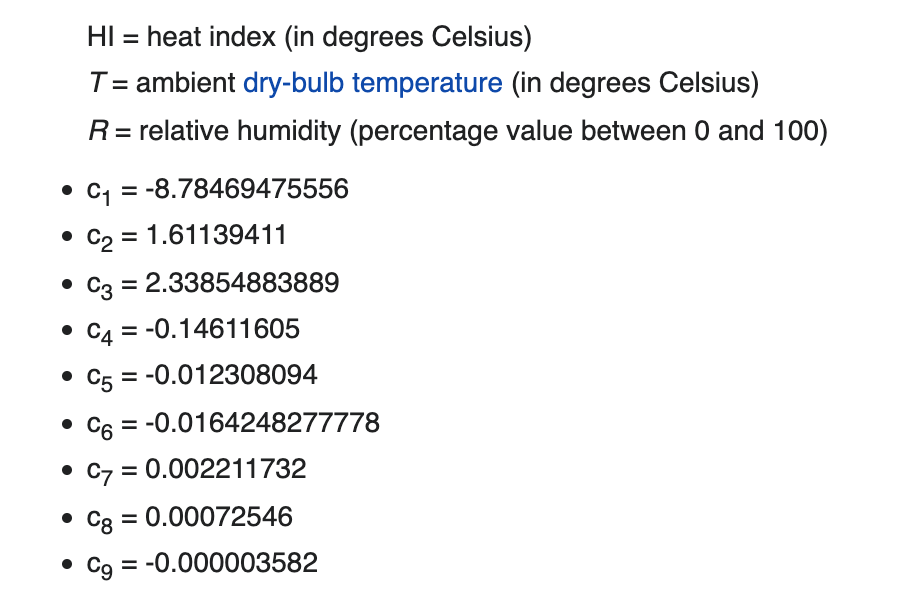
- Heat Index can be calculated using formula mentioned below in Excel spreadsheet by explorting data

- Heat index for the room averages to 32.96 which is way above 26 degrees with no fan turned on. There are some abnormalities in data which yields an error of 5 degrees in some hours but on an average their effect would not change the result significantly
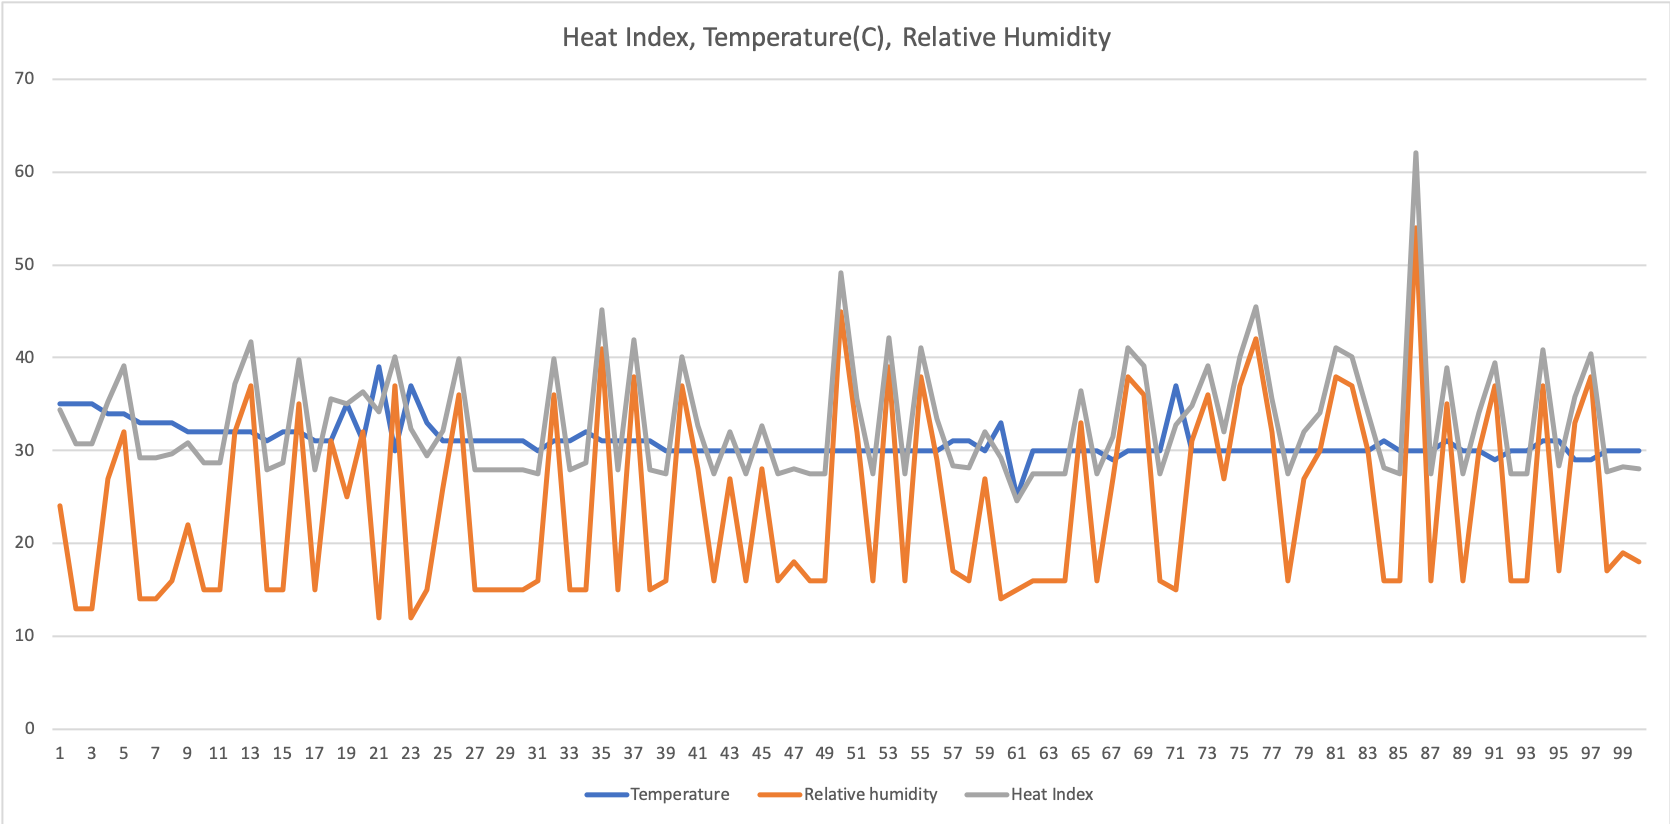
- Room is not very comfortable on Heat Index metric. Factors contributing to same can be location of room in 1st floor, measurements taken during June amidst hot and humid weather days and lack of ventilation across the room.
NodeMCU-Codes
References