Assignment 1
Setting up your website
We were required to set up our website complete with the projects and assignments for the course Advanced Material Processes and Die Design (DSL 732)
To set up your website you must have a basic level understanding of how HTML works. HTML or Hypertext Markup Language is a standardized system for tagging text files to achieve font, colour, graphic, and hyperlink effects on World Wide Web pages. Knowledge of CSS, PHP, Bootstrap etc can also be helpful in setting up a good and interactive webpage.
This is a brief overview of how I set up a website of my own:
Using HTML Templates
Since I have a very basic understanding of HTML, I chose to set up my webpage using a template provided by Vibhuti, who is an intern at IIT Delhi and is also assisting us in creating our websites. Thanks to her, most of the formatting was set up in the template provided by her. You may find similar templates on the internet for any purpose. One of the sites that I used to get a hands on practice was :
You can find similar websites that have a structure of a fully finished website and all you need to do is insert your content into them.

Prerequisites
To have a website you are required to have a place that will host your web pages. Generally a server proides us with a domain name and we are allowed to host our web page on that server. Whatever data that comes on a webpage (images graphics and the layout) comes through a server. Since we are in process of setting up a website we must first host a server on a local machine to test and see whether all the functionalities work correctly. For that I downloaded
- MAMP
MAMP is a solution stack composed of free and open-source software running with proprietary commercial software, to run dynamic web sites on computers running macOS or Windows. It can be used to develop web sites that use popular current technologies, on a stand-alone desktop or laptop computer without the need for a separate web server.
To download MAMP, go to
https://www.mamp.info/en/downloads/
- Install MAMP
- Search the executable file on this "C:\MAMP\MAMP.exe"
- Create a shortcut on your desktop for easy access
And also we need a text editor where we'll be able to view and edit our HTML codes easily. For that I used
- Sublime Text
It is basically like Notepad but with added features. You can easily idenify the code and make changes to it because of the color used to differentiate code with content.
To download Sublime go to
https://www.sublimetext.com/3
- Install the editor
- Search the text editor on "C:\Program Files\Sublime Text 3\sublime_text.exe"
- Create a shortcut on your desktop for easy access
So to summarize, we have downloaded a local hosting software and a Text editing software for our task of creating a webpage:
- MAMP
- Sublime Text
Creating my first webpage
Creating a webpage using HTML and Basic CSS styles is fairly easy. HTML is a simple and easy to learn language that can be used to create webpages. Since I had a basic prior knowledge of HTML, I was easily able to create my own webpage using Vibhuti's template and by searchig the internet for relevant HTML tags as and when the need arose.
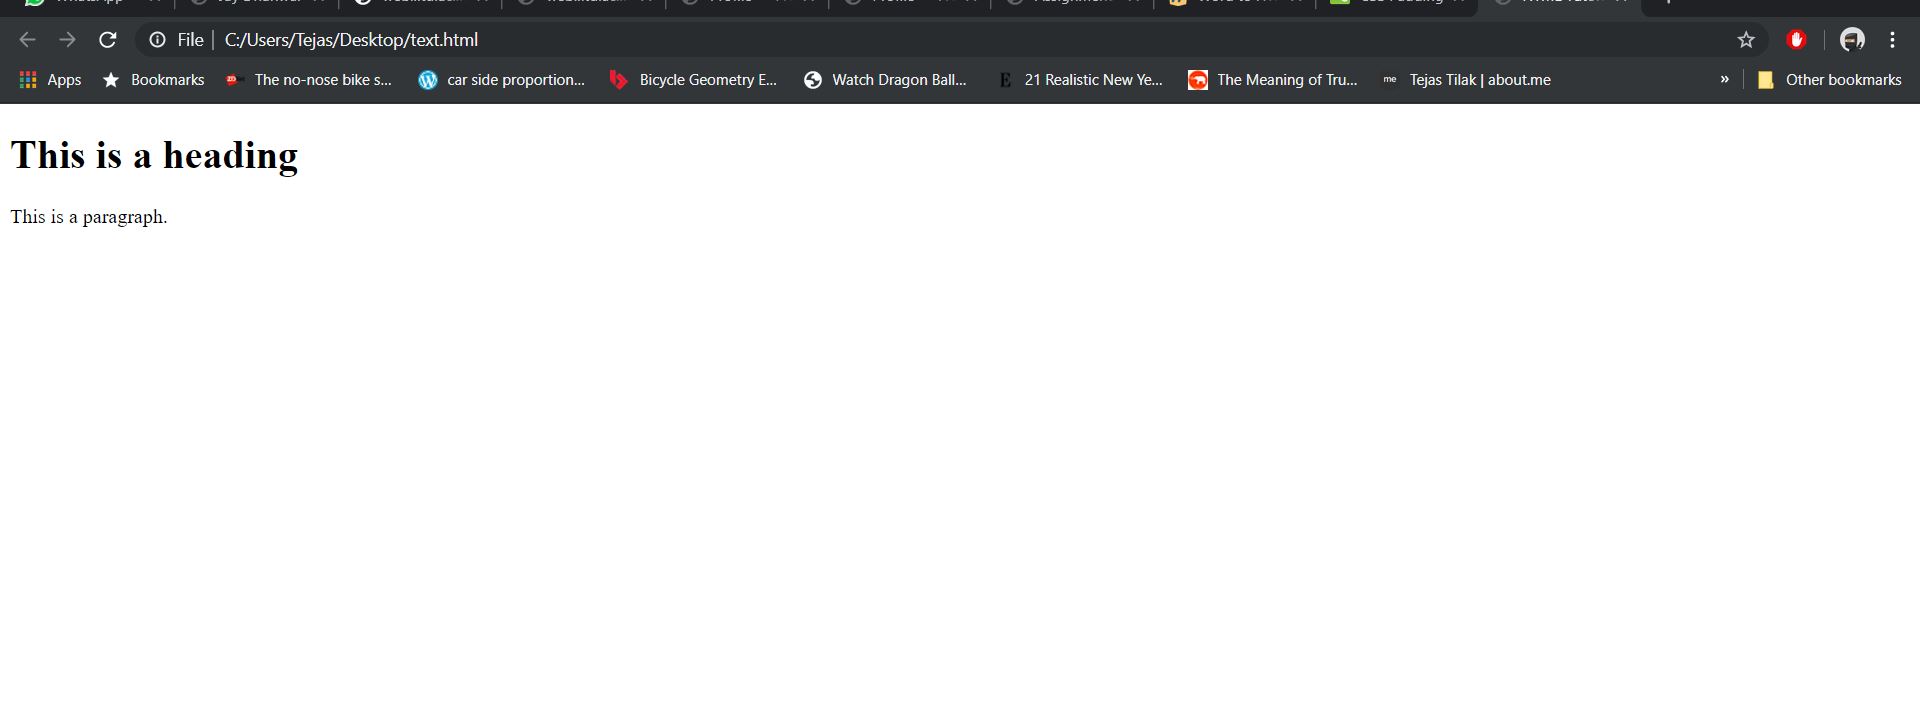
I started off with creating my first webpage.
- Copy the following code.
- Paste the code in a text file and save as an HTML file with the extension .html
- Now go and open the the saved file in a web browser or just double click the file.
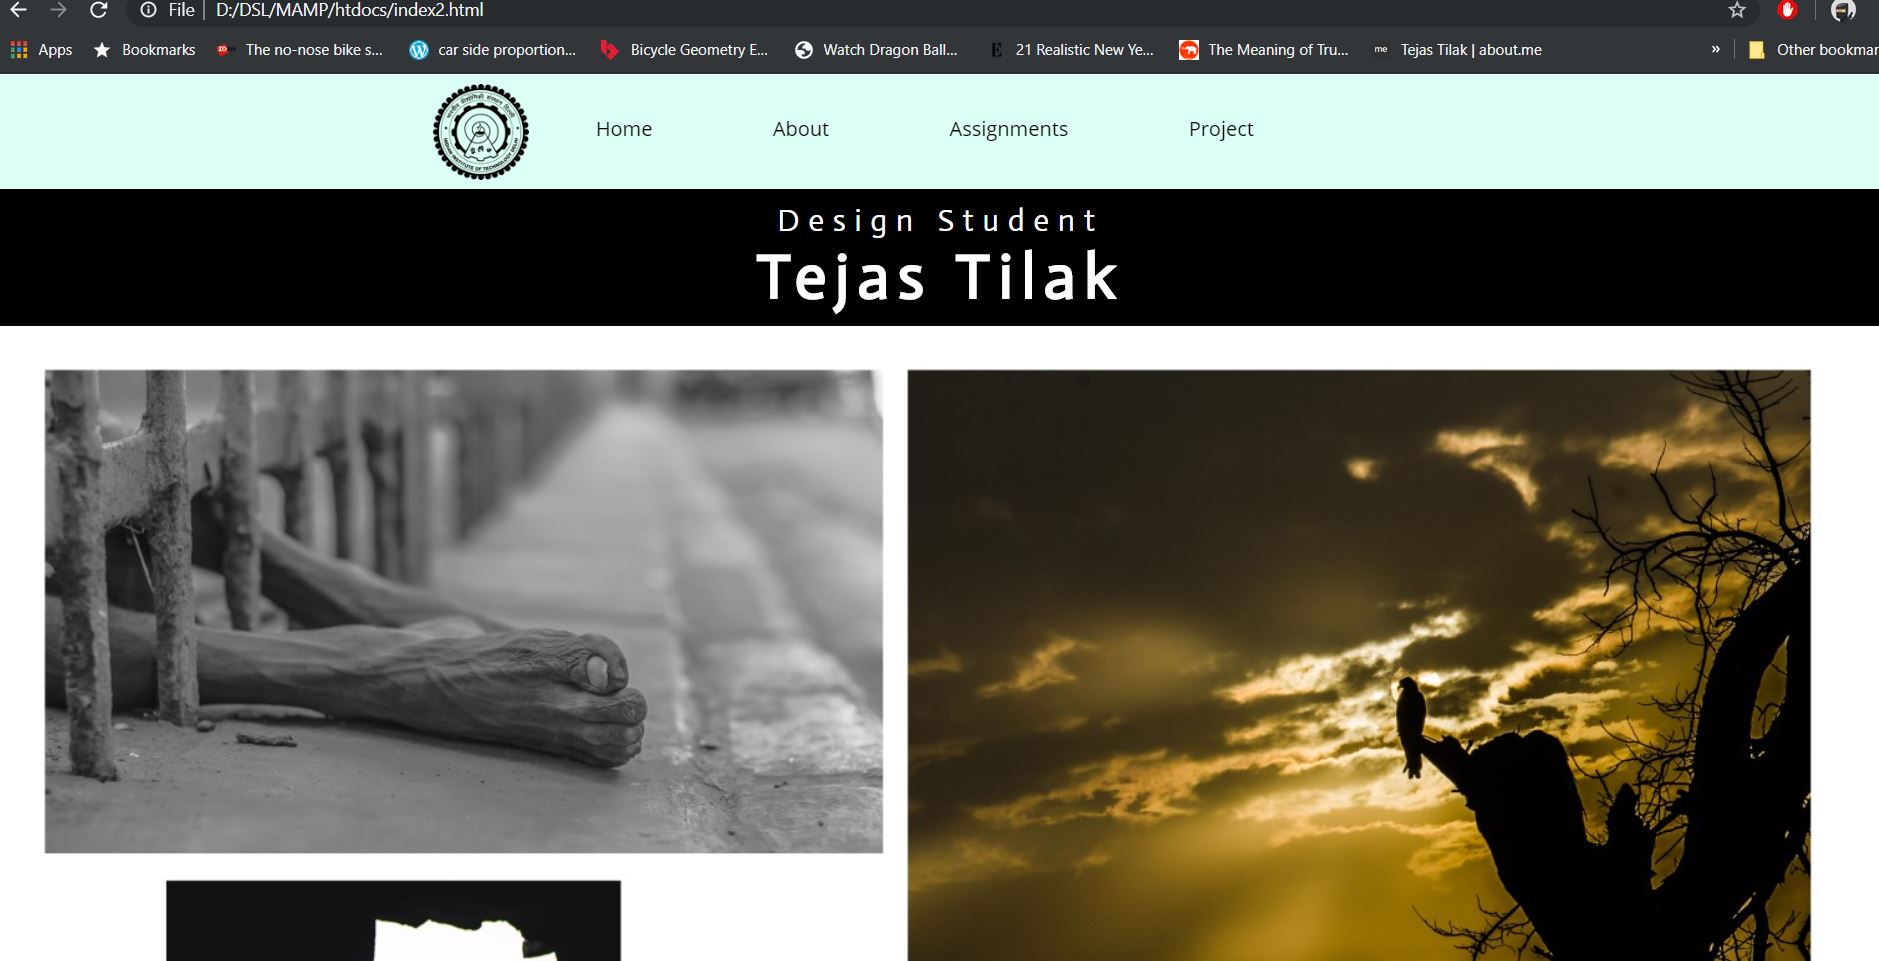
- You'll be taken to your first webpage that looks like this
Basic HTML Tags
Now using the knowledge of basic HTML tags, one can easily create a webpage and eventually a whole website. Let us look at some of the basic HTML tags and features we may need for a website.
- Paragraph Tags <p></p>
Used for paragraph spacing
Eg: <p> This is a paragraph </p>
- Break Tag <br>
Used for pushing the text to next line
Eg : <p> This is an Example of <br>
</p>
- Heading Tags <h#>
Used for different sized headlines varying from <h1> being the largest to <h6>, the smallest
Eg : <h1> This is a heading </h1>
To Add Media
- Image Tag
Eg: <img src="images/picture_name.jpg"
- Video Tag
Eg: <video width="200px" height="" controls autoplay>
<source src="videos/video_name.mp4" type="video/mp4">
</video>
Compressing Images
A website is never complete without visual elements. Images, Videos, dynamic graphics, all play an important role in bettering the look and feel of the website as well as to make it more interactive. Image compression becomes crucial when you have to make the page load quickly for the viewers and also consume less space in the hosting domain.
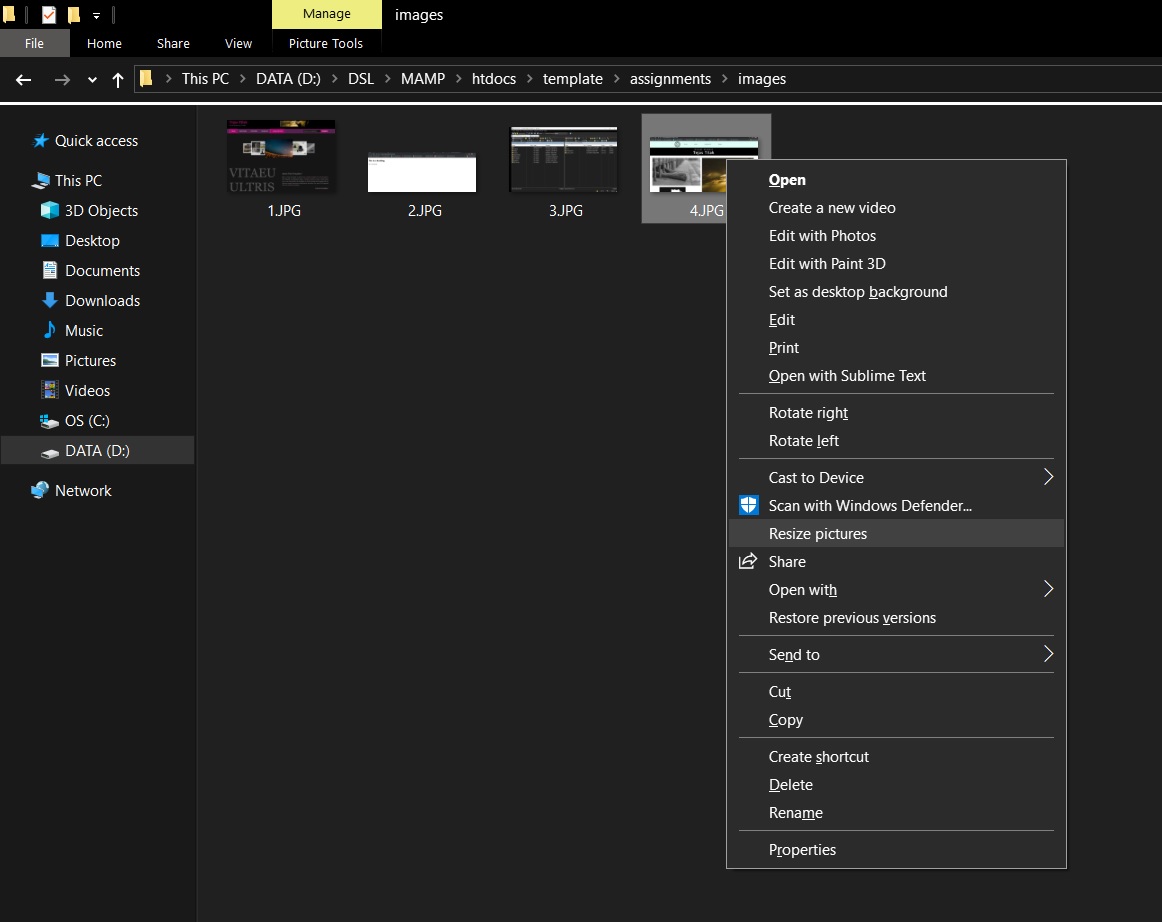
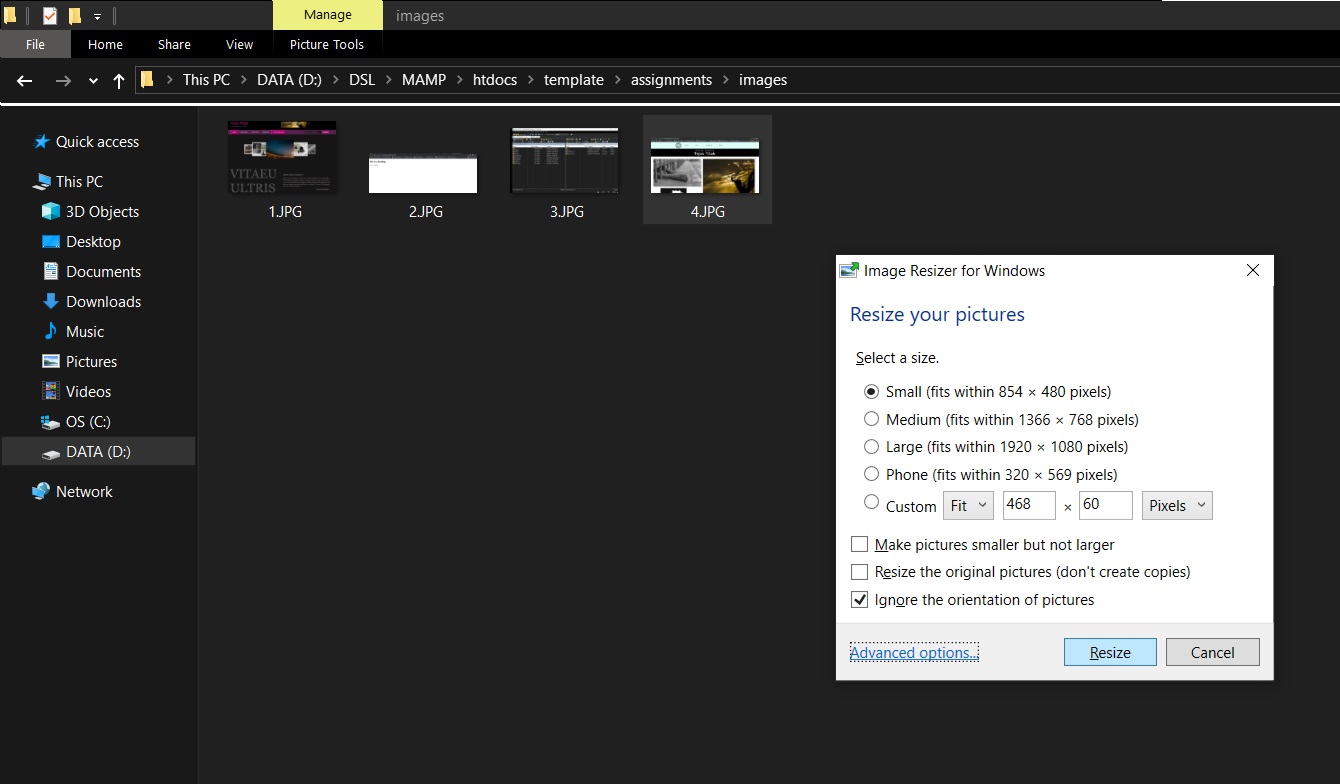
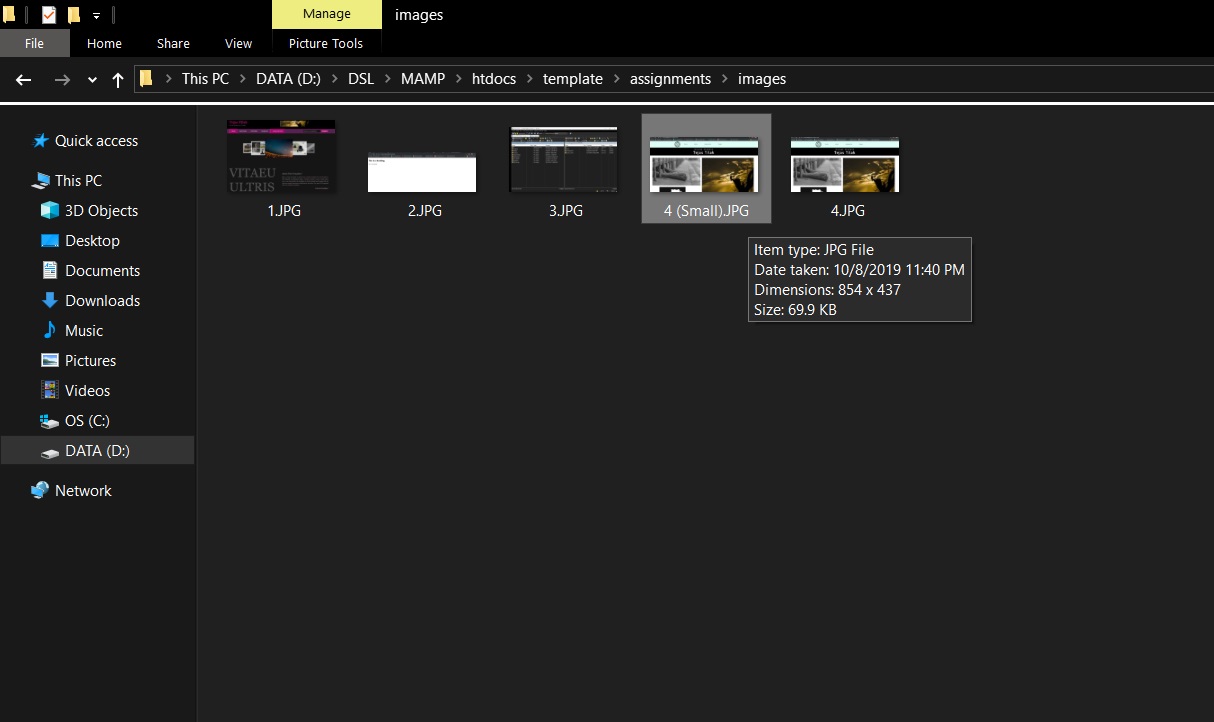
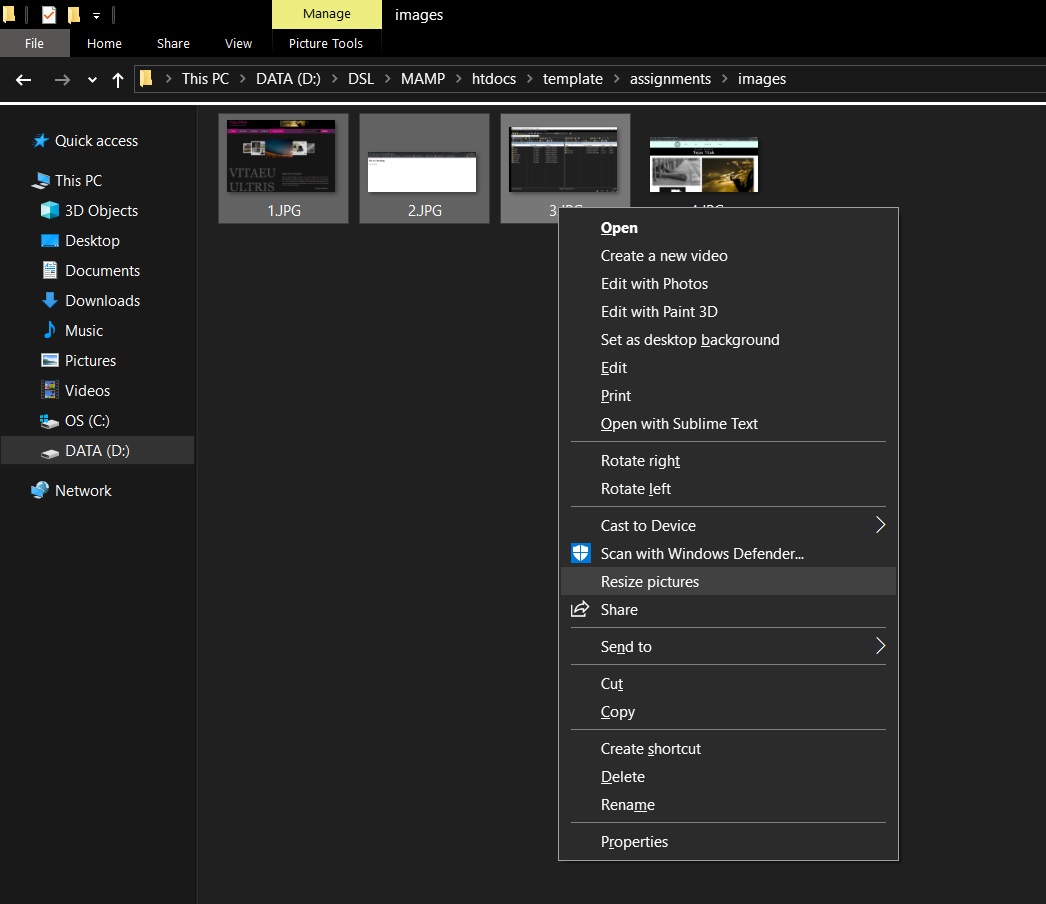
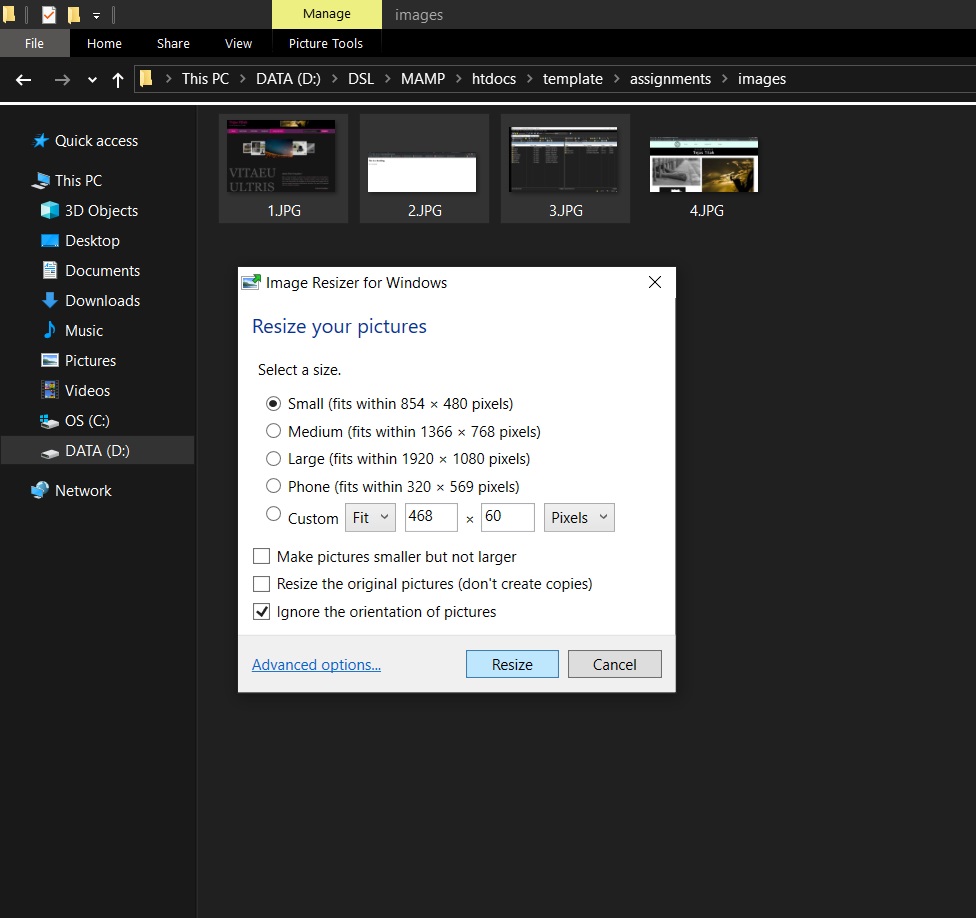
In our class we were introduced to an application named ImageMagick for compressing images. ImageMagick is a tool that helps compress high quality, big sized images to small sized ones without losing much in terms of image quality. Similar online and standalone applications exist in the internet. I chose Image Resizer for Windows, which is a standalone app like ImageMagick. I personally found it a little more convenient as in Image Resizer, the options to resize the image come within the Right Click Menu. You can choose to either change the resolution retain the same while reducing the size of the file. Additionally Image Resizer also allows batch resizing as well.
Steps to compress images using Image Resizer For Windows
For Single Image
- Select an image to resize.
- Right click and select 'Resize Pictures'
- In the next dialog box, choose the required size and press 'Resize'.
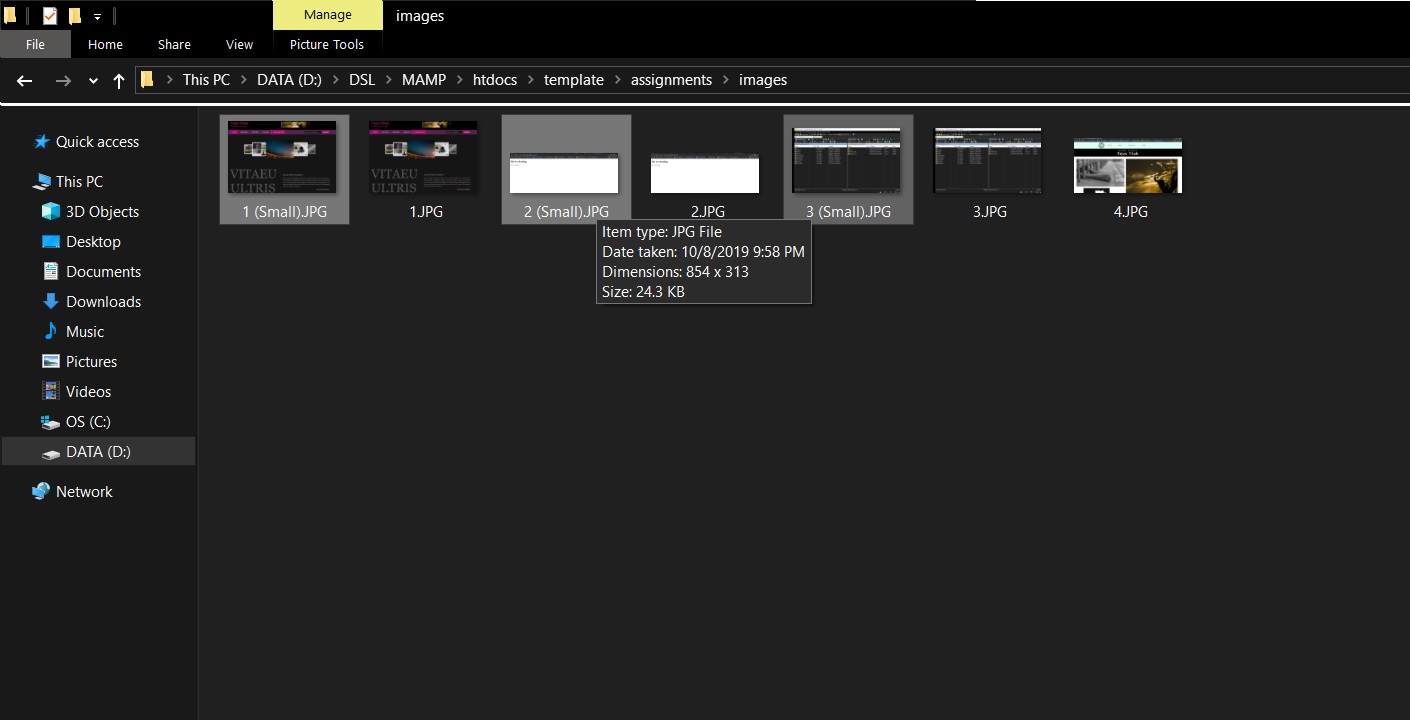
- Your image will be resized and will appear next to the original image.
For Batch Images
- Select a range of images to resize.
- Right click and select 'Resize Pictures'
- In the next dialog box, choose the required size and press 'Resize'.
- Your images will be resized and will appear next to the original images.
Compressing Videos
Like image compressors there are many video converters in the internet that can be used to convert/compress our videos to the desired format and size. Video compression, like Image compression is also essiential for the same reasons: space frugality in the host domain and quick page loading.
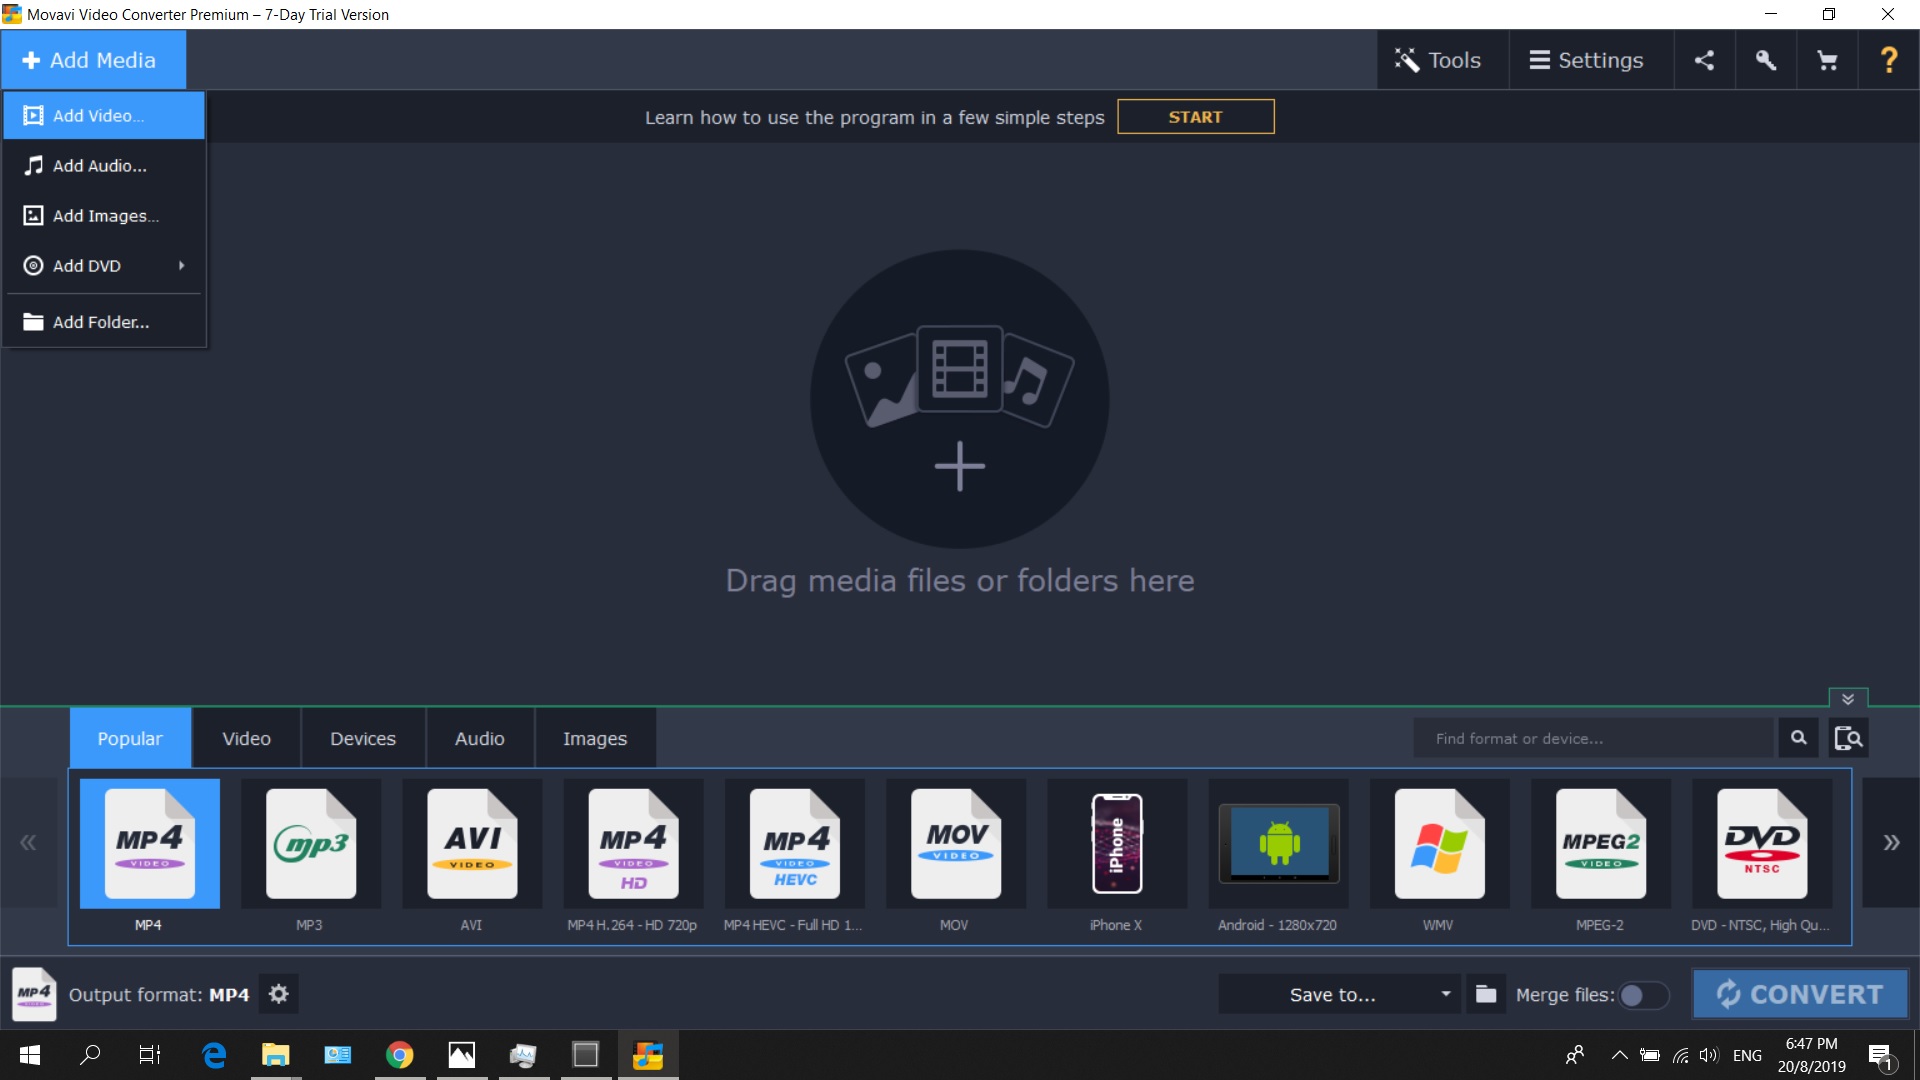
I chose Movavi for compressing my videos. Movavi is a free software that can be used to convert as well as compress video files to a smaller size. It is available for Windows, Mac and even mobile devices.
You can even use this application to dobasic video editing like trimming, joining, video montages, timelapses. Compressing videos using Movavi is fairly simple.
Steps to compress videos using Movavi
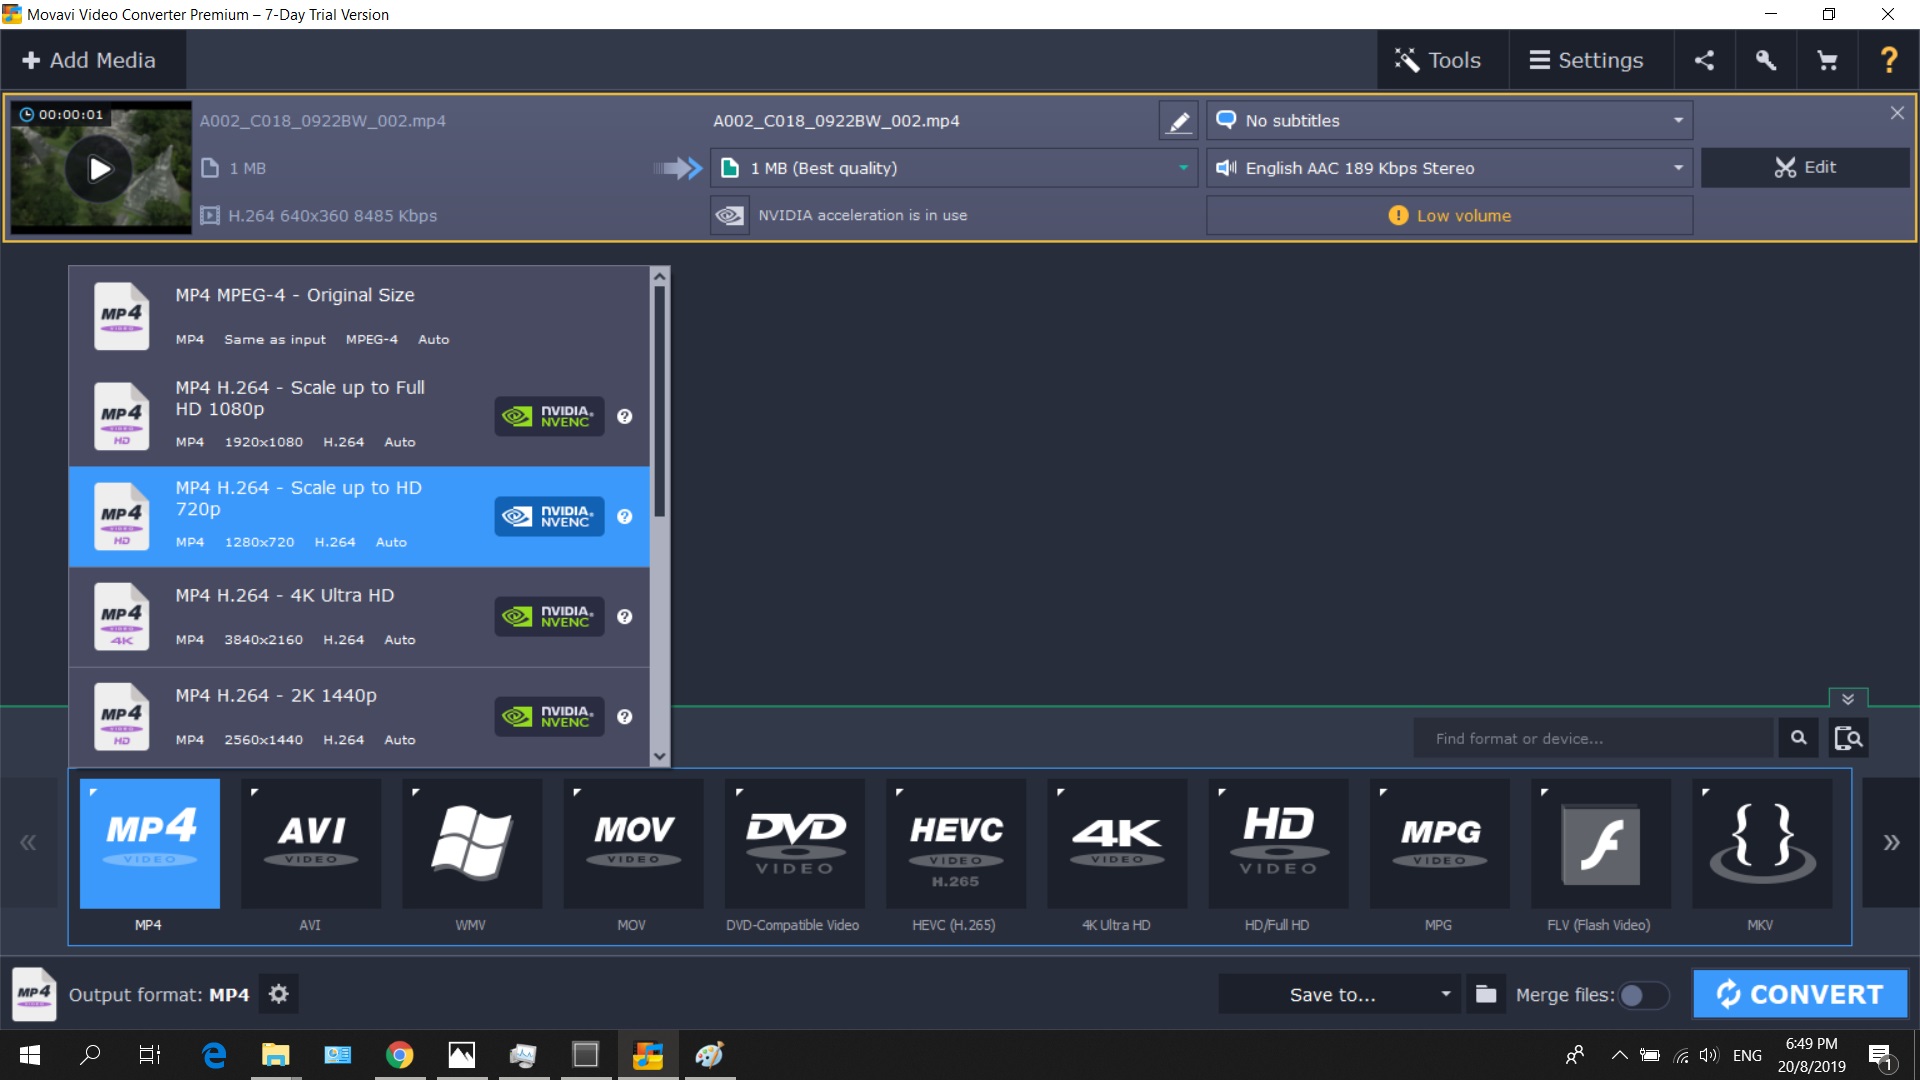
- Click the Add Media button and then Add Video in the upper left corner of the program interface. Choose the video you want to convert from the Open File dialog box and click Open.
- Choose the desired video format from the ribbon of presets. You can also use the search function to quickly find the format or device you need.
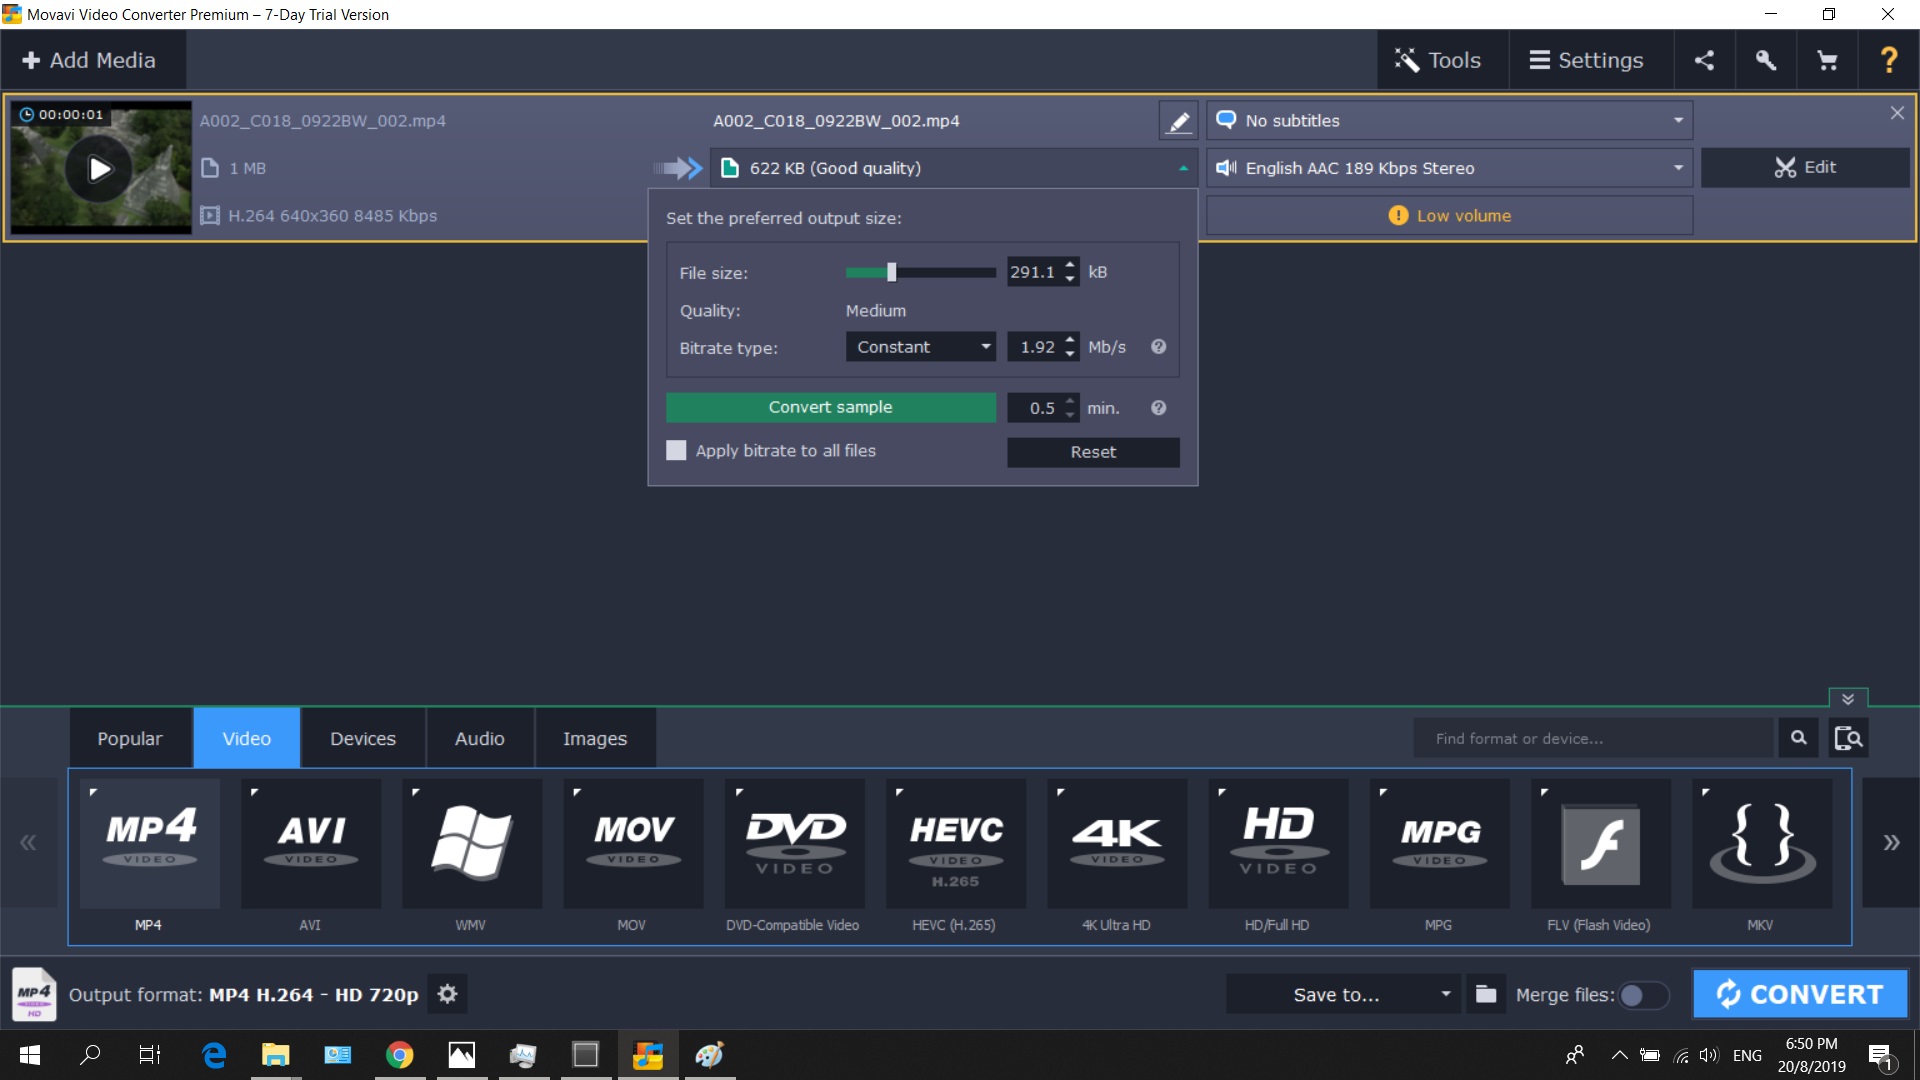
- Return to the source file list and click on the file size in the output information. This will open a new dialog box. Move the File size slider to the desired output file size and bitrate. You can click the Convert Sample button to check how a small segment of the file will look like after conversion.
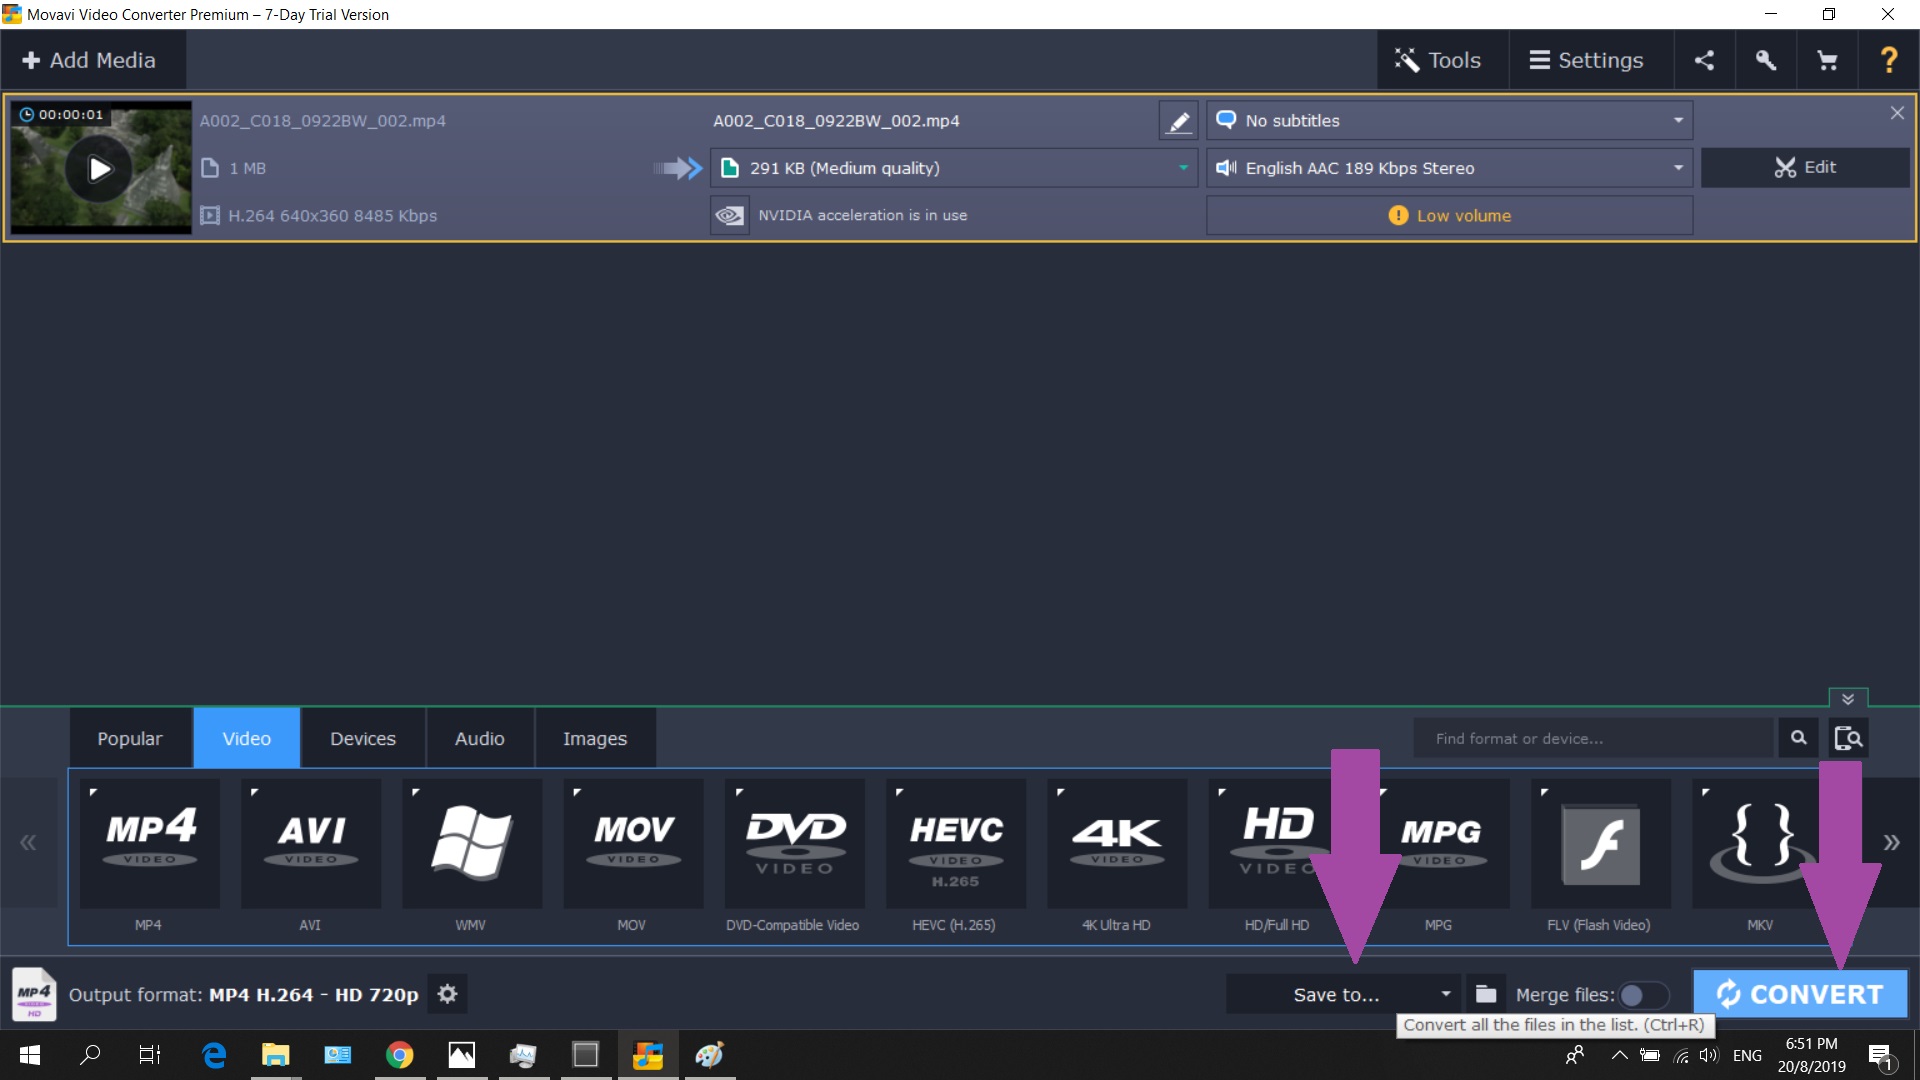
- Choose the output folder for the compressed videos by clicking the Folder icon at the bottom of the interface and selecting the desired destination. By default, the output video will be saved in the Movavi Library folder.
- Press the Convert button to start the compression process. After the operation is complete, the output folder with the converted video will open automatically.
Add Youtube Videos :
- Go to the video
- Click on the share button for the particular video
- Click on ‘Embed’ to get the autogenerated html code
- Copy and paste it in the required place
Editing the HTML Files
Different files used for the website development are:
- index.html
Homepage of the website.
- about.html
Basic details about myself
- assignments.html
Different assignments are added here with link to its html file
- project.html
Details regarding the project proposal and the final project
Web Servers
Until now we had been hosting our website locally. Which means that any data on our website will be available only to us and once we shut down the system, the website won't be available for anyone to see. That's where Web Servers come to play. Web servers run 24x7 to make our website available to our audiences. Hence, the next step after successfully designing a web page is to upload it to a web server. There are many paid and free web hosting servers that we can use to host our website. We'll be using IIT Delhi's web server for hosting our website. To do that we would be requiring
- WinSCP
WinSCP is a free and open-source client for Microsoft Windows. Its main function is secure file transfer between a local and a remote computer.
Using WinSCP we can transfer our website data saved locally on our local computer to the IIT Delhi's web server. Let us see the steps for the same
To connect to the server, login with institute user name and password with the host name and port number as shown below
Host Name: ssh1.iitd.ac.in
Port Number: 22
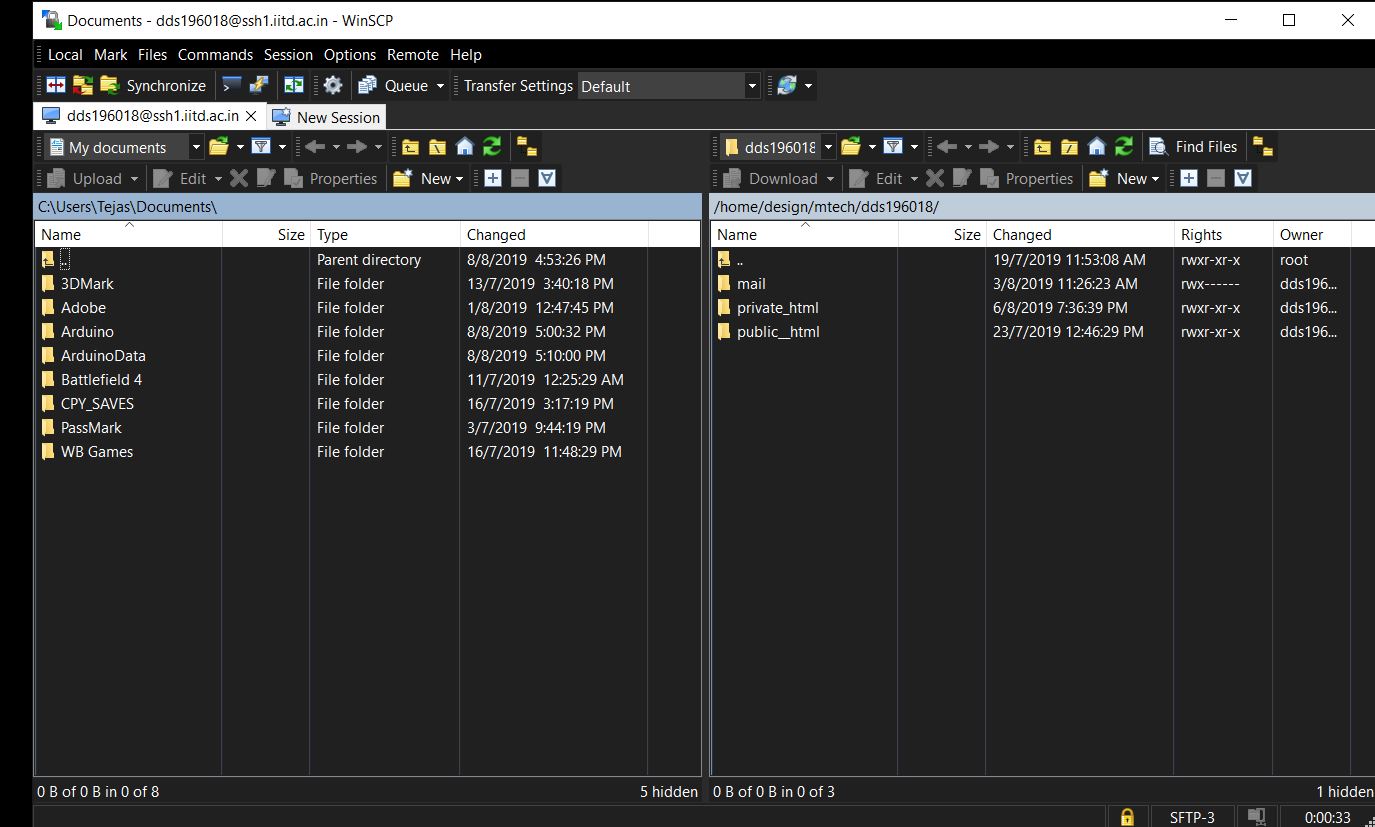
After login, create a folder with the name “private_html”. This is done as the we have only access to the website within the campus. Copy the edited html files from the local computer (left column) to the server (right column) and verify its working by going to the url in the format
http://privateweb.iitd.ac.in/~dds19----/index2.html
where '----' would be our respective roll numbers
This would be the link to your website. Check if the link works and the webpages show as intended.
And voila! Your website is now available to anyone in the campus. Add more content to personalize your website and show off your skills.